Clients, recipes, menus and foods can be shared with other Nutritics users.
Look for the sharing feature to do this. Please note that if your account is part of a licence group, people outside of this group cannot share items with you.
This guide will cover:
- Sharing Clients
- Sharing Foods and Recipes
- Sharing Items in Bulk
- Sharing Individual Portions
- Sharing Menus
- Creating Collaborator Groups
- Master Sharing Functionality
Throughout Nutritics you can share items with viewing or editing access.
- Viewing access is denoted by
and means collaborators cannot make any edits to the item.
- Editing access is denoted by
and allows collaborators to make changes to your item.
- Revoked access is denoted by
SHARING CLIENTS
The sharing feature within the client panel is located above the ‘Contact Details’ section:
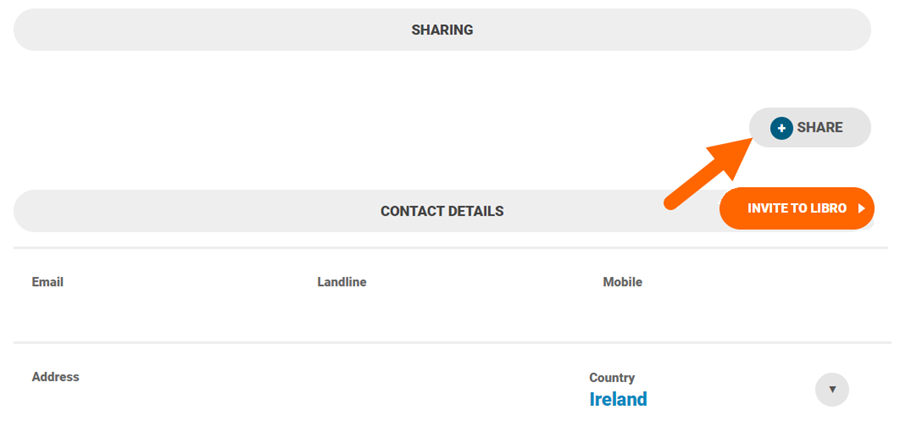
Click ‘+Share‘, then ‘+Add User‘ and type in the username or email address of another Nutritics user to enable sharing:

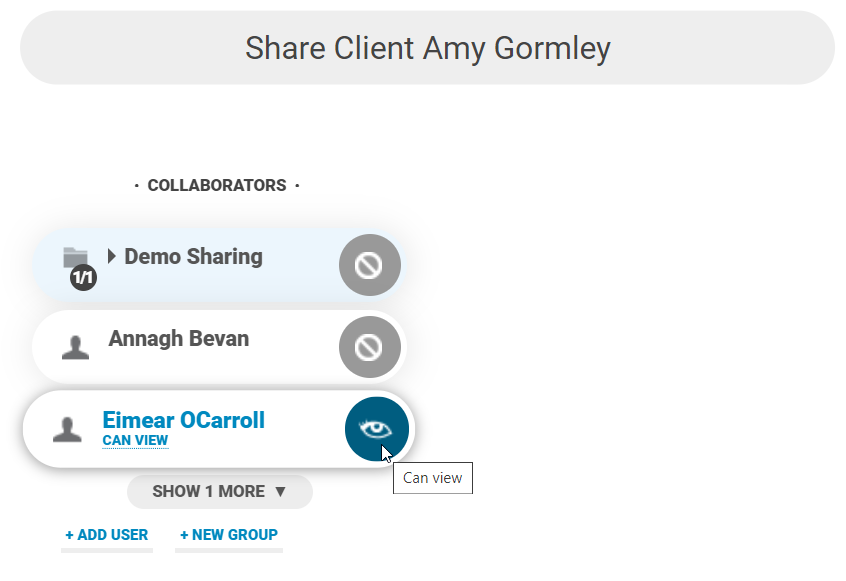
The collaborator’s name will then be added for sharing. Click the name once to share with viewing access or click twice to share with editing access:
SHARING FOODS AND RECIPES
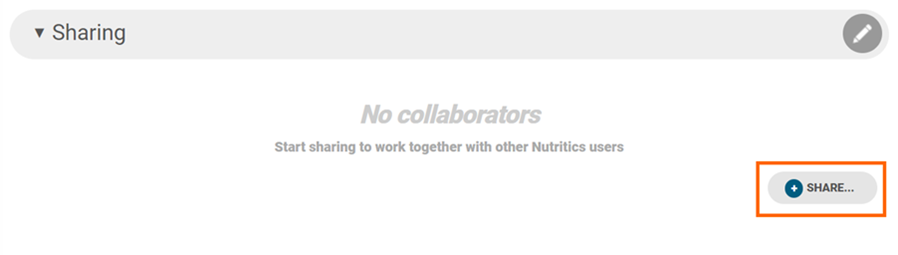
Scroll or Jump to the ‘Sharing’ tab in the food and recipe workspace and click ‘+Share‘:
Select ‘+Add User‘ and type in the username or email address of another Nutritics user to enable sharing:
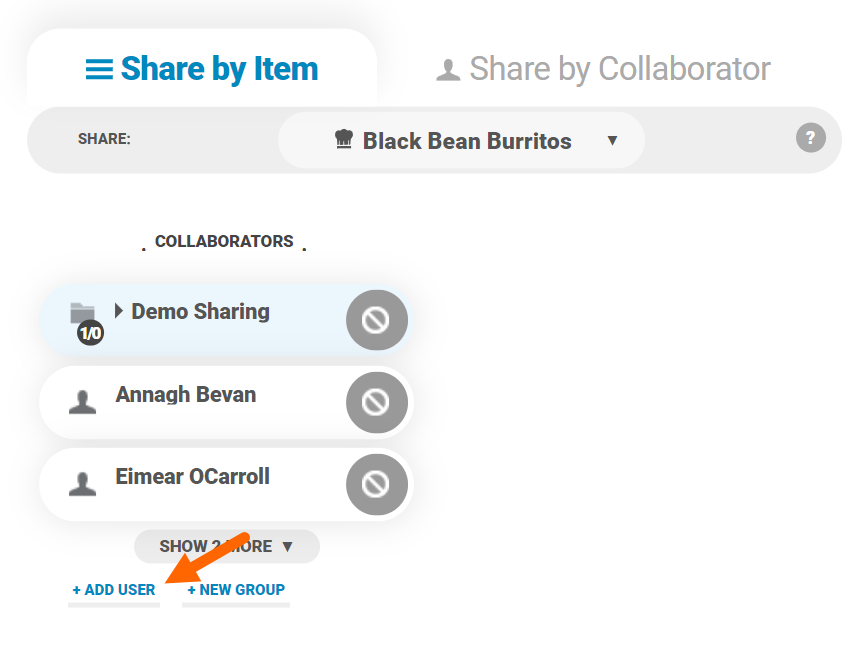
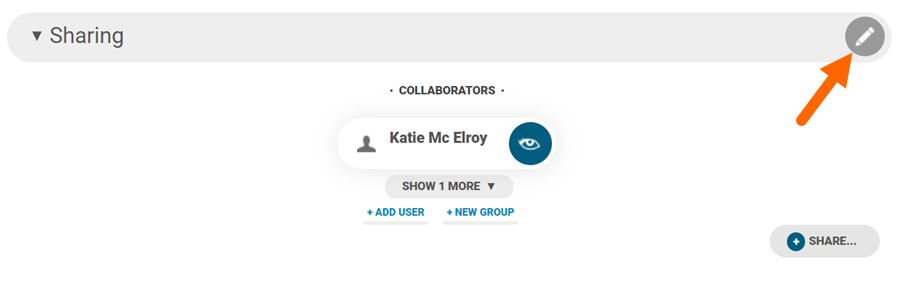
The collaborator’s name will now show for sharing. Click their name once to share with viewing access, or twice to share with editing access.
If your licences are part of an organisation or group, you will see all users of the organisation when you click ‘+Add User’.
Share other items with the collaborator from this panel by selecting the Share dropdown:

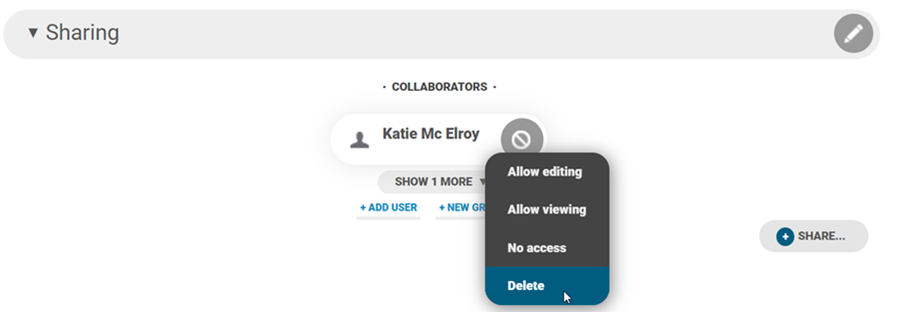
To remove a collaborator from the Sharing tab, right click on the username and select ‘Delete‘:
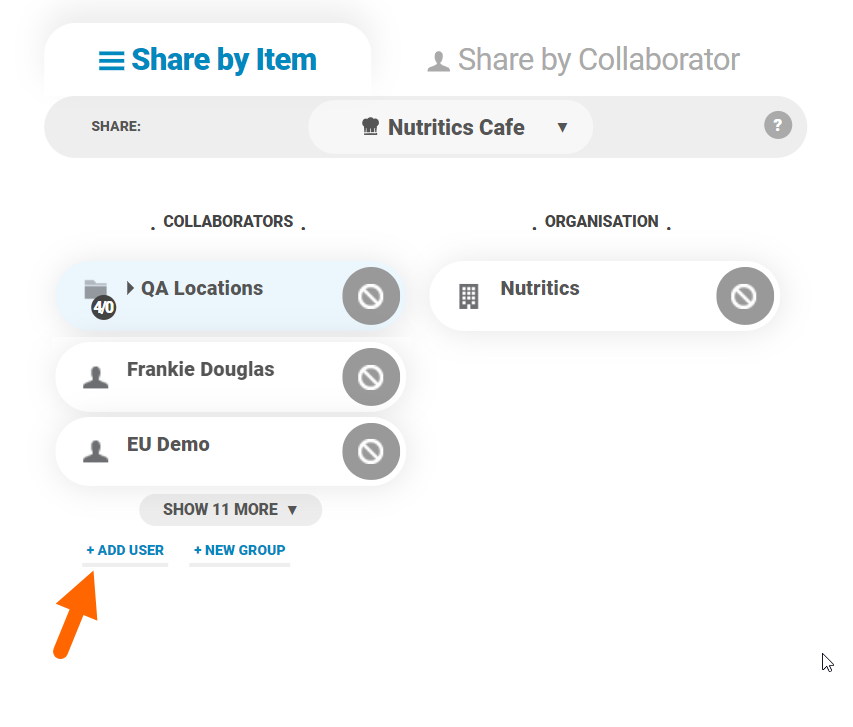
If you are an admin for an organisation you can choose to share with all account holders within your licence set by clicking on the name of the organisation instead:

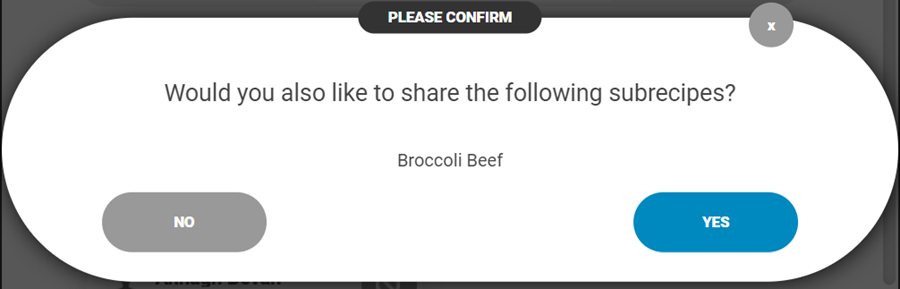
If your recipe contains another recipe (sub-recipe) you can decide whether to share this with the user also. If you decide not to, we’ll include the sub-recipe’s name in the recipe ingredients but the collaborator will be unable to open it as a standalone recipe.
Please note that this setting is only an option when ‘Sharing by Item’, rather than ‘Sharing by Collaborator’.
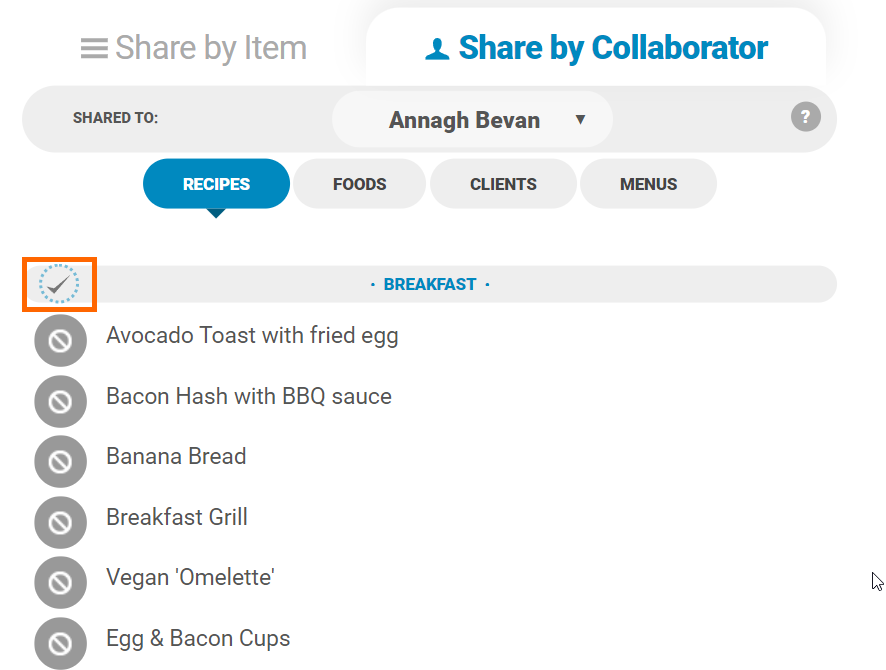
SHARING IN BULK
To share multiple recipes, foods or clients at once, select ‘Share by Collaborator‘ and enable sharing on multiple items:

You can click the icon shown on the top right of the sharing tab to access this tool also:
Choose the account to share with from the Shared to drop down at the top, then click the items or the checkboxes in the list to share.

Click the tick to the left of a group name to share entire groups to share in bulk:
Items that are shared with you have an inbound arrow and a yellow bar within the overview/workspace will be shown:


Items that you are sharing with other users are indicated with an outbound arrow

SHARING INDIVIDUAL PORTIONS
Click the sharing icon in the top right corner of a portion to hide this with collaborators:
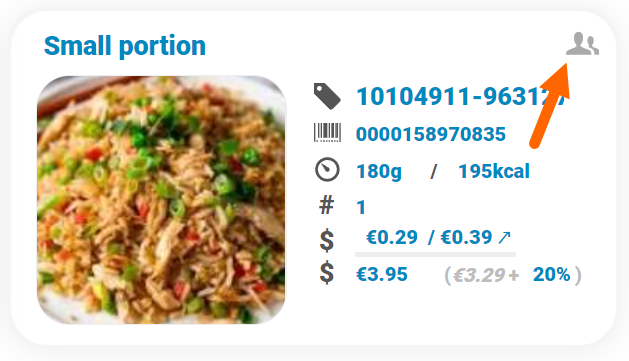
Once the eye icon appears, that product/portion will not be shared to those with access to the recipe:

SHARING MENUS
Open the menu you wish to share and go to the ‘Sharing’ tab in menu settings:

If you are an organisation admin you will see the option to share with the entire organisation. Click the organisation name to share with all users on your licence set.
Alternatively, click ‘+Share’ and ‘+Add User’ to add a new collaborator:
Type in the username or email address of another Nutritics user to add them as a new collaborator. They will then be added to the list.
Click their name once to enable sharing with viewing access and the collaborator cannot change anything on the menu (including monitors).
You will be asked if you want to share all items on the menu with the collaborator also:

If you do not share foods and recipes with the user they can still view the menu but cannot open items.
Click the collaborator’s name again to share with editing access allowing them to edit the menu completely. Please use this with caution if ordering is enabled on a menu and both accounts have different outlets set up.
Click the collaborator’s name again to revoke access to the menu.
CREATING COLLABORATOR GROUPS
You can create groups of users to share items across to. Please note that you can only create groups with other users in your organisation.
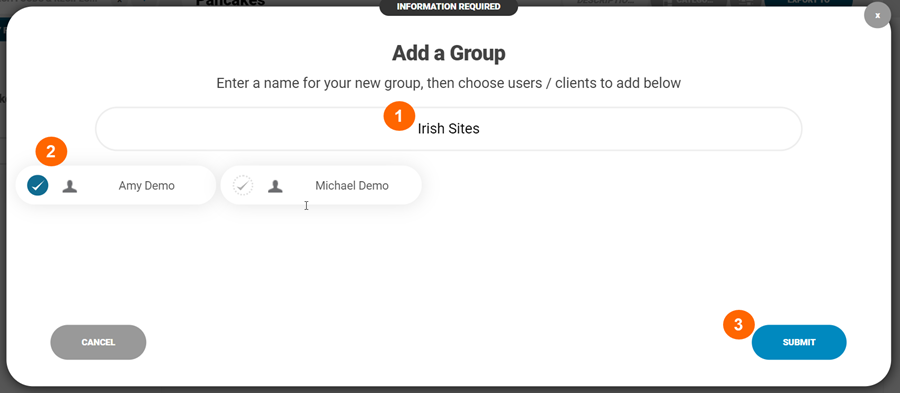
Click ‘+New Group‘ in the Sharing tab of an item:

- Enter a group name
- Click names to add users to the group
- Click ‘Submit’
Once the group is created you can share items to the group members:
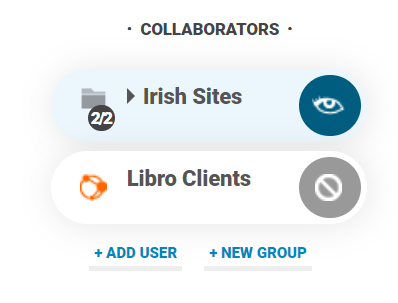
Right click the group to edit users or delete.
If new members are added to a group you can give them ‘group access level’. This means that everything the group was previously granted access to will also be shared to the new members also:
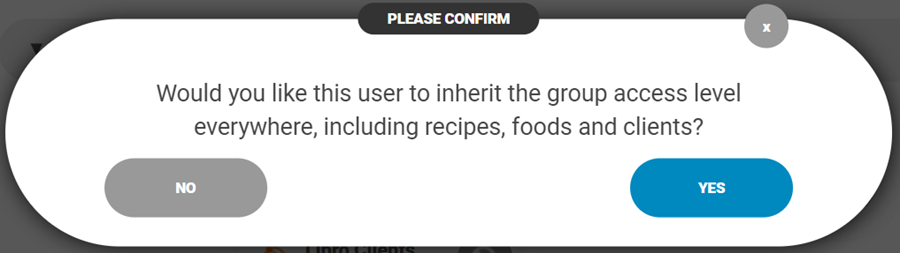
Click ‘No’ to start fresh and not share previous items.
If you restrict access to an item after the collaborator has used it in their menus or recipes, this item will be automatically removed from their account and no longer available for use.
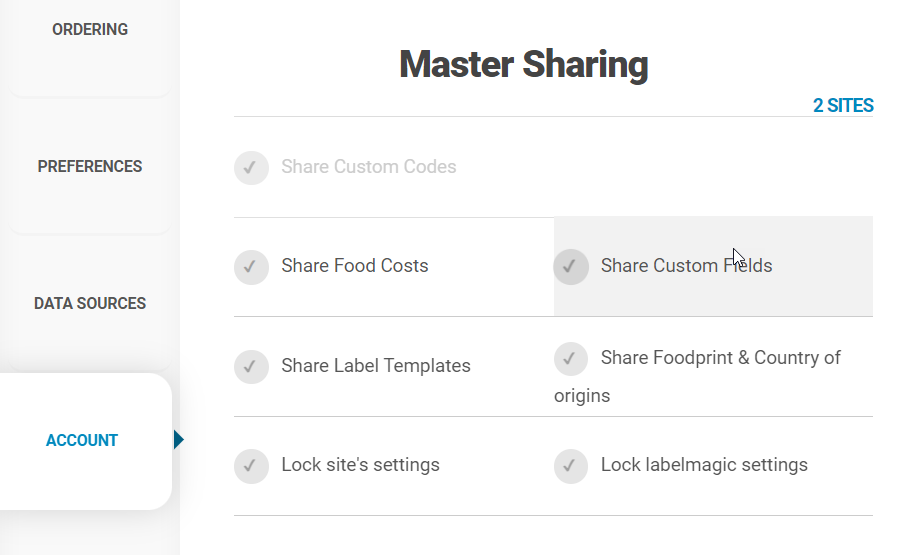
MASTER SHARING FUNCTIONALITY
If you have purchased a licence set with master sharing functionality you have the option of sharing particular data with your site accounts.
This includes choosing to share custom codes, custom fields, food costs or label templates etc. to your site licences automatically.
For example, you may want to share recipes with your site licences, but not costs attached to the recipes. Customise this in Settings>Account: