An unlimited number of new foods, products, and supplements can be user added to Nutritics from label data, International food tables, or from laboratory analysed values.
An unlimited number of new foods, products, and supplements can be user added to Nutritics from label data, International food tables, or from laboratory analysed values.
Pro Tip: Most of the foods in Nutritics are ‘average samples’ from multiple samples or brands. Thus when searching for products, it is often suitable to simply use an existing ‘best match’ food from the Nutritics database. Just be aware that the allergen information may not be specific to your branded product.
Adding an individual food:
1. To add a food, click the Start button at the top left of the screen and select the ‘New Food’ option.

2. Specify if your food data is from a product label or other data source, such as lab analysed values or an International Food Composition Database
Pro Tip: In order to include vitamin and mineral values, which are not usually available on manufacturer’s food labels, you can import the nutrition from a ‘best match’ food in the database. To do this, search for a similar food in the database and click ‘insert’ after step 1 above. You can then update and edit as per the steps below (alternatively, search for a food and right click it to duplicate and start editing the values)
3. Title the food and provide a description with any additional information (for example, manufacturer, data source, flavour, searchable keywords or any other background information).
4. Based on the name input, a category may be auto selected for the food. Ensure this is appropriate. The category chosen will determine the cooking methods available if the product is used in a recipe.

5. Check if the label/data is presented per 100g of product – adjust the box as necessary
6. Fill in the label data exactly as presented on the label, additional nutrients may be added by clicking show extended nutrients
7. Click the submit button to add the food – the system will automatically check for any input errors before showing the complete food workspace
8. Next, add the allergen information for the food. The allergens detected are specific to your region. The region can be changed under the ‘food labelling’ section by clicking on the dropdown:

To add allergen information, add the ingredient list for the product by clicking the pencil icon in the ingredient list section:
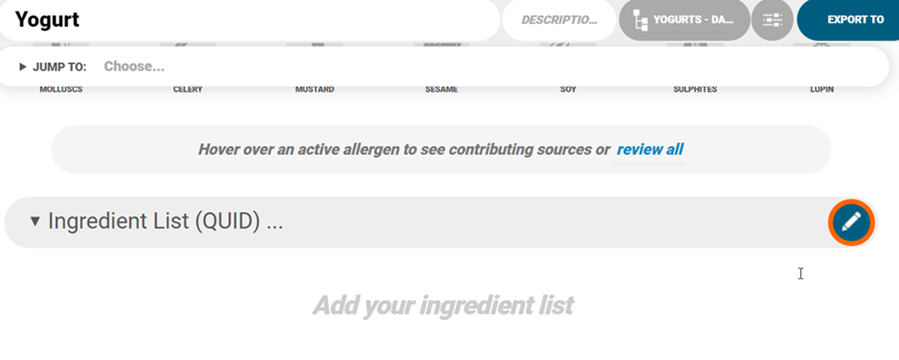
- Type in the ingredient list or copy and paste it from another source
- Include any ‘may contain’ allergens in the bottom field
- Alternatively, specify if the food is a single ingredient item e.g. olive oil, fruit, and we’ll automatically input an ingredient list based on the food name. You’ll just need to approve the allergens that we can deduce from this, or edit them if incorrect
- Click ‘Scan For Allergens’ to detect allergens

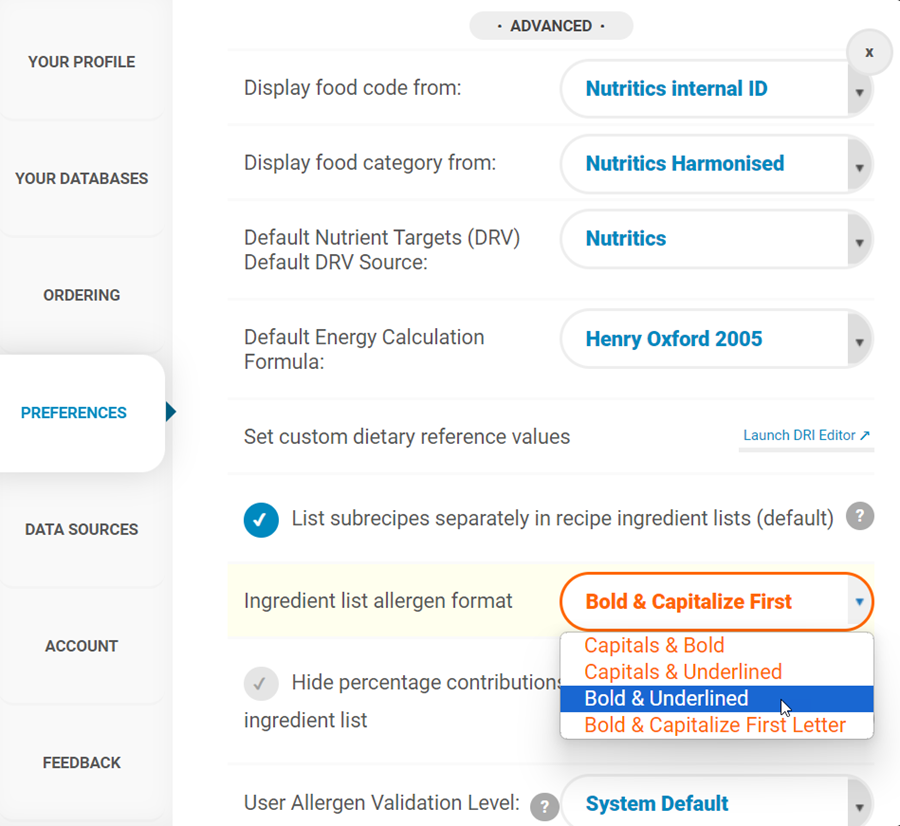
You can change how the allergens are formatted by going to Settings>Preferences> Advanced. Choose your preference from the dropdown beside ‘Ingredient list allergen format’:
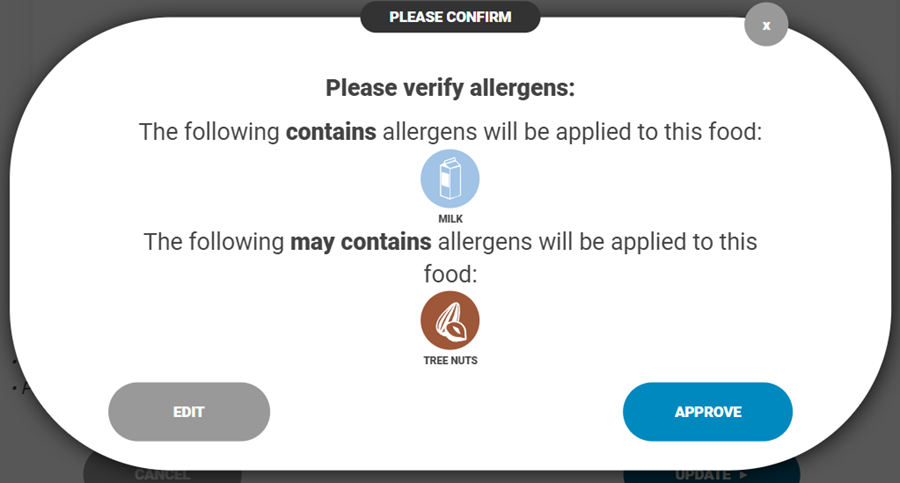
If any allergens have been flagged, you will be asked to approve them in order to proceed:
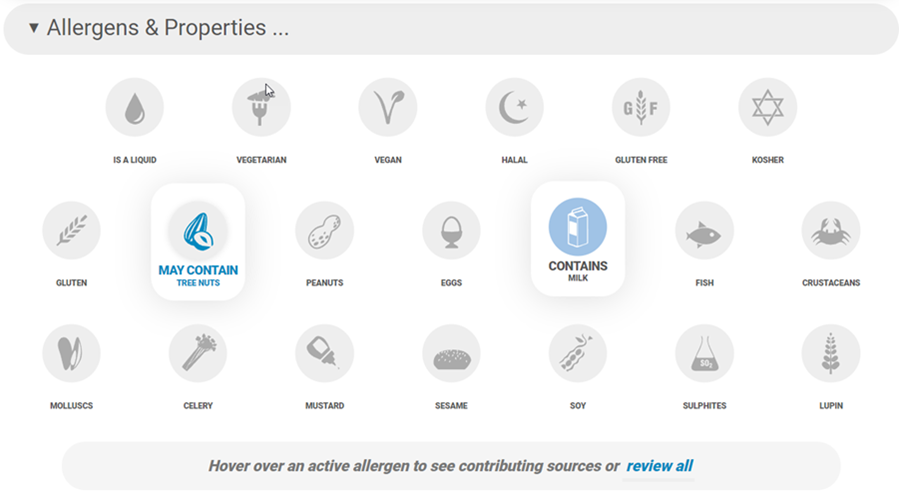
Allergens in the ingredient list will be flagged in the allergen tiles automatically:
9. Scroll up to add optional information such as a photograph, food cost or usable yield. We will assume the food has a 100% yield if this is not added. Once the food cost and usable yield have been input the usable ingredient cost can be calculated.

You can also tag the food to a group:
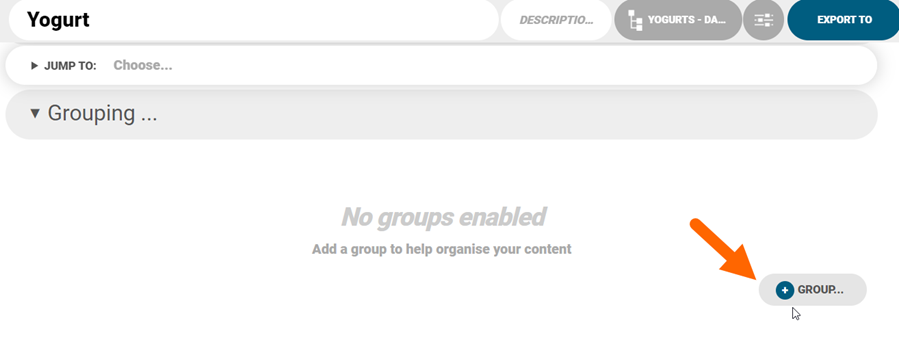
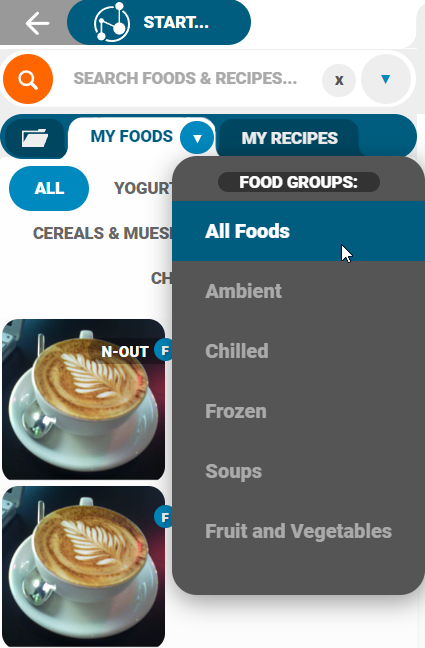
Food groups can be accessed in the Nutritics Content Explorer:

And by clicking on the ‘My Foods’ tab and hovering over the arrow that appears:
10. Add food-specific custom fields (e.g. shelf life, origin, storage instructions) in the modifiers box:

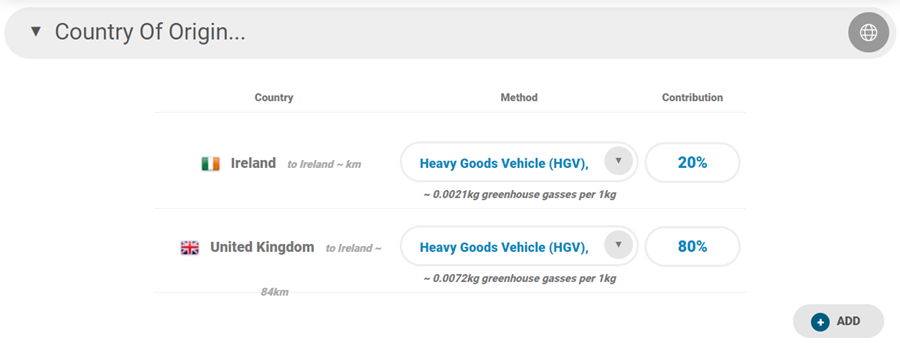
11. Add the food’s country of origin. When a country is added, it will be set to 100% automatically. If a second country of origin is added, input the correct percentage. The system will change the first country’s percentage in response to make up to 100%:
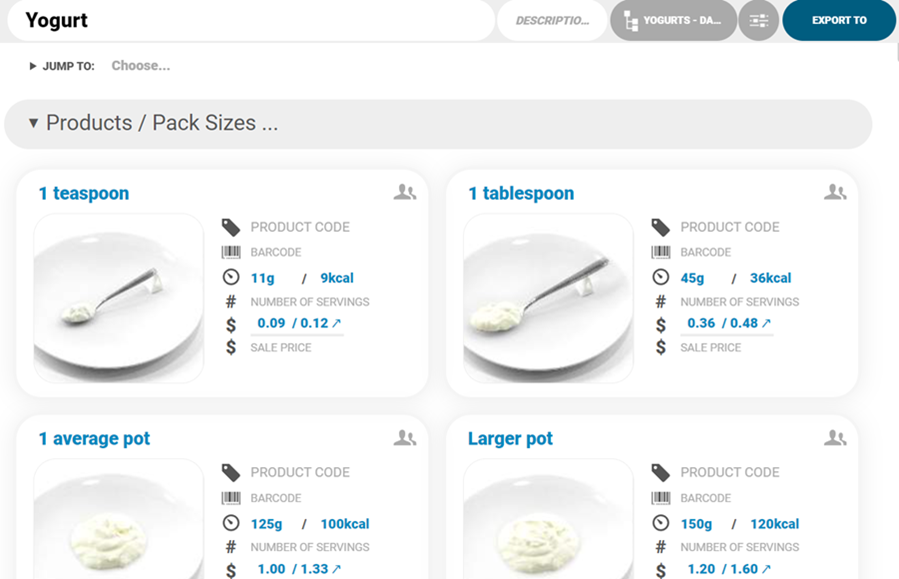
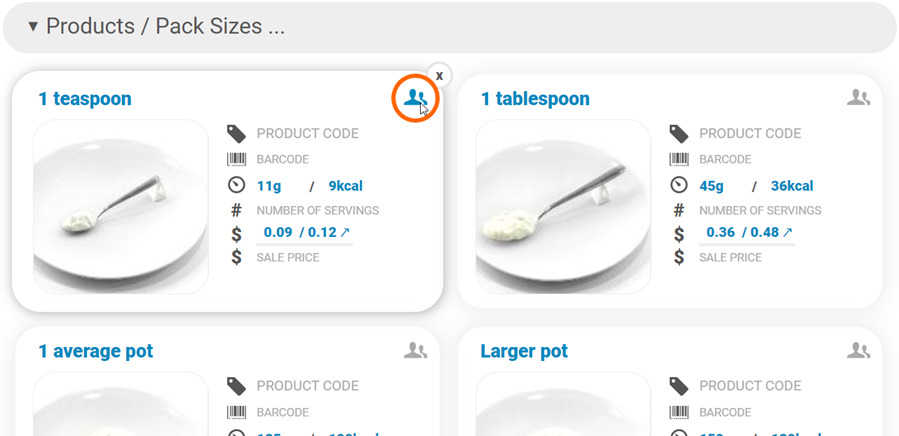
12. Scroll or jump to the Product/Pack Size section to add portion size information. These portions will be available to choose from when adding this food to a recipe etc. later on
If the food is a shared food, you can make portions private and collaborators won’t see certain pack sizes/products:
You can also enter a portion or pack size using the AI Serving Size feature under the Product / Pack Size panel.
To use it, simply click the AI icon when creating a new product or pack size:

Smart portion suggestions will be highlighted.
Simply choose a portion from the list, and it will be saved to your portion and pack size for future use:

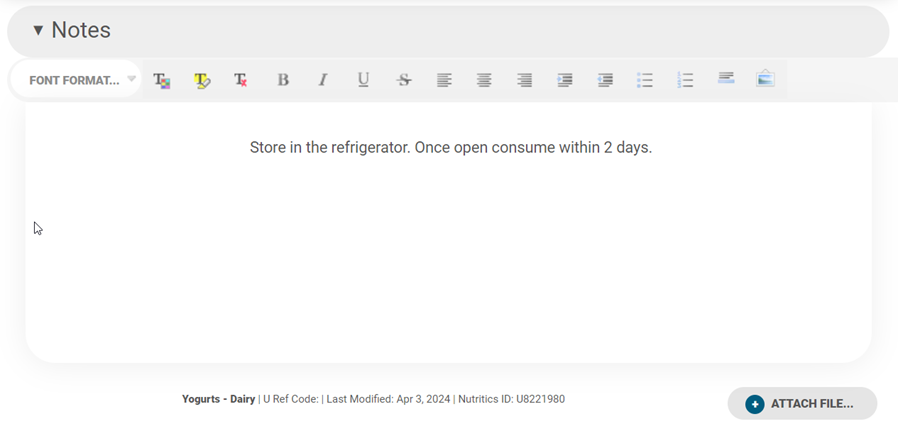
13. The notes section is a free text box to attach any notes about the product e.g. storage instructions or cooking instructions.
14. All data is saved automatically with each action and all foods added to your account are added to the ‘My Foods’ tab of the Nutritics Explorer.