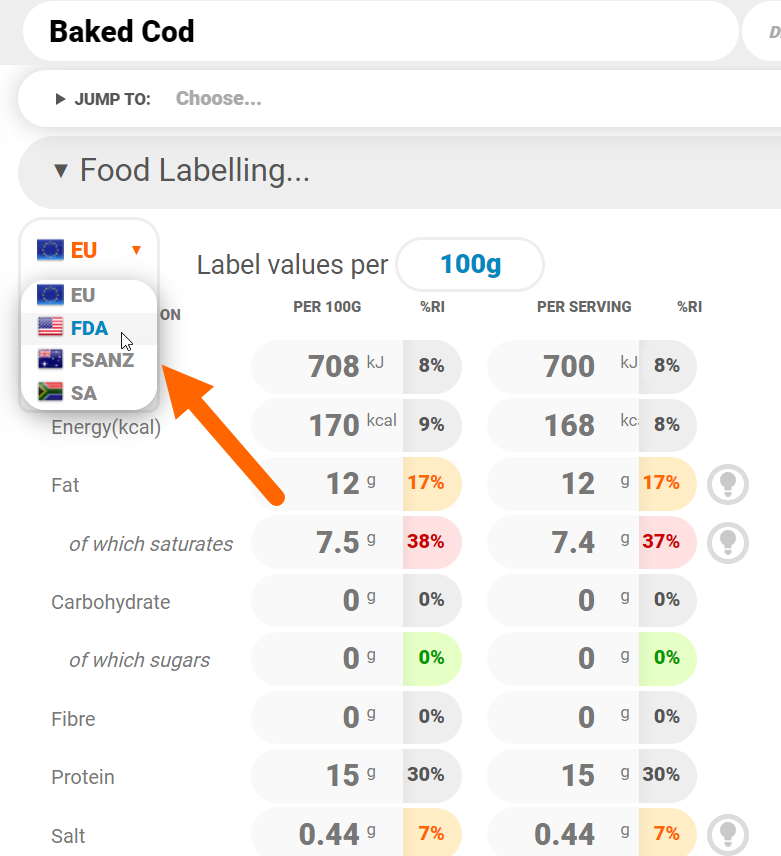
Allergens in Nutritics are specific to the regulations selected on the food and recipe workspace. The region can be changed on an individual recipe or food from the drop down as shown below, or can be set as a new default for the account in Settings>Preferences.
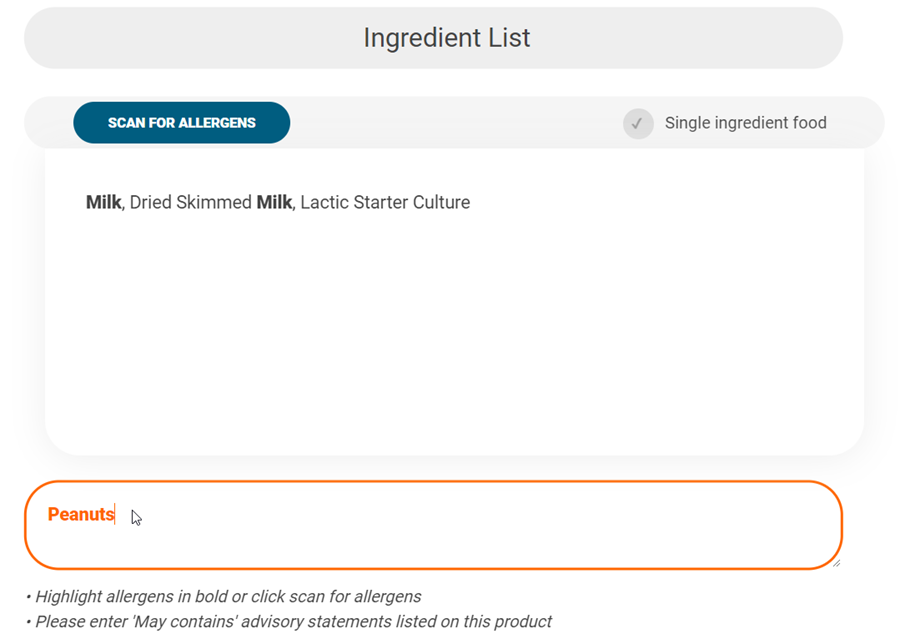
When building recipes using database food items, allergens are calculated automatically and indicated in the allergen tiles. If you are using your own created food items, we highly recommend adding the ingredient list and clicking ‘Scan For Allergens‘ to detect allergens automatically and confirm.
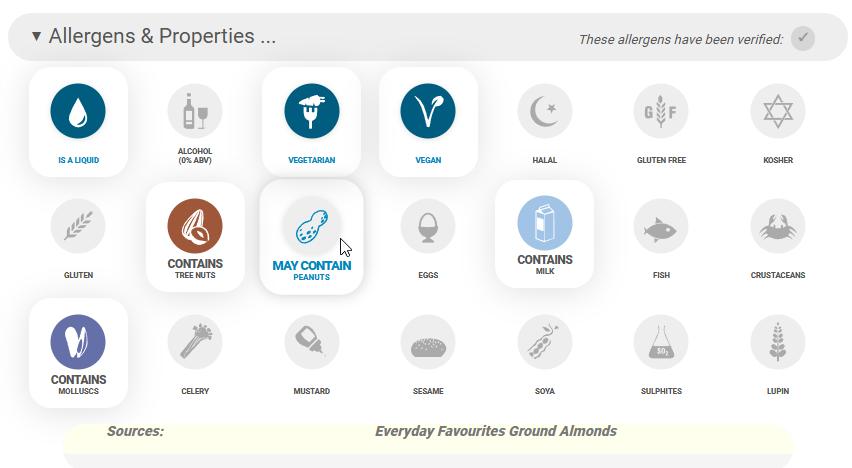
Once saved, this will activate the relevant allergen tiles and update the ingredient lists where this food is used across your recipes, labels and digital menus:

Nutritics will automatically include the disclaimer to see allergens in CAPS & bold, as well as any ‘May Contain‘ allergens.
You can also list the ‘May Contain’ allergens when editing a food’s ingredient list. List the may contain allergens in the bottom field and click ‘Scan for Allergens‘ to register this in the recipe workspace:
The trigger food for an allergen may be identified in a recipe by moving the mouse over the specific allergen indicator. You can then right-click the food from your ingredient list to view or edit the food, or you can swap it out for an alternative ingredient to engineer the allergen out of your recipe entirely.
If you use ingredients from a database that is missing allergen information you will see a warning message above the ‘Allergens & Properties’ tab:

Click ‘Review’ to open the allergen overlay in the ingredients section:
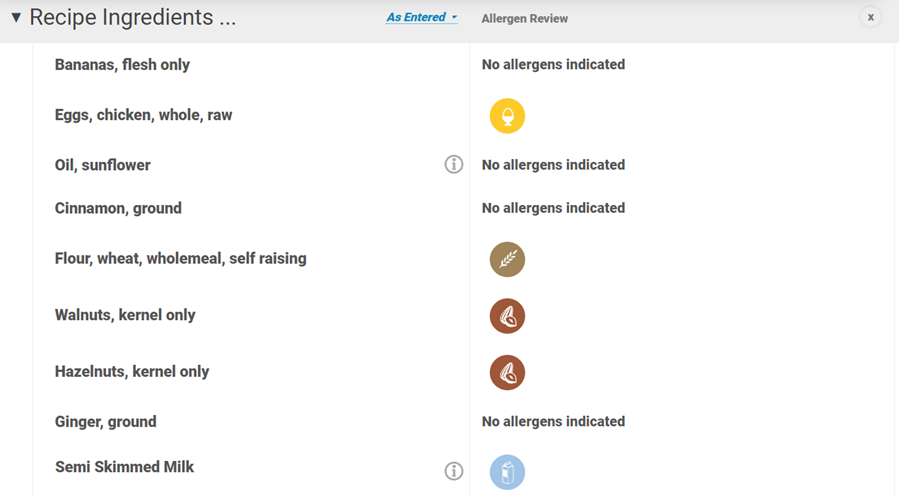
- Review the allergens per item to ensure they are accurate
- If allergens are not correct, right click the item’s name to ‘View/Edit’ the item’s ingredient list and allergen
- Once you are confident the allergens are correct per ingredient, scroll back to the ‘Allergens & Properties’ tab
- Click ‘These allergens have been verified’
This recipe can now be used in menus and to create labels.