Foodprint is a carbon and water footprint management and reporting solution.
Foodprint can be used within Nutritics to calculate CO2 equivalents produced from production, processing, storage/preservation, packaging and transport methods. This is possible on both foods and recipes within the software.
In this guide you will find:
- Calculating A Food’s Carbon Footprint
- Calculating A Recipe’s Carbon Footprint
- Adding a Foodprint Badge to Labels
Calculating A Food’s Carbon Footprint:
- Begin by creating a new food
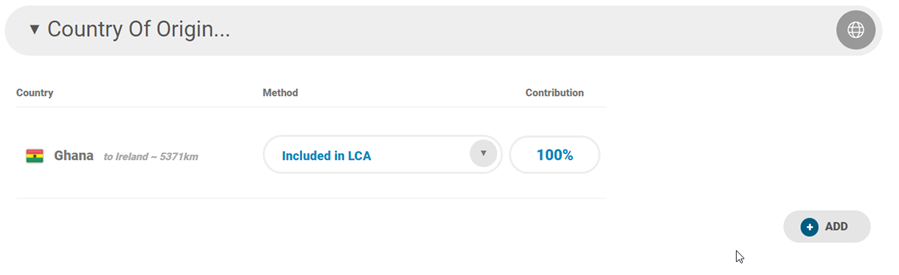
- Once the food is created scroll to the Country of Origin tab. Click ‘+Add’ to input a country of origin and choose a new country. If you don’t know the country of origin of your food, Foodprint will select the next best match based on your location. A country may already be set on a published food in the system or by the supplier, in this case the “+Add” option will not appear on this panel:

- Next, add the transport method to calculate the greenhouse gas emissions for transport of the food to you e.g. by air, truck, cargo ship:
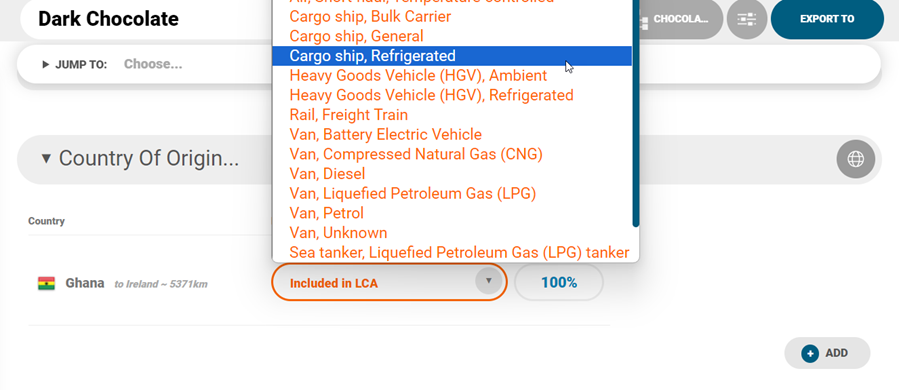
Some sources already have this transport factor built into the data in the ‘Sustainability & Foodprint’ tab and will automatically set this dropdown to ‘Included in LCA‘ (Life Cycle Analysis):
- Type the percentage of the ingredient that originates from this country into the ‘Contribution’ box. This information must be made available by the manufacturer or supplier. Once added, this data is maintained and calculated wherever the ingredient is used in Nutritics.
- If there is more than one country of origin click ‘+Add‘ again and enter the country. Once you correct the value for the existing country the system will automatically balance the percentages to equal 100%.
- Scroll down to the Sustainability & Foodprint tab where Nutritics will automatically match Greenhouse gas emissions and water usage from best available peer reviewed LCA data sources. The top 10 matches will show under the dropdown according to your location and the food’s country of origin.
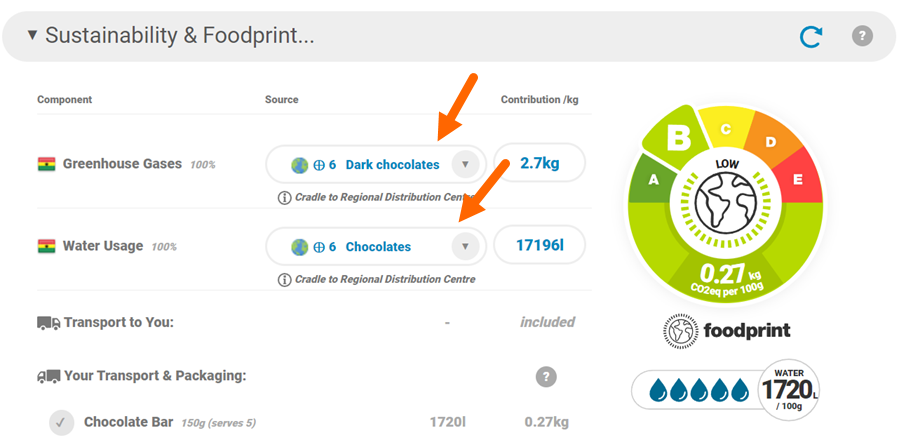
- Click the dropdown to modify the automatch selection, or input a custom value in the fields on the right. You can hover the mouse over the text in the drop down to see the source. LCA references can also be seen in Settings>Data Sources>Sustainability
Pro tip: The lower the score, the more specific the match. The system will choose the most appropriate option with the lowest score automatically, but you can fine tune and select other identified matches if more appropriate. This signifies a higher accuracy of data in accordance with the country of origin. For example, a score of 1 means there is data available on the food for the country of origin input but a score of 10 means only average data is available at a category and global level, rather than the specific food level.
- The information from the food’s country of origin transportation will sync directly to the Transport to You section.
- Input your own (outbound) transport and packaging information per product/pack size by clicking the edit pencil icon. This will direct you to the products at the top of the recipe page to add the packaging and transport additions.
- Click on the cost to edit these. These changes will be incorporated into the final Foodprint score.
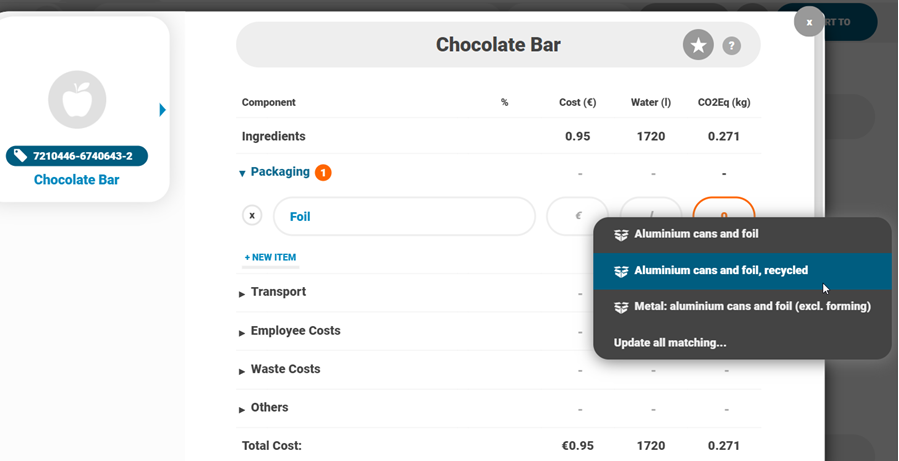
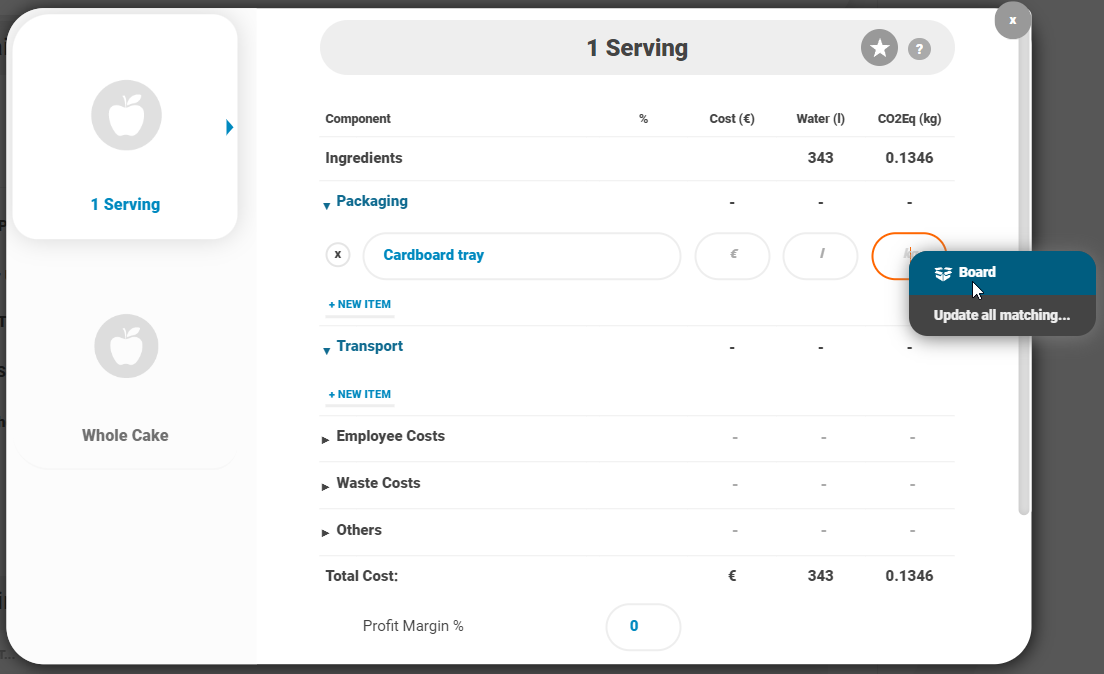
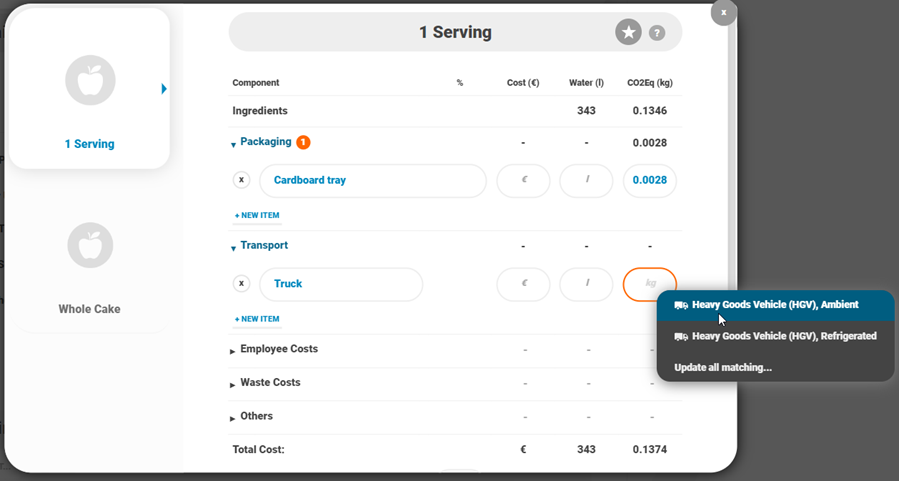
- Input CO2Eq (kg) and Water (l) data for packaging, shipping and ‘others’ if required. Nutritics has a lookup library incorporated for estimations of shipping and packaging emissions. Input a keyword e.g. foil or plastic, then click the CO2 field and choose the closest option for an estimation:
Please note that water usage will remain blank as water footprints are not typically used in packaging production.
- Input the weight of the packaging and click ‘OK’ to update the emission values:
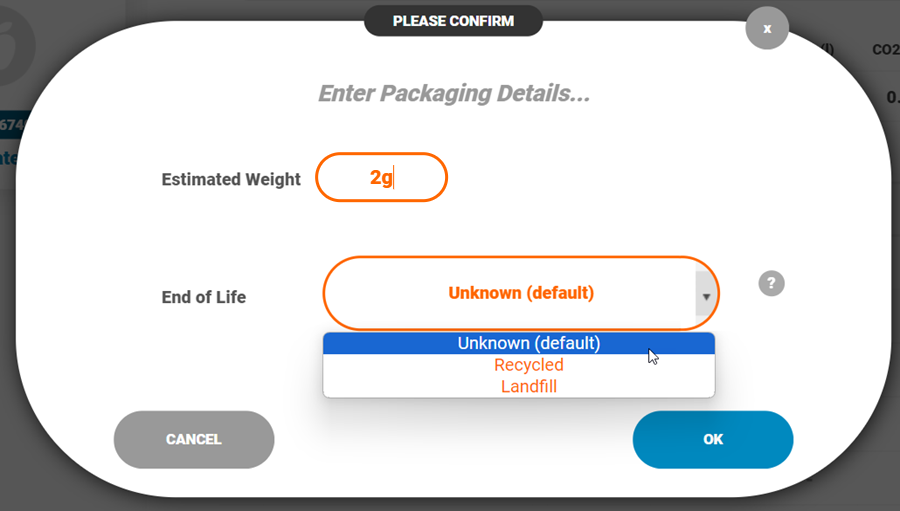
Pro tip: Input an end of life for the product if the package is disposed of on the premises
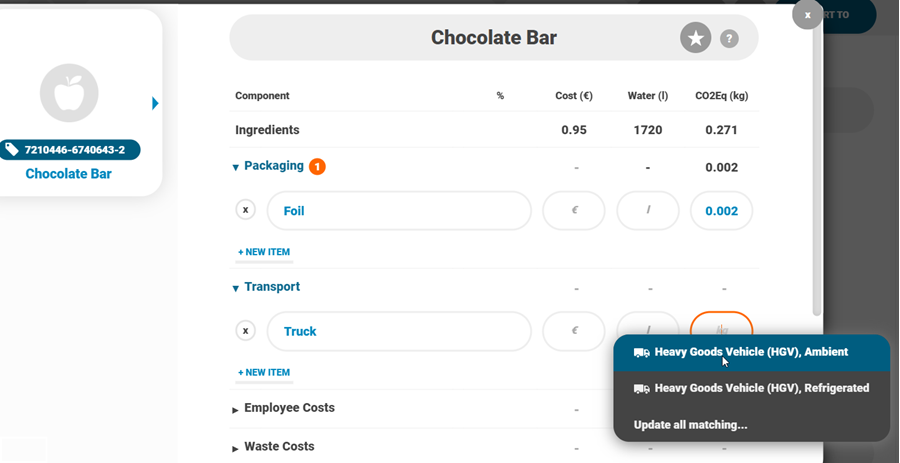
- Input a transportation method, for example, from a central production kitchen to outlet locations via truck and click the CO2 field to choose a method:
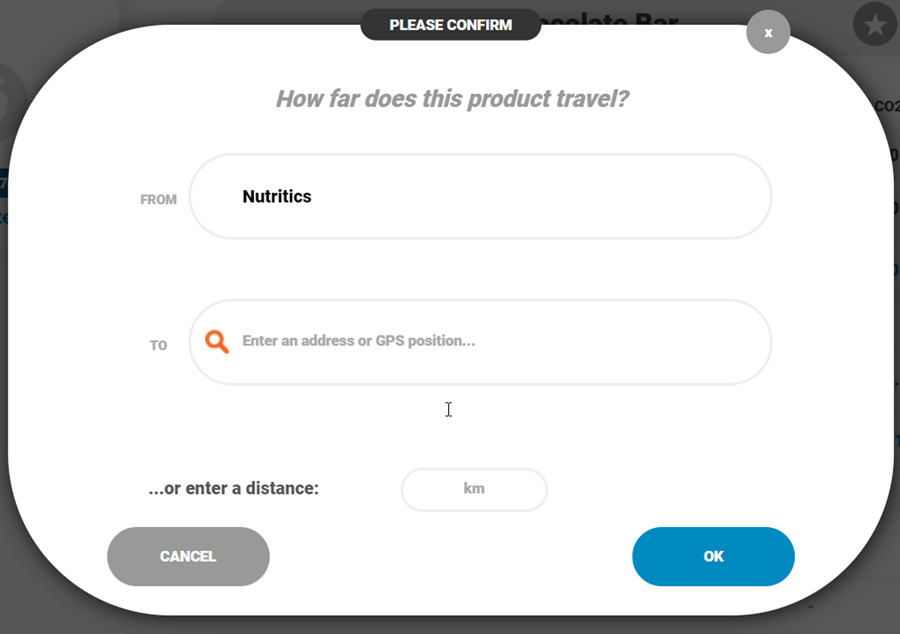
- Input how far the product will travel using an address, postcode, or by manually inputting the distance.
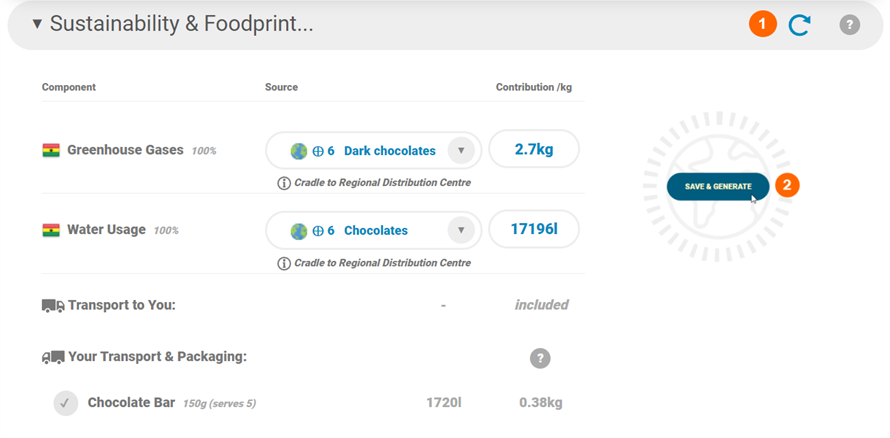
- Click ‘OK’ and move back to the Sustainability & Foodprint tab. Refresh the panel using the refresh icon (1), and click ‘Save & Generate’ to generate a Foodprint badge if requested (2):
- Where there are multiple products or pack sizes you can choose the individual product and generate a new badge
Pro tip: Right click the badge to download it as a large or small image
Calculating A Recipe’s Carbon Footprint:
- Begin by creating a recipe, using foods with complete Sustainability & Foodprint data (following the steps here). Alternatively, use foods as normal and click the ‘Generate Badge’ button under the Sustainability & Foodprint tab to apply our automatch to all ingredients in the recipe.
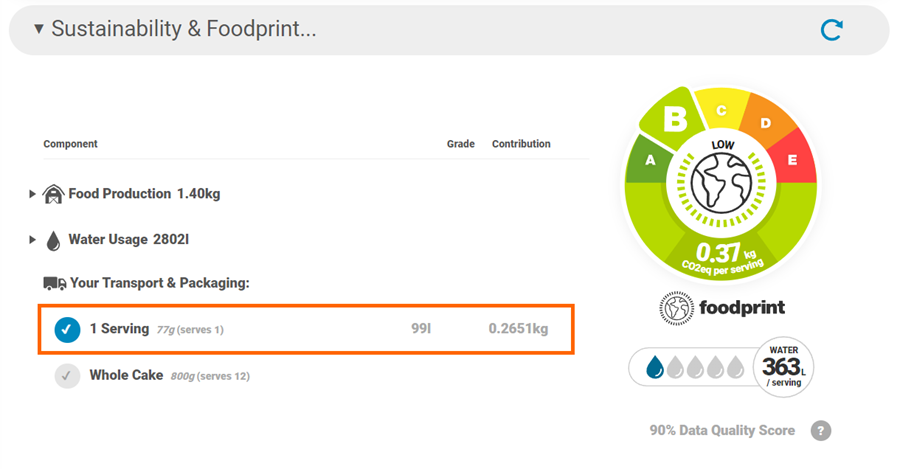
- Expand the ‘Food Production’ row to scrutinise the matches. For best results, each automatched ingredient should be reviewed. If no match is found on an ingredient, that food should be opened and a suitable match manually set, or a custom value can be input, if known.
- Where Nutritics has automatically matched data these are chosen from the best available peer reviewed LCA data sources. These are matched according to your location, the food category and the food’s country of origin. LCA references can be seen in Settings>Data Sources>Sustainability.
- Input your own (outbound) transport and packaging information per product/pack size by clicking the edit pencil icon. Packaging and transport additions will be incorporated into your final Foodprint score:
- Input CO2Eq (kg) and Water (l) data for packaging, shipping and ‘others’ if required. Nutritics has a lookup library incorporated for estimations of shipping and packaging emissions. Input a keyword e.g. foil or plastic, then click the CO2 field and choose the closest option for an estimation:
- Input the weight of the packaging and click ‘OK’ to update the emission values:
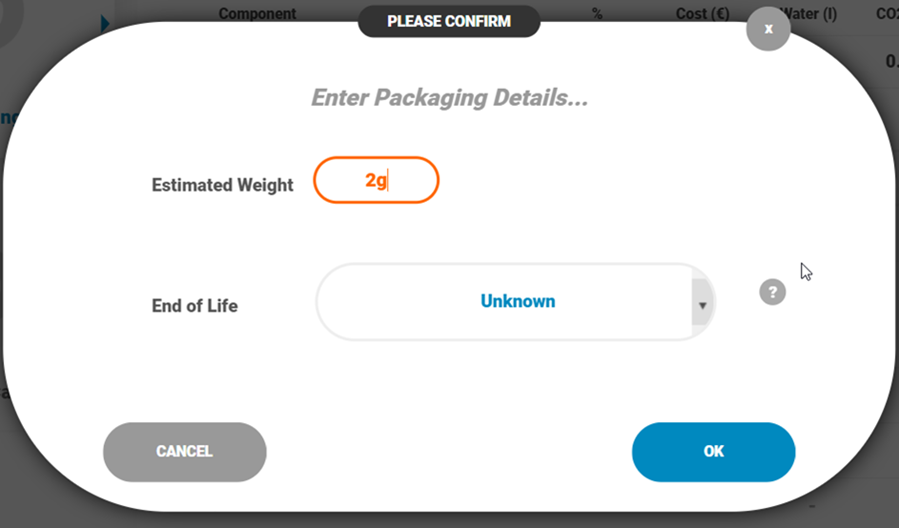
Pro tip: Input an end of life for the product if the package is disposed of on the premises
- Input a transportation method, for example, from a central production kitchen to outlet locations via truck and click the CO2 field to choose a method:
- Input how far the product will travel using an address, a postcode, or by manually inputting the distance:

- Click ‘OK’, close costs and move back to the Sustainability & Foodprint tab. Refresh the panel using the refresh icon (1), and click a product to generate a Foodprint badge (2):

- This badge can be printed with a recipe report or added to your label using the Foodprint element
Pro Tip: Foodprint badges are calculated per serving for recipes. If the Foodprint is different than expected, revise the serving size of the recipe and check if the food category assigned is accurate. This will ensure data is being calculated accurately.
Adding A Foodprint Badge To Your Label
Add a Foodprint badge to your product label syncing information directly from the recipe workspace. If you have not included sustainability information on your recipe or food, please see the instructions here.
- Create a label for your product
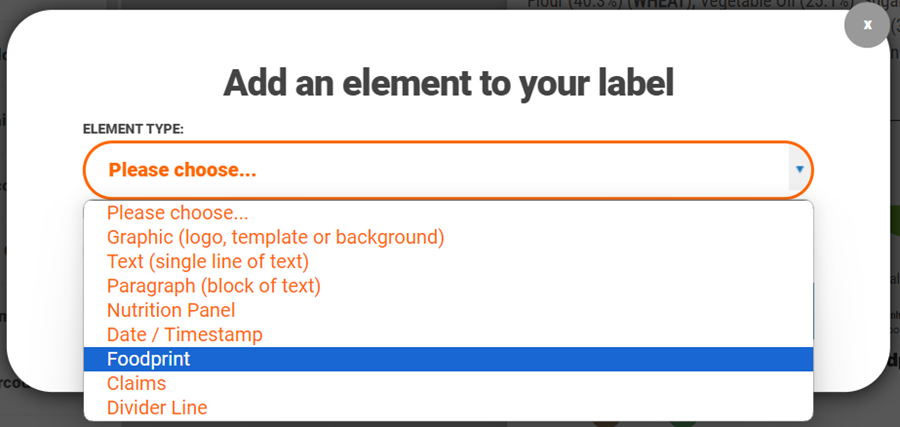
- Click ‘+Add An Element’ to include the ‘Foodprint’ element on the label
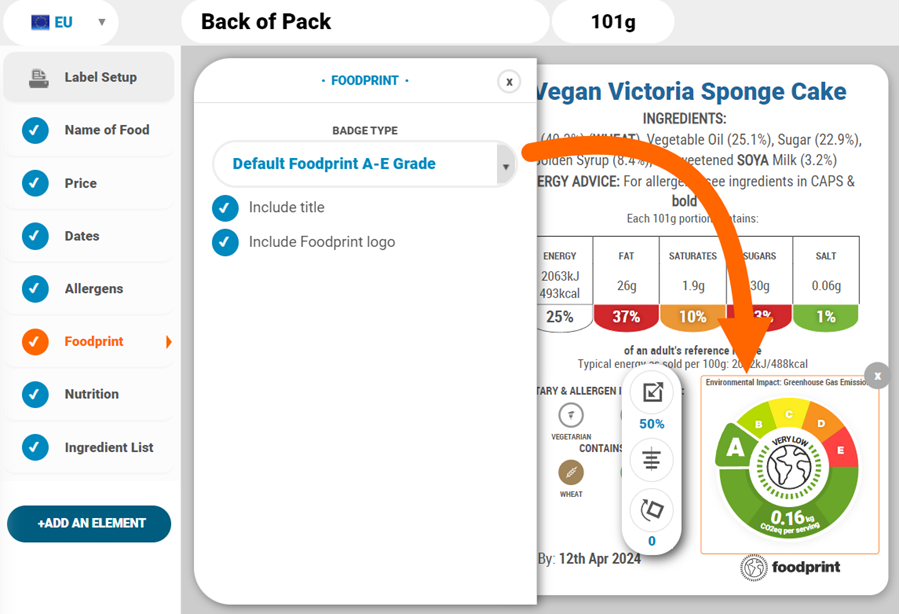
- Choose your desired badge:
The ‘Default Foodprint A-E Grade’ Badge will show the final scoring of the product’s Greenhouse Gas Emissions Grade and CO2 eq/kg usage per serving:
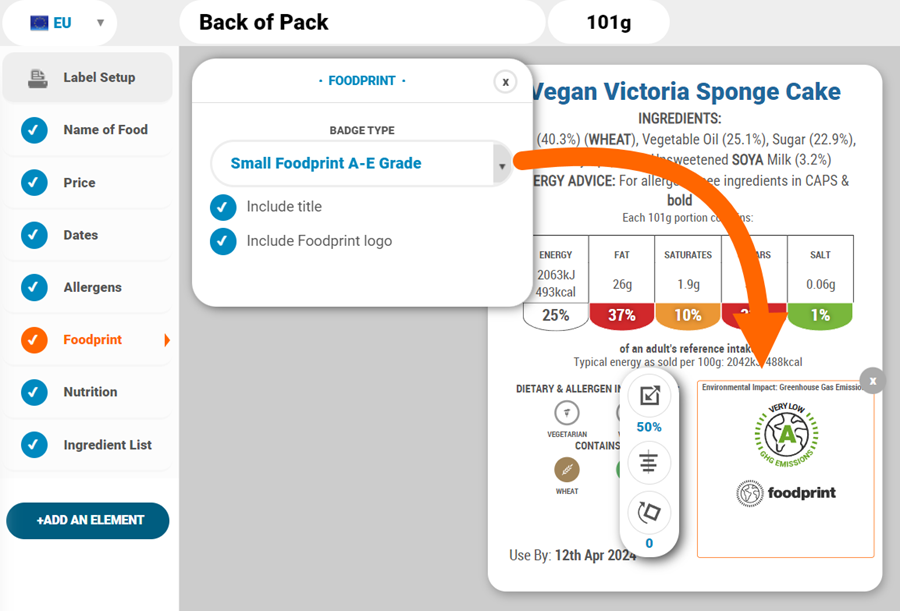
The ‘Small Foodprint A-E Grade’ will only show the Greenhouse Gas Emissions grade per serving:
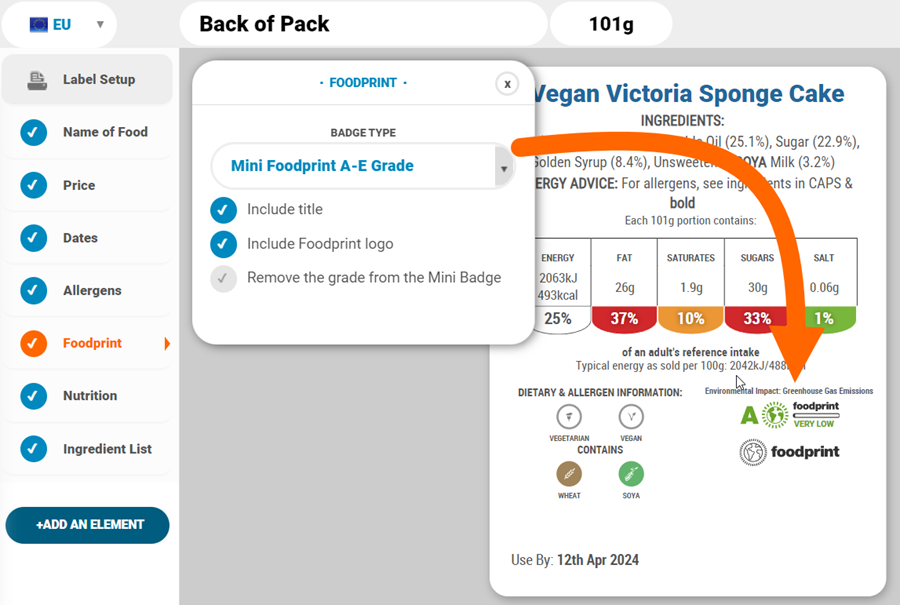
The ‘Mini Foodprint A-E Grade’ badge will show the Foodprint grade and rating per serving:
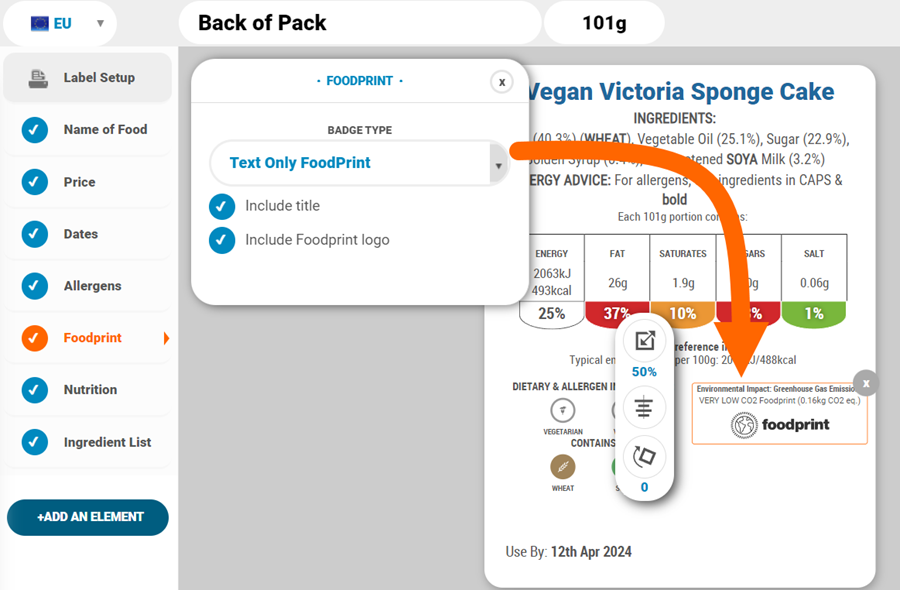
The ‘Text Only Foodprint’ badge will show the Foodprint grade and rating in writing only:
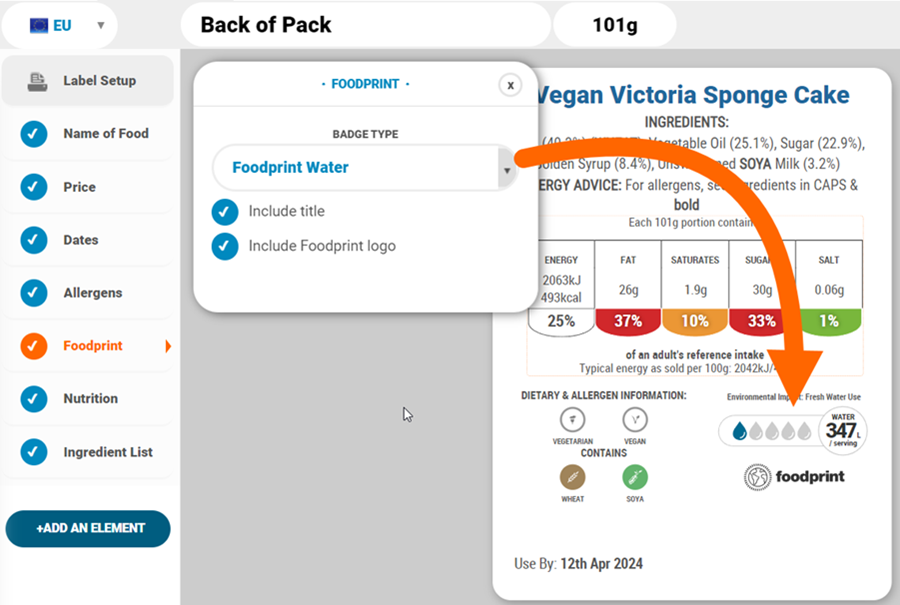
The ‘Foodprint Water’ badge will only show fresh water usage per serving:
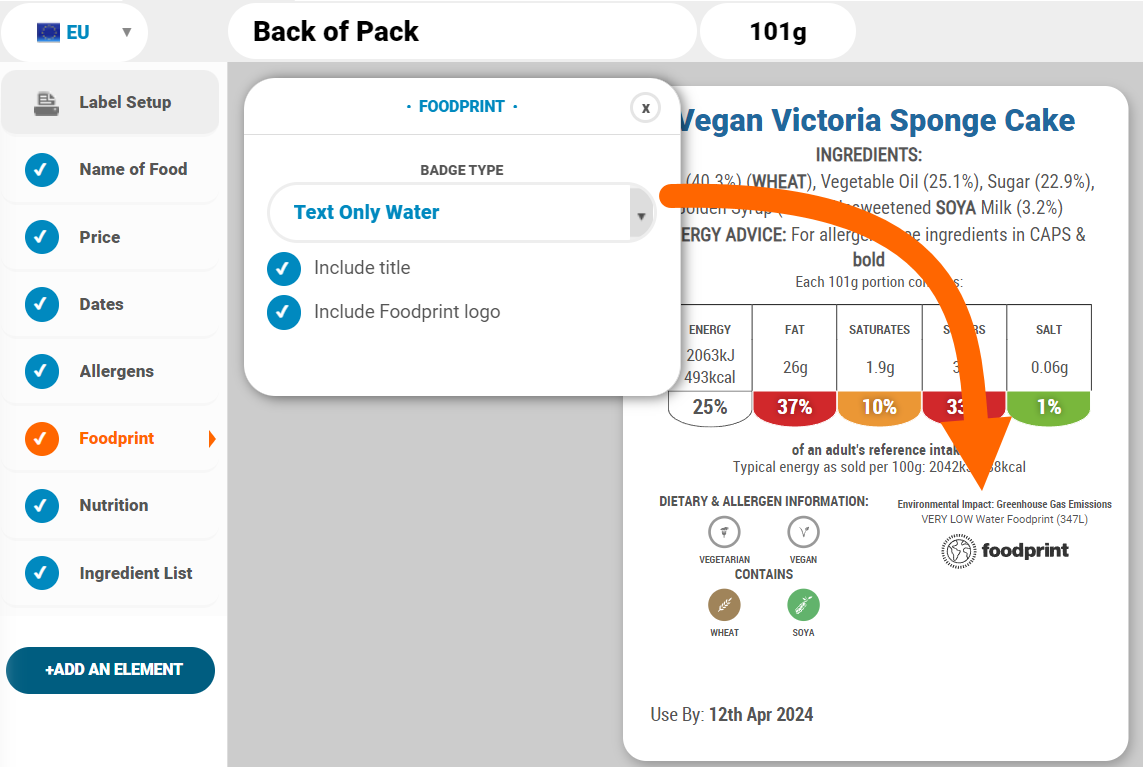
The ‘Text Only Water’ badge will only show fresh water usage per serving in writing:
- Add the text ‘Environmental Impact: [relevant information based on badge used]’ above the badge by selecting ‘Include Title’
- Remove Nutritics’ Foodprint logo below the badge by deselecting ‘Include Foodprint logo’
- To include multiple badges on one product label click ‘+Add An Element’ then ‘Other Element’
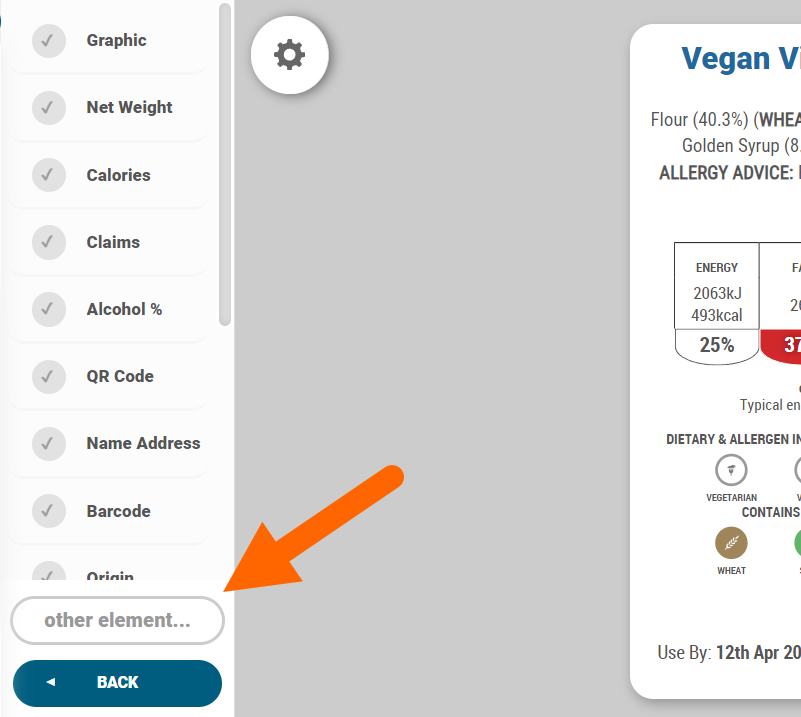
- Choose ‘Foodprint’ from the dropdown and name the element to add it to the label
You can then select the second desired badge to include on the label.
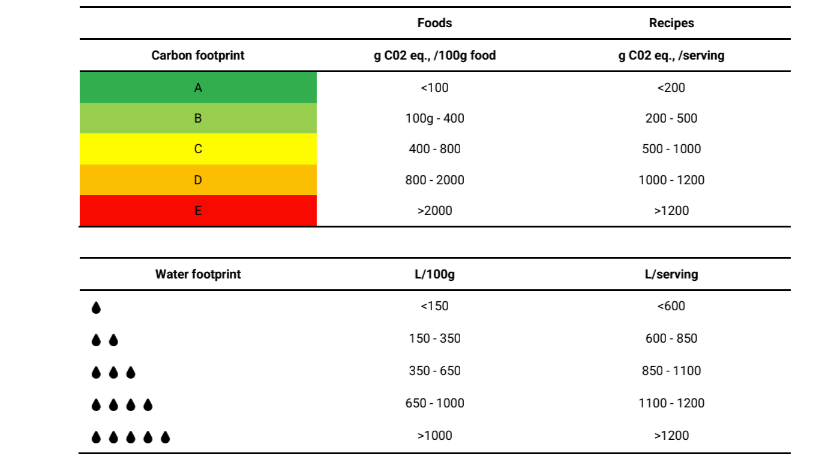
Scoring Criteria
For additional information on our scoring you can see the info graph below: