Stage Gates allow account admins to control and build workflows in Nutritics.
The flow of steps created can be assigned to other users within your organisation. Instructions can be included to inform users on how to complete the assigned stage.
In this guide we’ll cover:
- Creating a stage gate process
- Stage Gates from an assigned user’s POV
- Managing a Stage Gate as an admin
CREATING A STAGE GATE
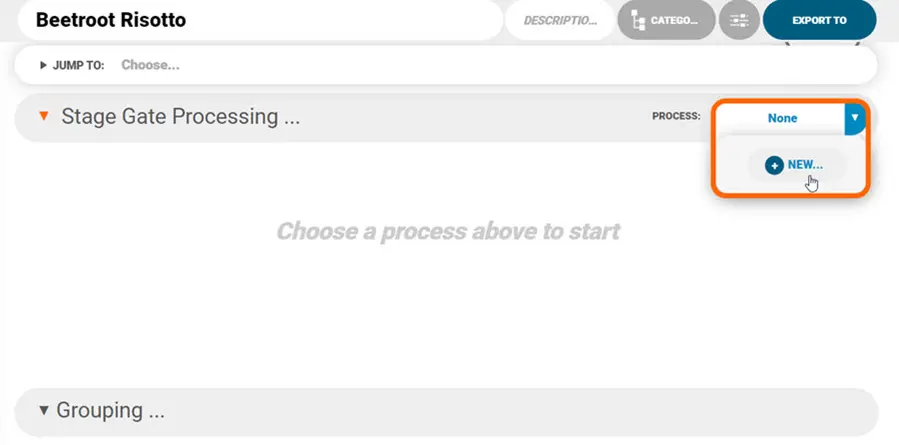
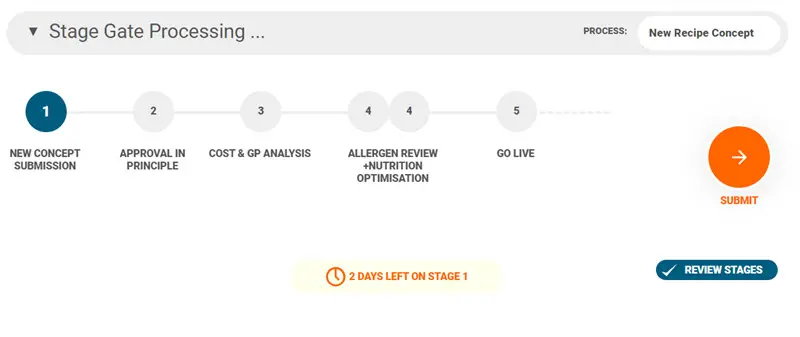
To create a Stage Gate open a food or recipe and scroll or Jump to the Stage Gate Processing tab:
1. Click the Process dropdown and select ‘+New’:
2. Enter a name for the stage gate process e.g. New Recipe Concept
3. Begin adding stages to the process by clicking ‘+Add Stage’
4. Enter the first stage name e.g. New Concept Submission
5. Input instructions for the assignee to complete the stage:
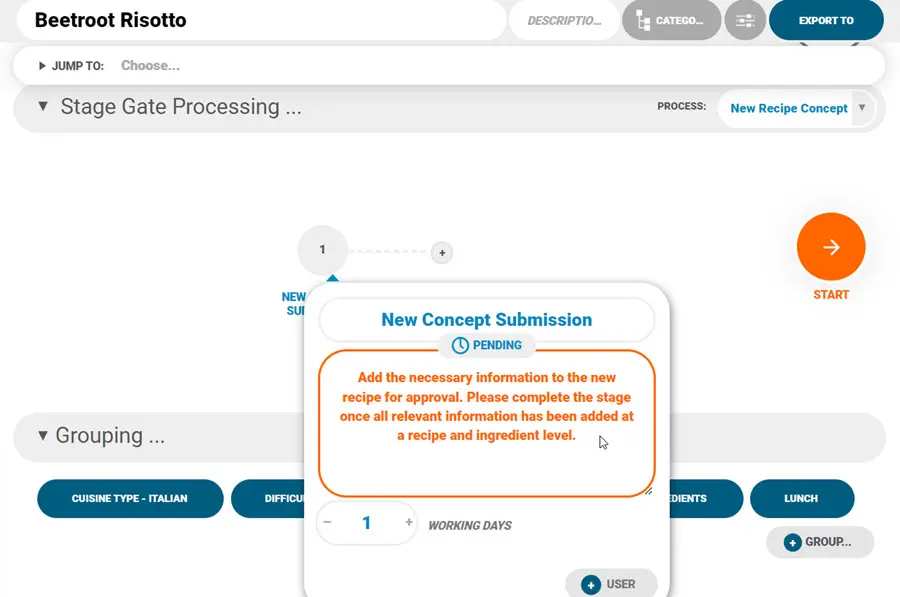
6. There is a status attached to each stage, it will be pending until the stage is complete
7. Specify the number of working days permitted to complete the stage
8. Click ‘+User’ to assign the stage to a member of your organisation. Please note that they must have a separate Nutritics account. Search by name, username or email:
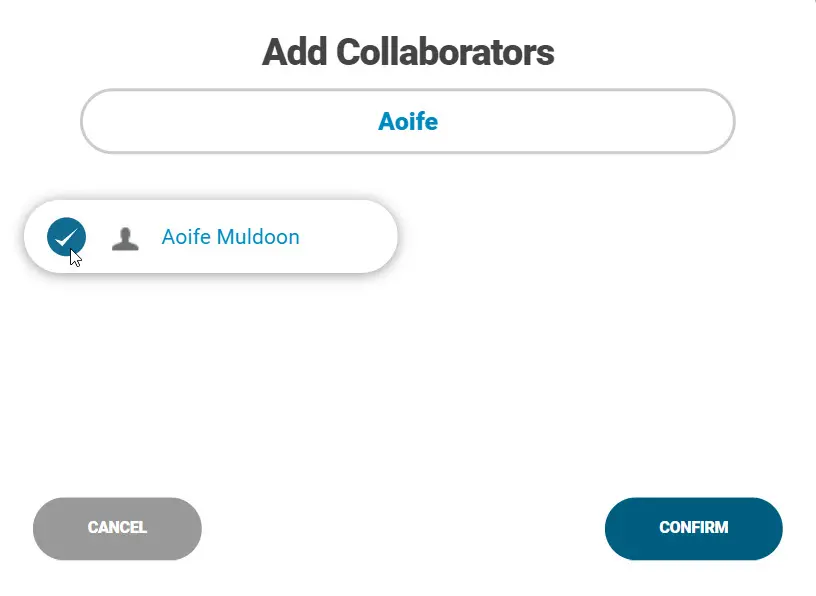
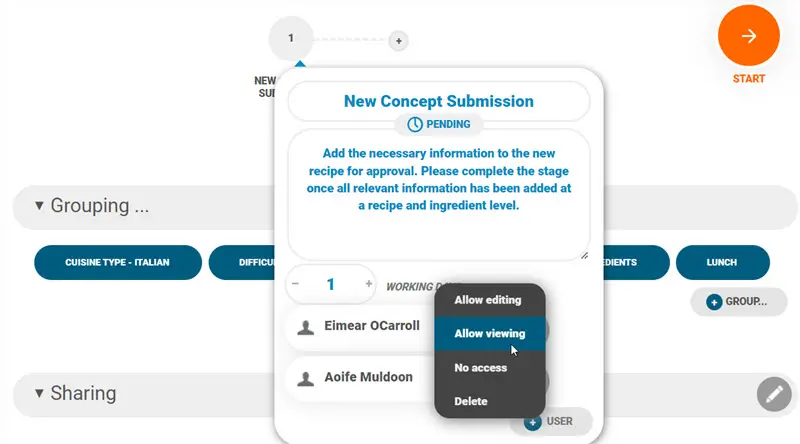
9. Tick the correct user and select ‘Confirm’. You can assign multiple people to a stage and edit their access to the food or recipe by clicking their name or right clicking. Please note you must permit viewing or editing access for the user to see the food or recipe:
10. Repeat the steps above to add additional stages to the stage gate process
11. All stages are sequential; however you can grab a stage and drag it on top of another stage to allow them to be actioned at the same time. This is useful for independent stages. For example, both the allergen review and nutrition optimisation stages can be performed at the same time:
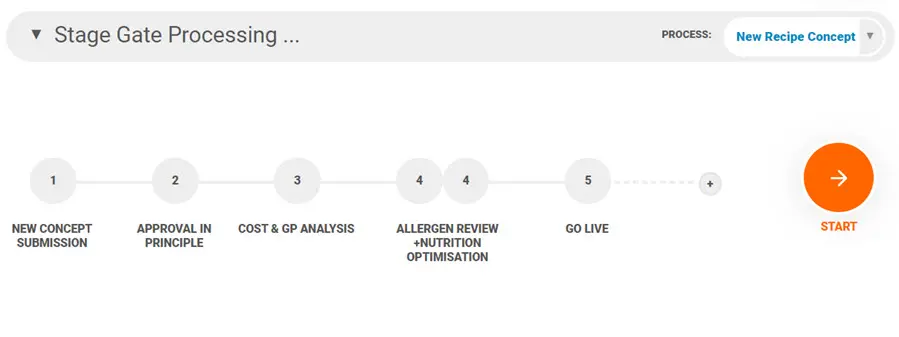
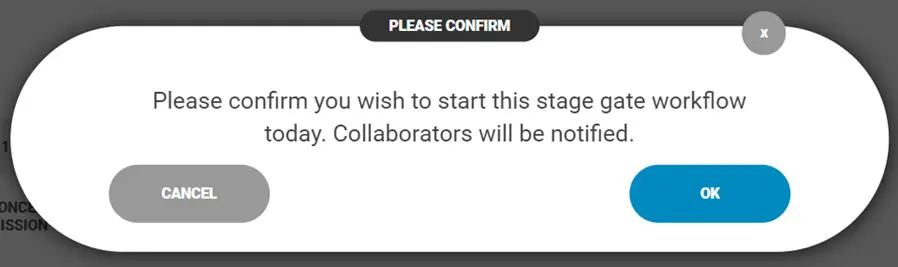
12. Click ‘Start’ to begin the Stage Gate. Once the Stage Gate is started, the first collaborators will be notified (those assigned to the first stage) that you’ve submitted this recipe to the Stage Gate:
Please note: The owner of the Stage Gate is the person who initiates it, they can make necessary changes and override stage completions by clicking ‘Proceed’. Ensure to set yourself on the first stage if you would like to own the workflow.
STAGE GATES FOR ASSIGNED USERS
- Once the workflow has started the first assigned user will get a notification the next time they log in to complete their stage:
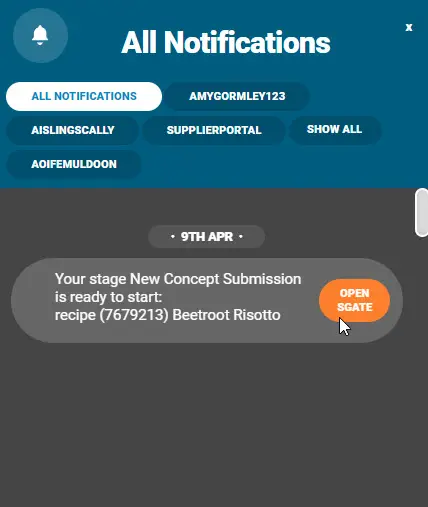
2. Click ‘Open SGate’ to open the recipe or food and complete the assigned task
3. You can see the stage assigned in blue and all information attached to the stage by clicking on it:
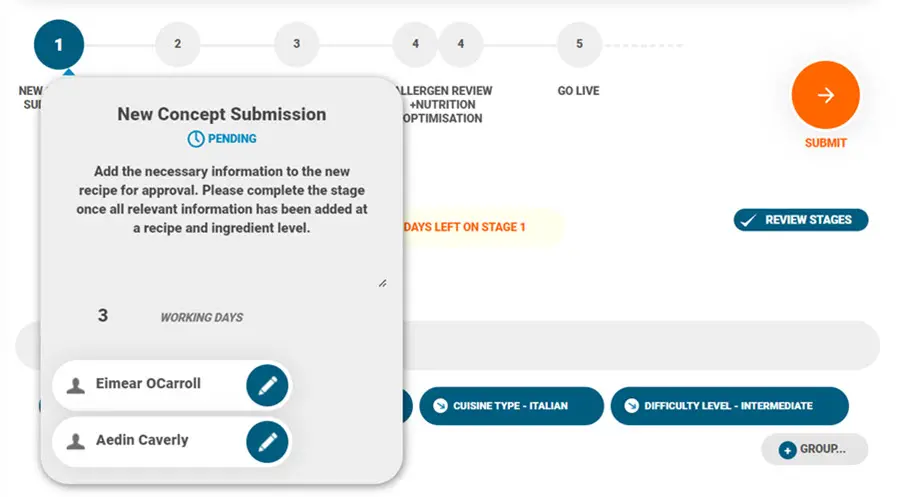
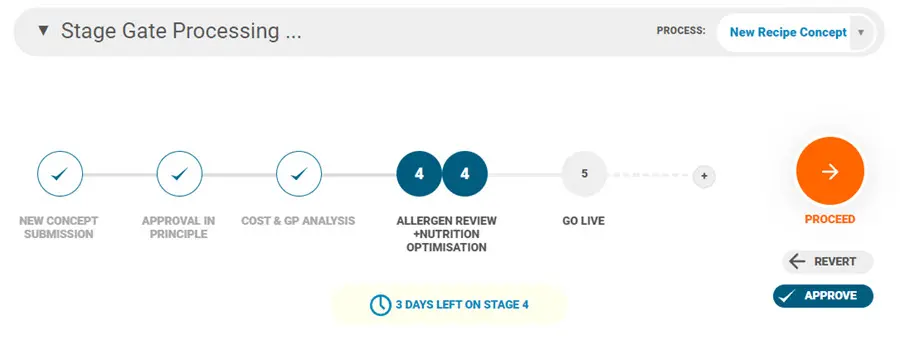
4. The time remaining on the stage will be highlighted at the bottom of the tab:
5. You will receive a notification if the deadline has passed and you did not complete it in time
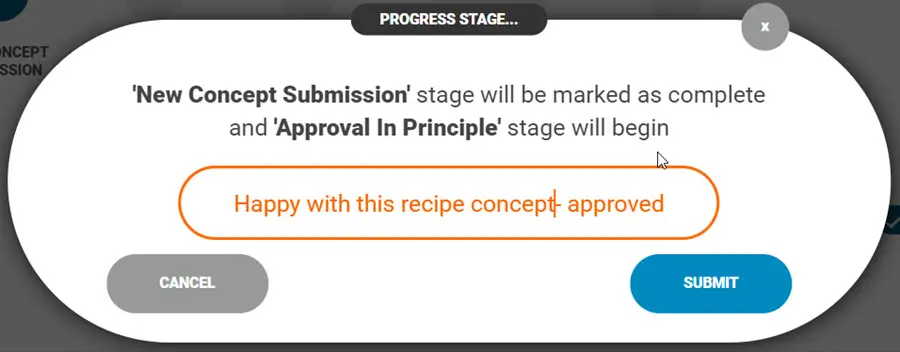
6. Once reviewed and completed, click ‘Submit’ to complete the stage
7. Add a comment with the completion for the admin and others assigned users to view:
8. The workflow can now proceed to the next stage
9. Users can click ‘Review Stages’ to see an overview of statuses and comments attached to the stages.
MANAGING A STAGE GATE AS AN ADMIN
- Admins will receive a notification when a stage is completed by an assigned user
- Admins can click to ‘Proceed’ to the next stage at any time. This action will override the assigned user on the stage:
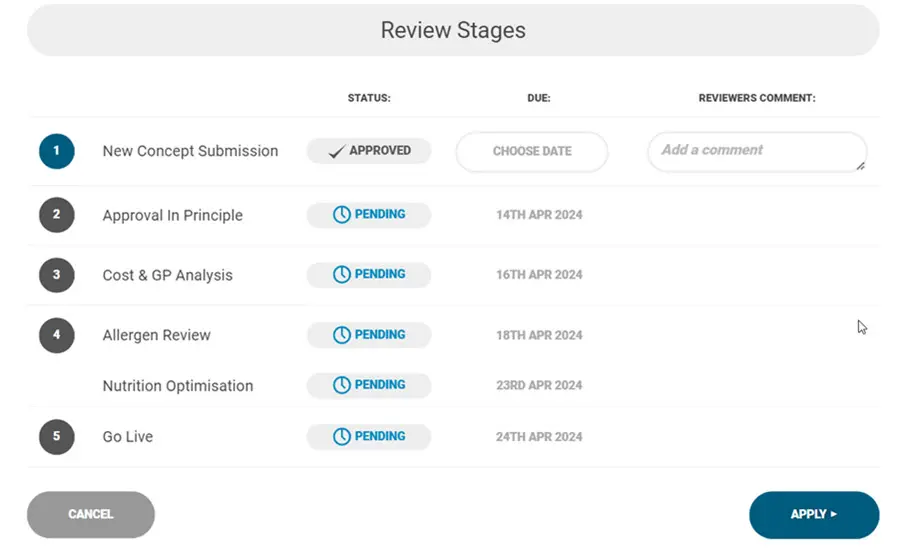
Admins can click ‘Approve’ to see an overview of all stages of the workflow. Add comments and/or click ‘Apply’ in the bottom right to validate the stages:
- This can also be done after each stage but it is not necessary as the stage gate will proceed regardless.
- Admins can also revert a stage back if they are unsatisfied using the ‘Revert’ button
- Click the slider icon beside the Stage Gate name to change notification preferences for assigned users:
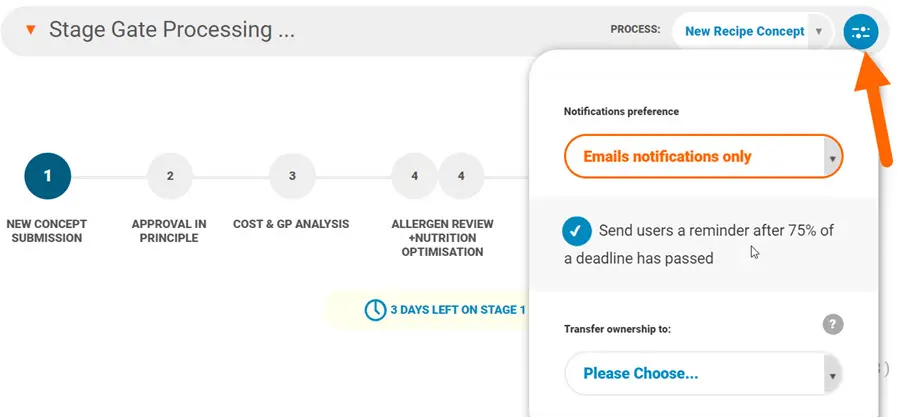
You can also transfer ownership of the workflow here