Nutritics meal plan creator enables the creation of custom eating plans to suit your client’s health or performance based goals.
Please note that you can currently only create a single day meal plan in Nutritics. To create a multiday meal plan, you must create these as separate days.
This guide will bring you through:
- Creating a meal plan
- Adding foods to a meal plan
- Adding recipes to a meal plan
- Using sample recipes in your meal plan
- Syncing recipes in a meal plan
CREATING A MEAL PLAN
To create a meal plan, select a client (or set up a new client) and click the plus button on the meal plan panel:

Alternatively, go to the Start menu and click ‘New Meal Plan‘.
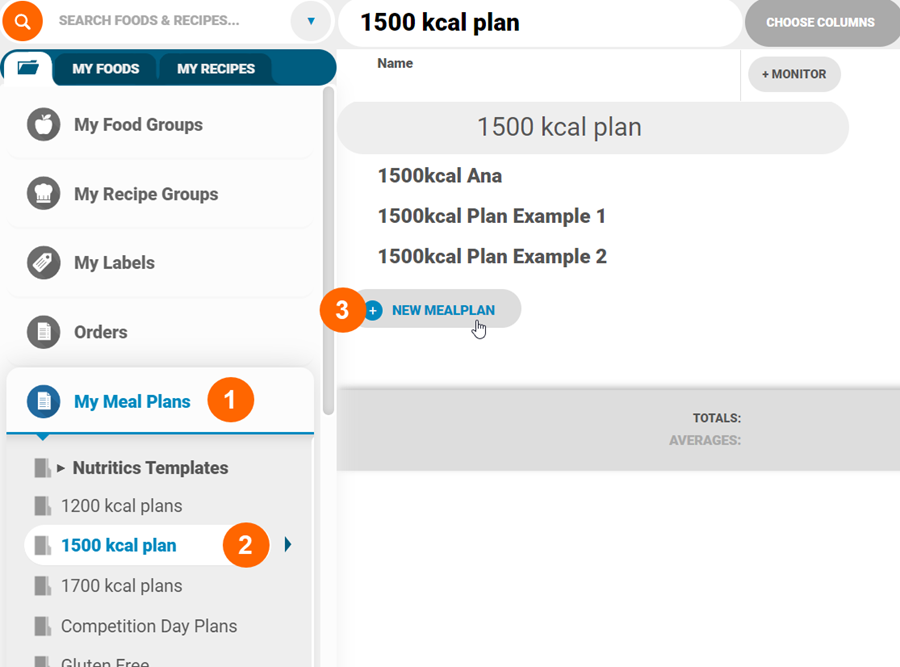
You can also create a new meal plan from the ‘My Meal Plans‘ section of the Nutritics explorer (1). Click on a meal plan group to open it (2) and then click on ‘New Meal Plan‘ (3).
Meal plans can be created from scratch, or you can reuse a previously created meal plan and attach it to a new client. Select the preferred option, and the meal plan creator screen will open. Give the meal plan a title and date:
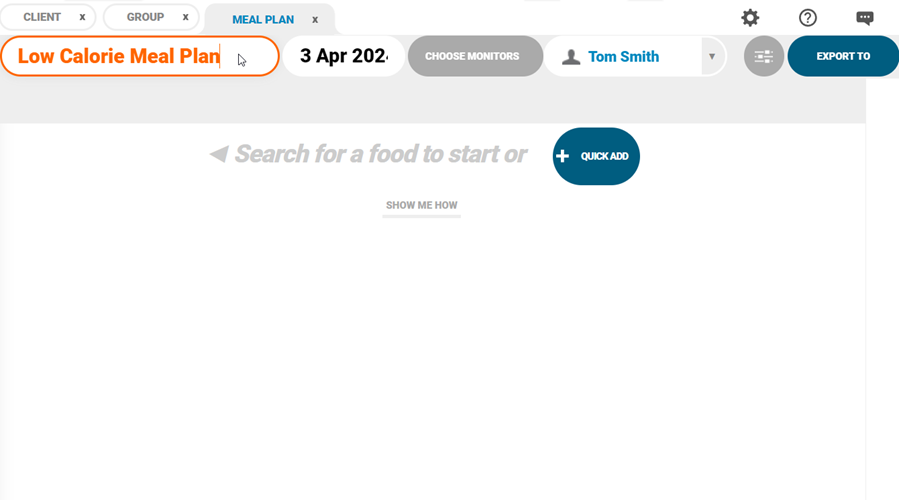
A meal plan will calculate a client’s nutrition targets based on their age at the date input in the top bar:

Ensure this date is input as the date of proposed consumption to analyse targets accurately. Alternatively, input a prior date of consumption to analyse the meal plan retrospectively.
ADDING FOODS TO A MEAL PLAN:
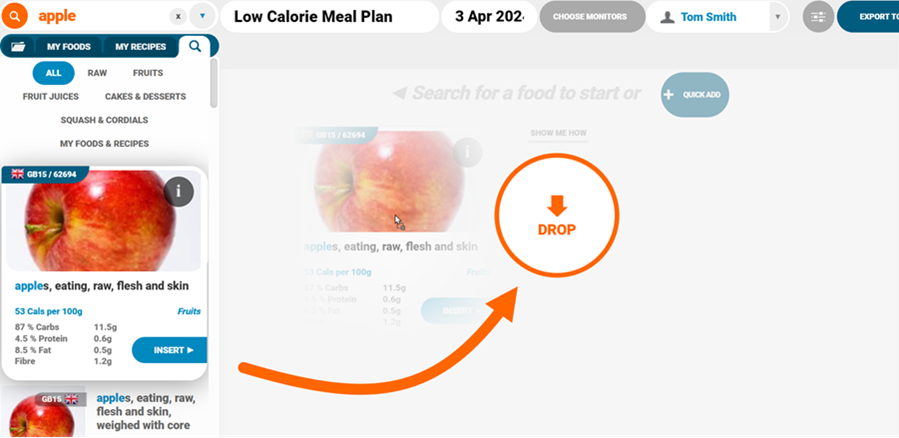
- To begin creating the meal plan, search for a food in the food search box at the top left of the screen
- Click on the food once to see more information on it and click insert to add it to the meal plan

Foods and recipes can also be dragged and dropped onto the meal plan workspace:
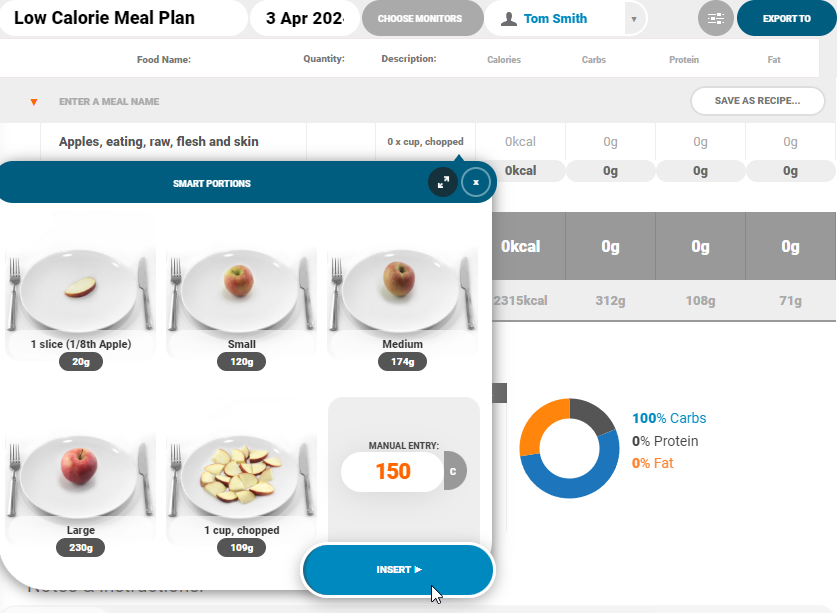
- Enter a quantity for each food in the ‘Quantity‘ column. Select from predefined portions (available for most foods) or manually enter a quantity in the manual entry field:
- You can also change the food and the description to more ‘client friendly’ names by clicking on the text and typing new names.
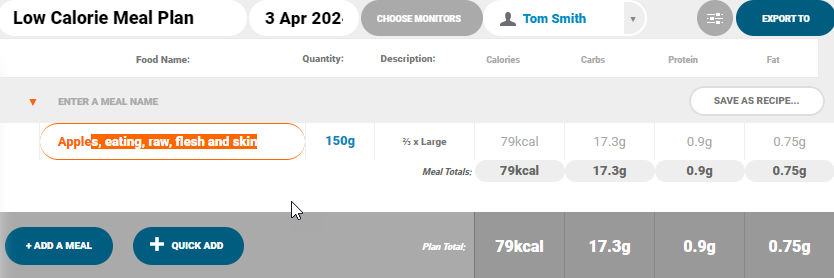
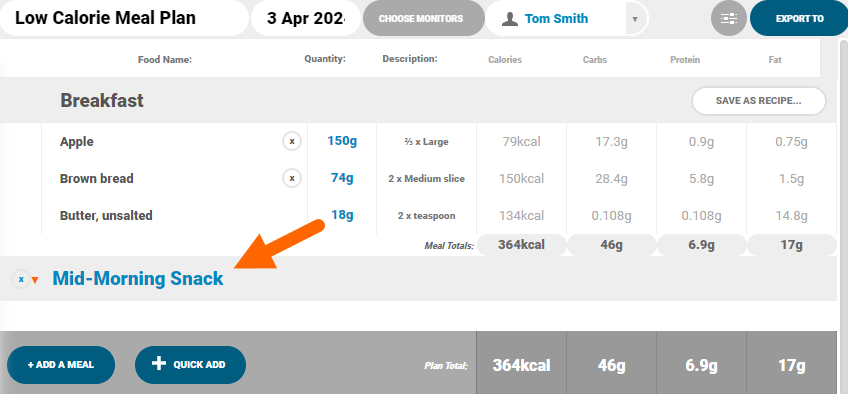
- Give the meal a name in the text box above the food names:

- To add a new meal to the meal plan, click the ‘+Add Meal‘ button and give the meal a title.
If you click on a meal title, it will change to a bold, blue font indicating that that meal has been selected. Any foods added to the meal plan now will be added under that meal heading.
- Foods and recipes can easily be rearranged in the meal plan by dragging and dropping them from one meal to another:

- Continue adding meals and foods until you are satisfied with the meal plan
- As you work, you will see nutrient totals for both the meals and the overall meal plan compared with the client’s targets:
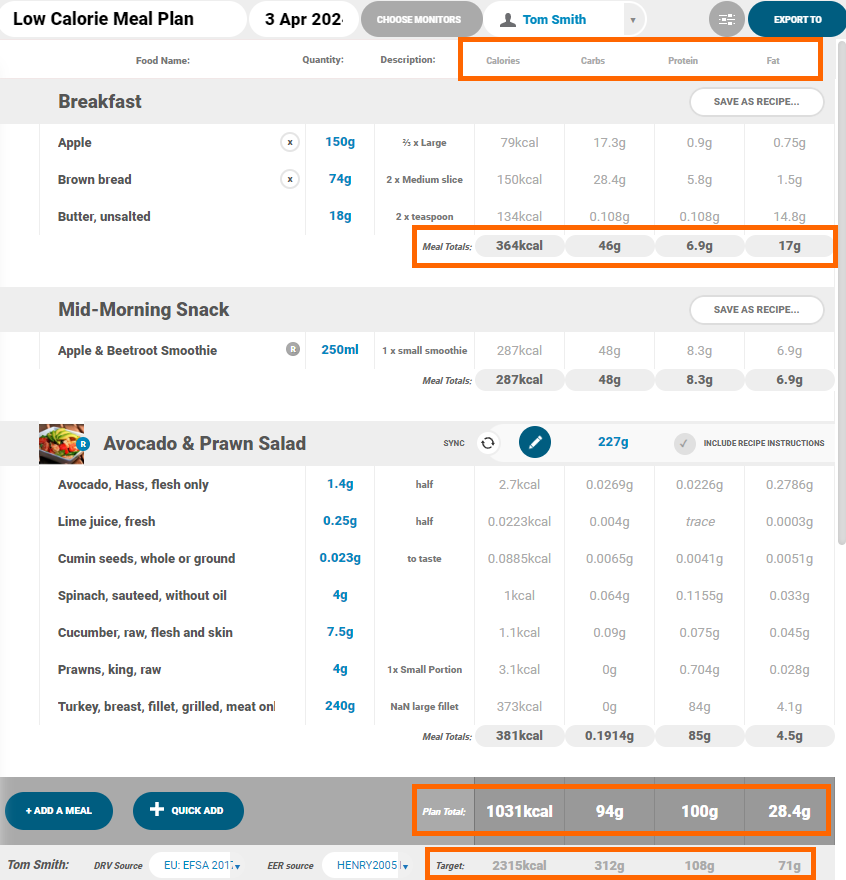
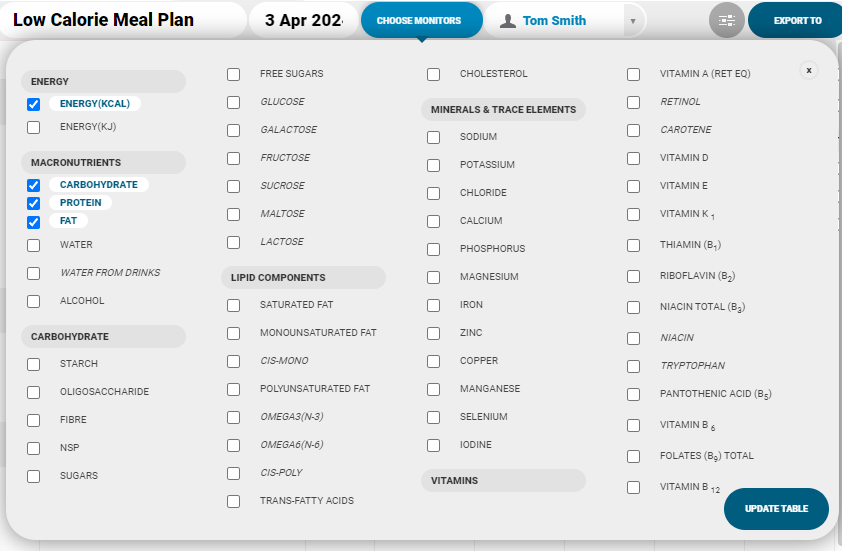
- You can choose the nutrients on display by clicking ‘Choose Monitors‘ at the top of the workspace. We recommend ticking a maximum of 5 monitors as this is the max number that fits on an A4 sheet.
ADDING RECIPES TO A MEAL PLAN
Previously created recipes can also be used in a meal plan.
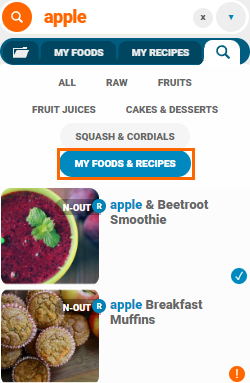
Simply search for the recipe in the search bar and look for the R icon indicating a recipe. Use the ‘My Foods & Recipes’ tab to filters the search results to only display items you have created:
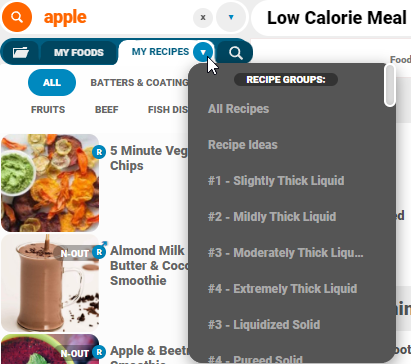
You can also browse recipes in the ‘My Recipes’ tab or filter your recipe list in groups from the small arrow beside the ‘My Recipes’ tab:
After clicking the ‘Insert’ button on a recipe, you will be asked if you want to import all ingredients from the recipe. Selecting no will import the recipe name only (as a single row on the meal plan) with the nutrient totals. Selecting yes will import all the ingredients with their individual nutrient breakdown.
Once a recipe has been added to a meal plan you can specify how many servings of the recipe you want to be included in the meal plan.
You can also choose to include any cooking instructions that have been added on the recipe level in your meal plan reports.
USING SAMPLE RECIPES IN A MEAL PLAN
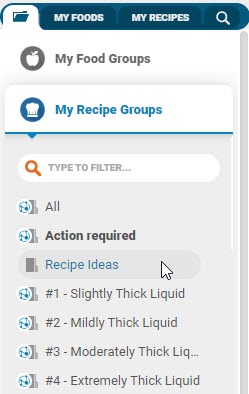
In an effort to inspire, and lessen the workload, we’ve created some sample recipes for you to use in meal plans. You can see these recipes in the ‘Recipe Ideas‘ folder in the ‘My Recipe Groups‘:
Open this folder and browse through the recipes. To add a recipe from this folder to your meal plan open the meal plan on another tab, open the recipe you wish to add and click ‘Insert‘ in the bottom right corner. This will add to your meal plan.
Alternatively, you can search for the sample recipe in the search bar like normal. You will see the recipe listed under the N-R database.
SYNCING RECIPES IN A MEAL PLAN:
When you add a recipe to a meal plan, it’s like taking a snapshot of that recipe. If you make changes to a recipe and would like these changes to be reflected in a meal plan, click on the sync button to the right of the recipe name.
The sync button will pull through the latest version of that recipe to your meal plan.
If you do not sync a recipe in a meal plan, it will remain unchanged. This means that one recipe can be tweaked and reused multiple times based on your client’s requirements.
Why not check out our guides on nutrient monitors and rearranging foods and meals in a meal plan next?