The ‘staff area’ is used to provide staff with an overview of all beds and wards and to allow them to place and edit patient orders as needed.
You can access the Staff Area via Menu Settings.
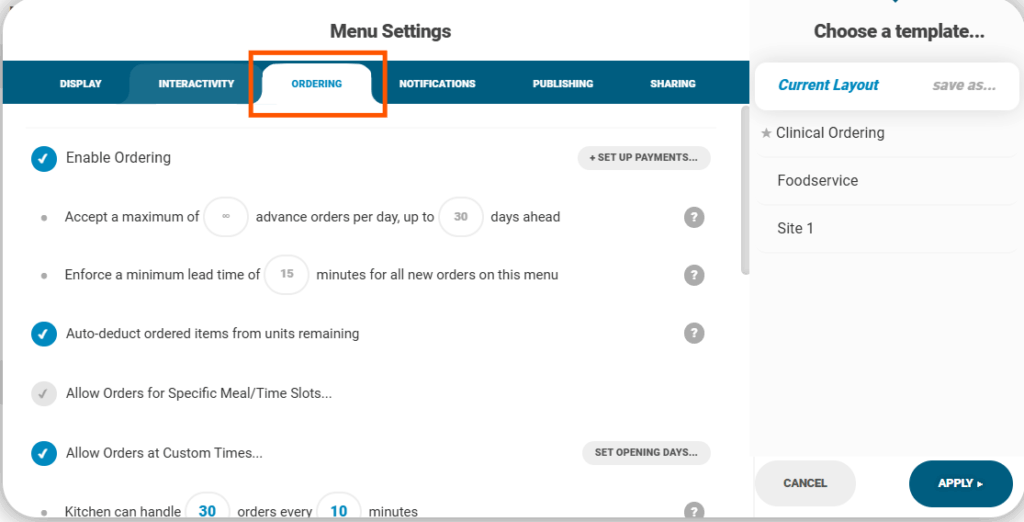
- To access the staff ordering area, open the menu settings and then navigate to the Ordering tab:
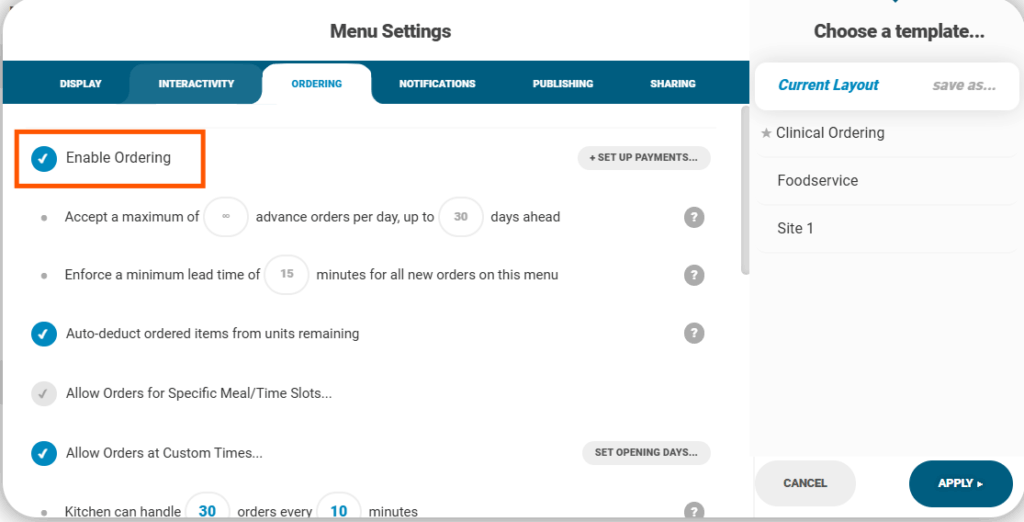
- Staff can Enable Ordering from the Ordering tab. This will allow customers to place orders from the digital menu:
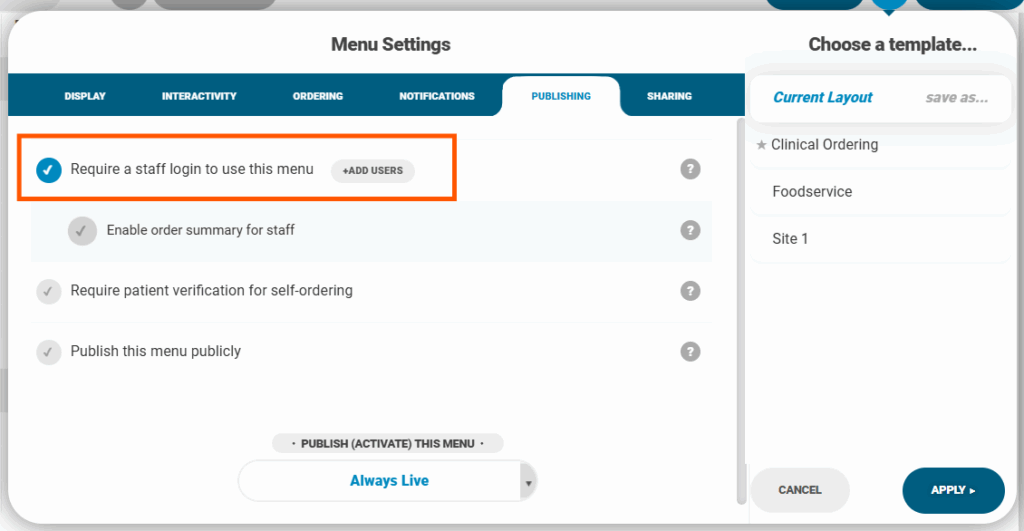
- Pin protection must be enabled for each menu individually in the ‘publishing’ tab of the menu settings:
- A staff pin can also be enabled from within the Ordering Tab in Settings > Ordering > Master Password:
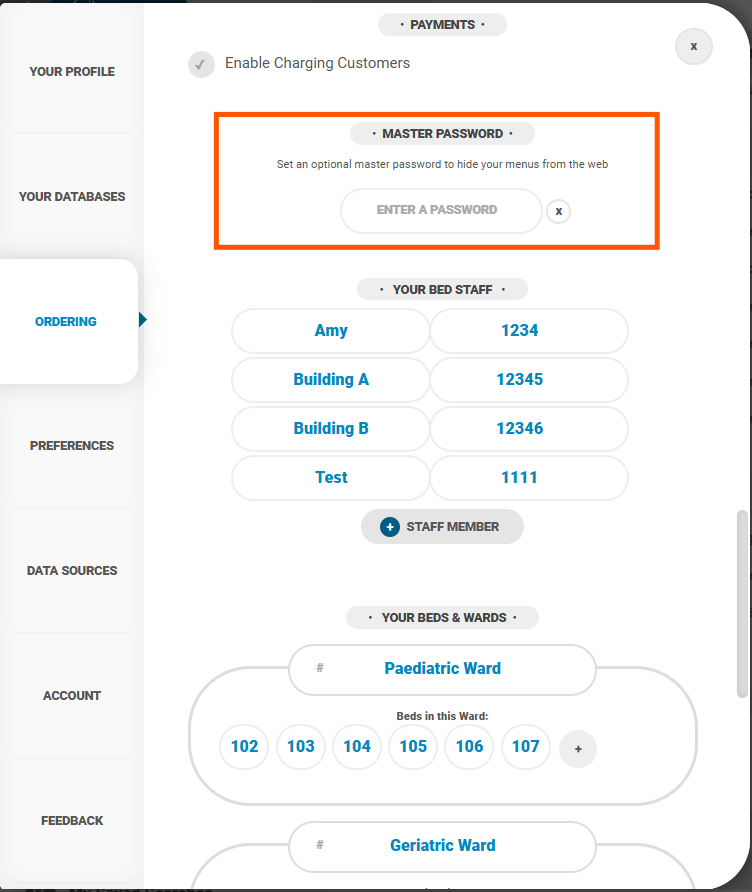
- It’s also recommended to have patients assigned to beds and wards. You can assign a bed and ward to a patient from within their Client Profile under Clinical Adjustments:
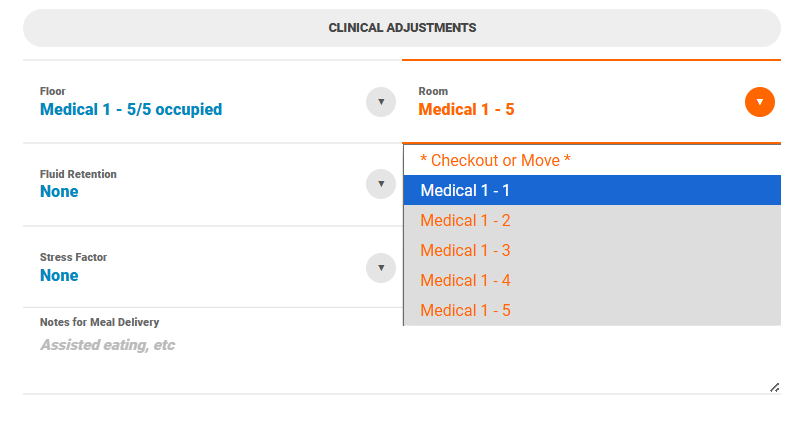
- The number of occupied beds is visible for each ward during the patient assignment process:

- If a bed is already occupied, it will appear greyed out (as shown below), and you won’t be able to assign a new patient to it:
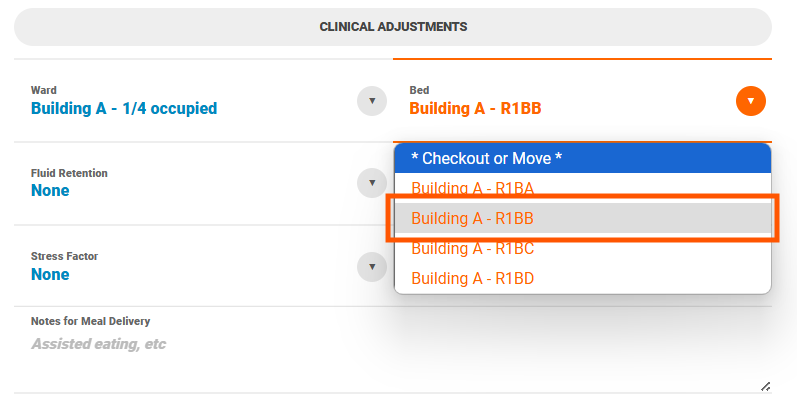
- Once a patient has been assigned a bed, they can be either reassigned to a different bed or checked out as needed:
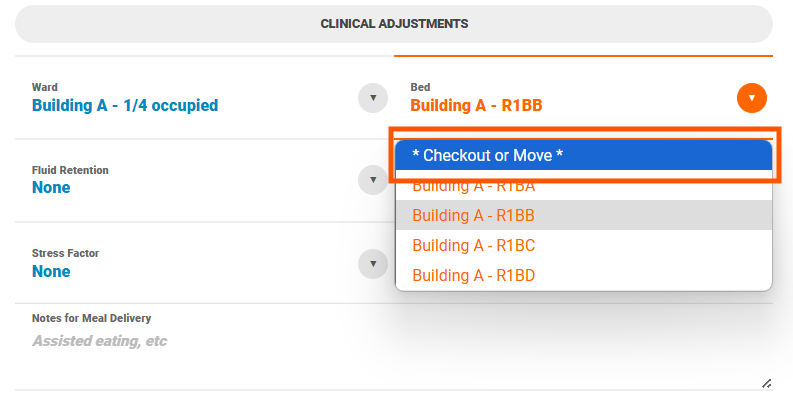
- When checking a patient out, you’ll have the option to adjust the check-out date and add a note to accompany the check-out, if needed.
- If a patient is moved, all meals associated with that patient will move with them.
- If a patient is checked out, all meal orders for that patient will be cancelled:

The staff area is opened once a menu is loaded and the staff member has entered their pin.
By default, the staff area shows a summary of the current day.
- You can use the arrows to move between days, for example, to review orders from previous days or to add/edit orders for future days.
- If meal slots have been set up, you can filter by meal slot (e.g., view only lunch orders).
- You can also filter by bed or ward.
- All beds are shown in this row:
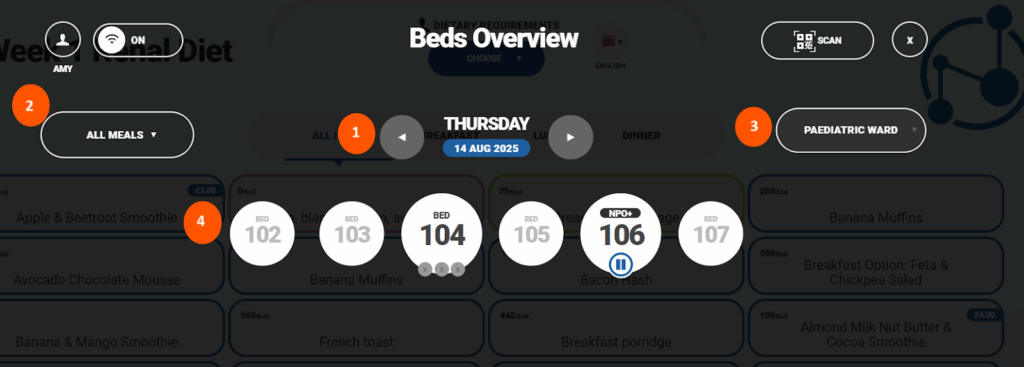
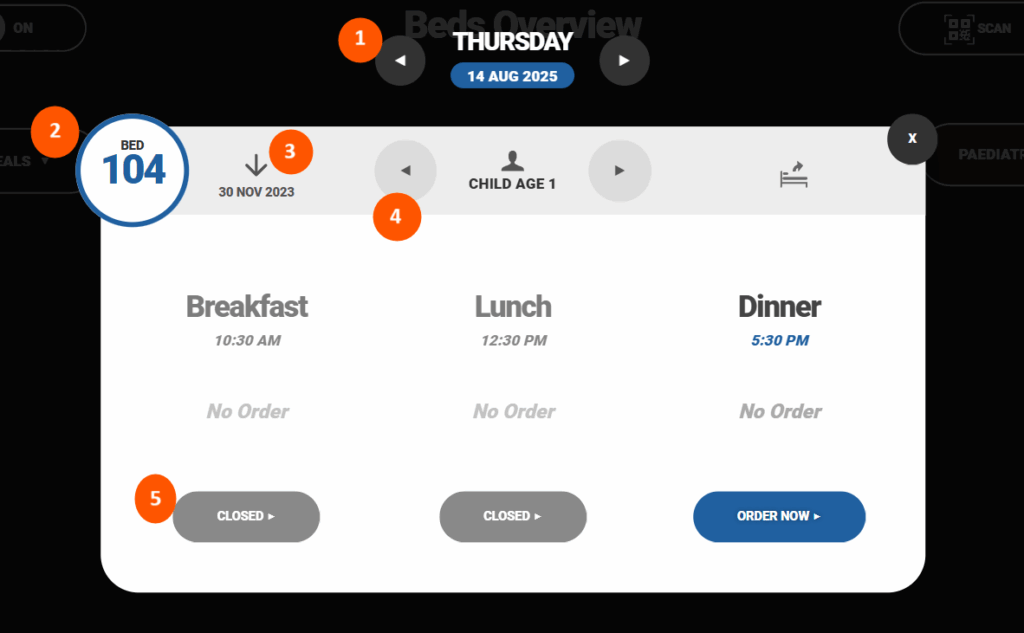
You can open any bed by clicking on it, which will display the full details including:
- The current date – use the arrows to view previous/future days.
- The bed number.
- The date the patient was assigned to the bed.
- The patient’s name – Use the arrows to navigate between patient beds.
- The available meal slots (as configured in the Ordering tab of the menu settings) allows orders to be placed for those slots – If the current time is past a defined slot, for example, if breakfast is set for 9:00 AM but the staff area opens at 10:00 AM, the slot will be shown as “Closed”:
Once you place the order, you’ll have the option to Edit or Place Order:

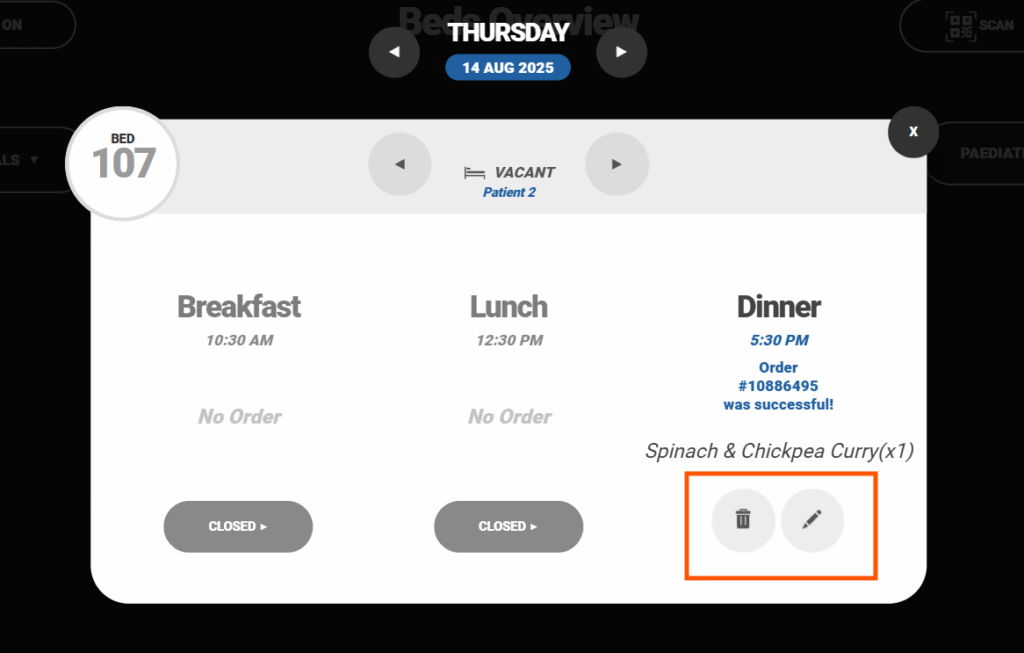
- Once the order has been placed, its details will be shown, along with options to edit or delete it.
- You won’t be able to delete the order if preparation has already started (order status is no longer “Pending” in the kitchen dashboard) or if it’s too close to the order’s due time:
Once an order is submitted, a menu will appear prompting the staff member to:
- Order the next meal for the same bed (Next).
- Go back to the bed overview:
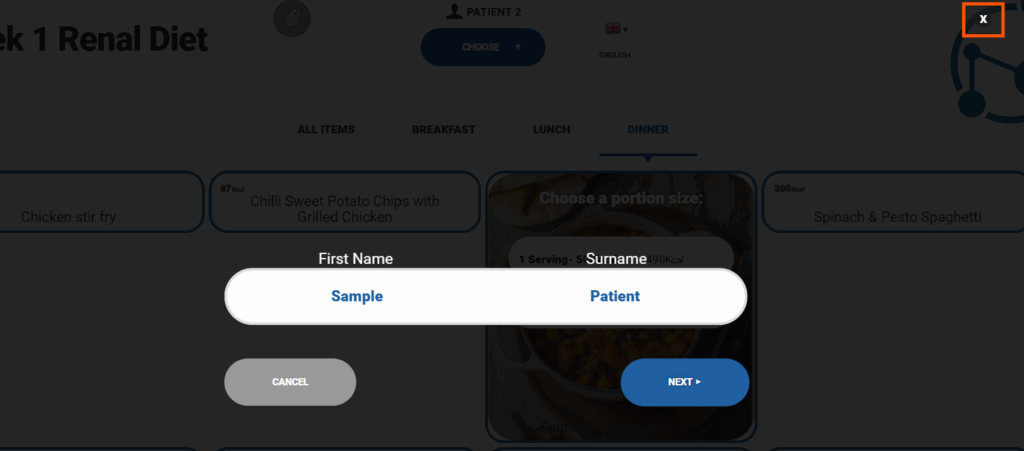
To close this menu, click the X icon in the top-right corner.
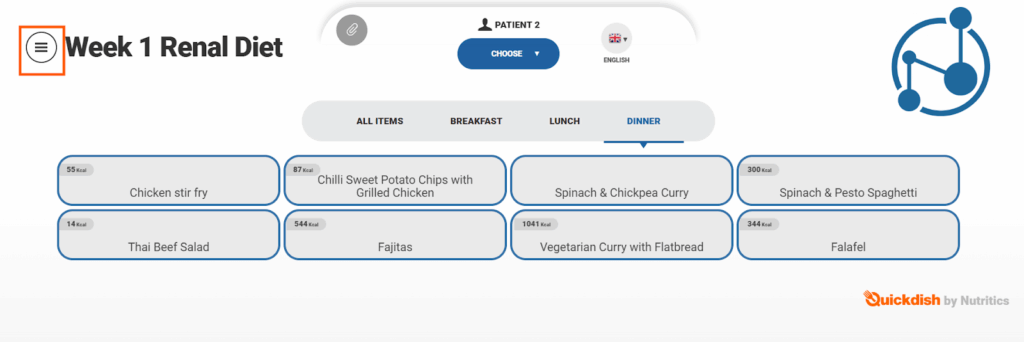
You can re-open the bed overview at any stage by clicking the icon below.
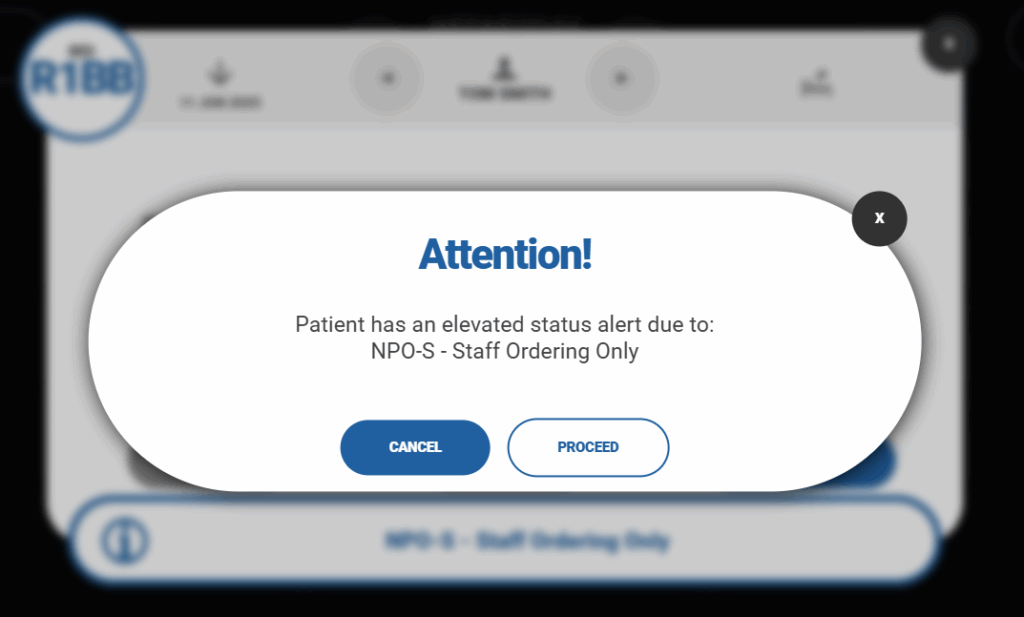
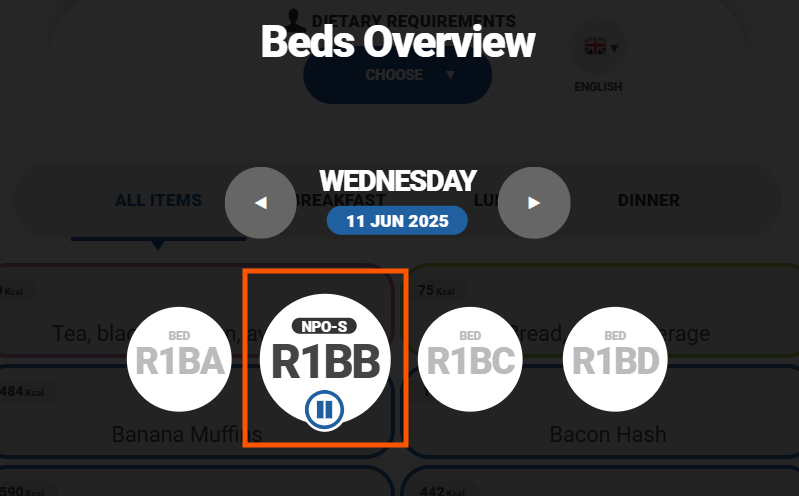
- If ‘Staff Ordering Only’ is selected during patient setup, a pause icon will be displayed on the corresponding bed to indicate this status:
- If an order is attempted, a notification like the one shown below will appear: