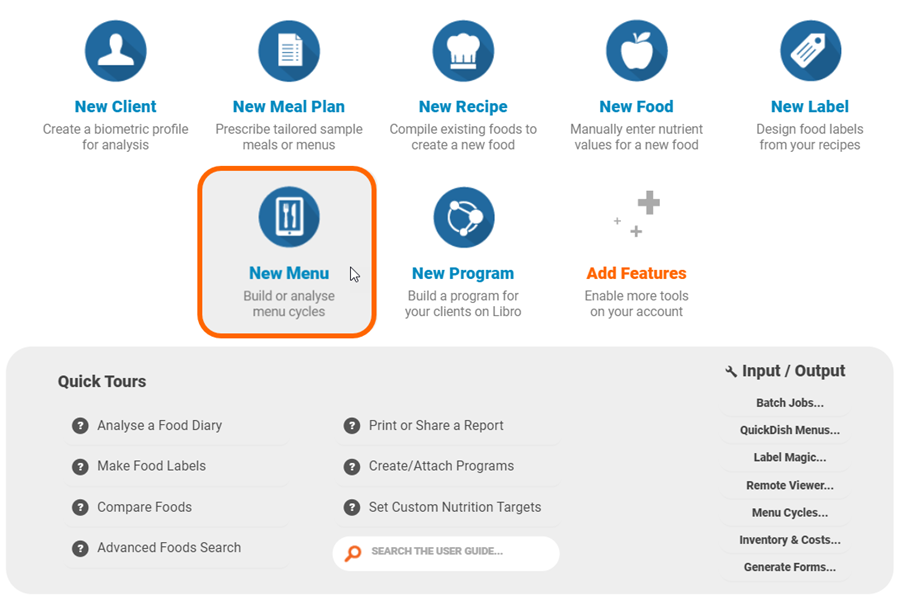
Recipes and foods can be organised into menus and analysed in the foodservice version of Nutritics or with the foodservice add-on pack.
After a menu is created, there are a number of display options available for use, including a digital interactive menu, a printable allergen & calorie summary report, and full menu cycle overview report.
This guide will cover
CREATING A MENU
- Click ‘Start’ then ‘New Menu’. Alternatively, click the folder icon below the food search box, then click ‘My Menus‘ > ‘+New Menu’ under the Ungrouped folder
- Enter a name for your menu, for example, Monday’s Menu, á la carte, Early Bird, Weekend Specials etc.
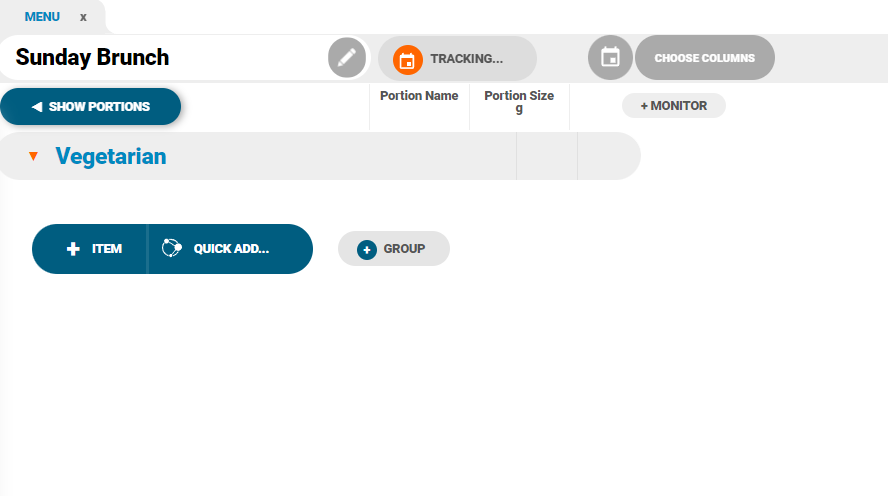
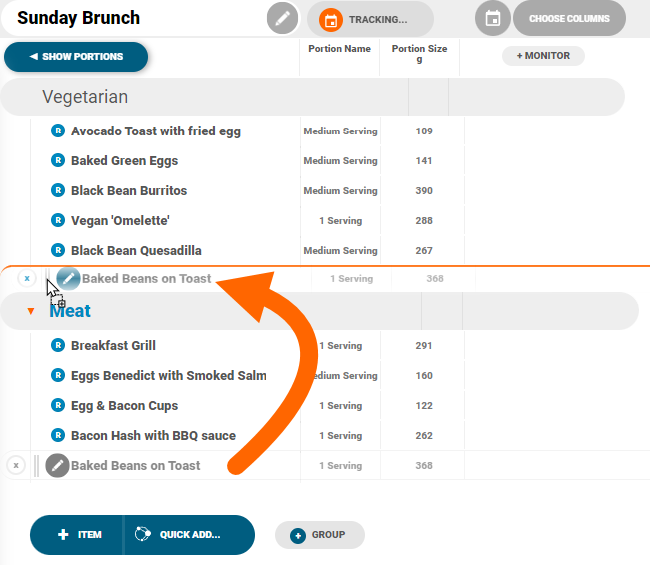
- Click ‘+New Group’ to add a section/heading to your menu (e.g. soups, sandwiches, entrees):
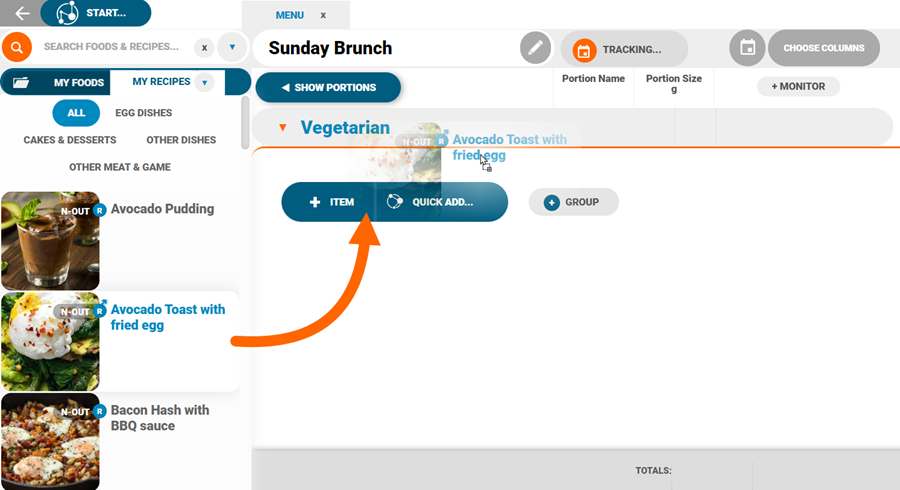
- Search for items in the search bar and drag and drop them onto your menu (or use the insert button). Alternatively, you can use our Quick Add tool (see a guide on this here)
Pro Tip: Switch the workspace view between the tile and list mode by clicking the toggle in the bottom right of the screen.
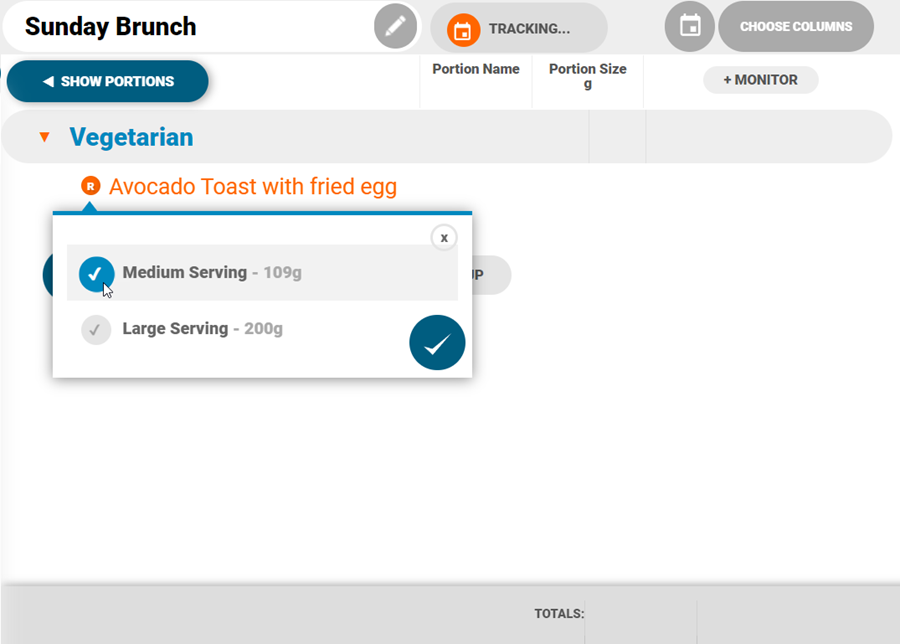
- Select the recipe portions that should appear on the menu from the dropdown
- Continue adding items to the menu section/heading. Add new headings using the ‘+Group’ button in the bottom bar:

- Rearrange groups or menu items by dragging and dropping
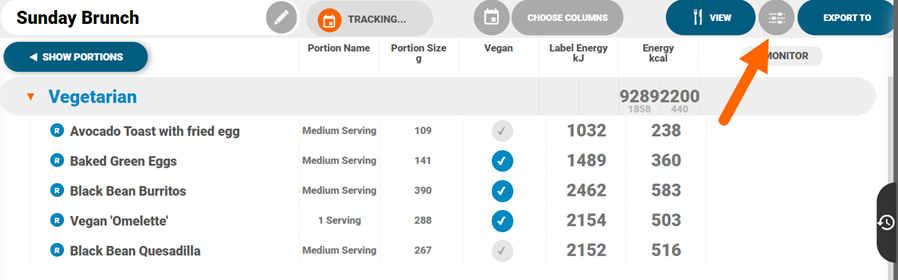
- Click ‘Choose Columns’ from the top toolbar to customise the detail that is available on display. We have a video on this here.
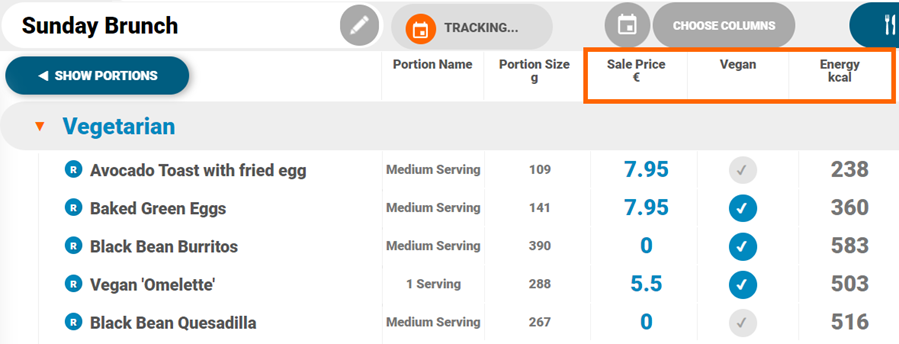
Nutritics has some pre-loaded templates available for use here. These will customise your workspace view e.g. choose the Allergen view and enable all allergen associated columns.
- Click the
button in the top toolbar to preview your menu in digital format. You will see an overview of live, scheduled and inactive menu counts. Click the ‘QuickDish’ tile > ‘Launch’ to open this menu in a digital format:

- If you have integrated with Ten Kites you can open your Ten Kites menu by clicking the Ten Kites tile instead.
MENU EXPORTS
You can export your menu to additional formats via the ‘Export to’ button:
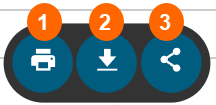
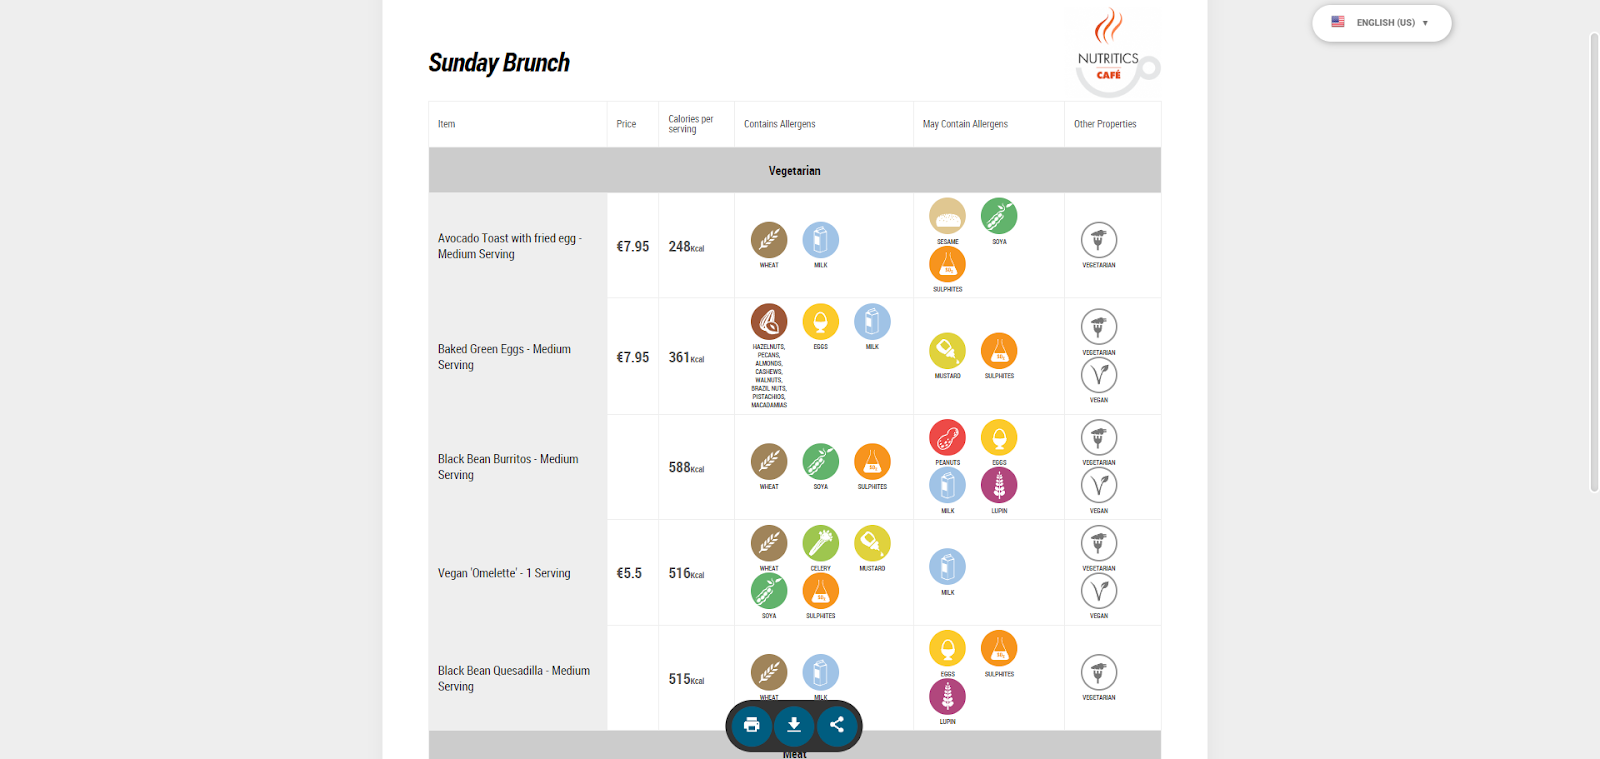
- Report: Preview menu data in a new tab, including all menu items and the chosen columns. Further share this report via printing (1), downloading as a PDF (2) or using the share link (3):
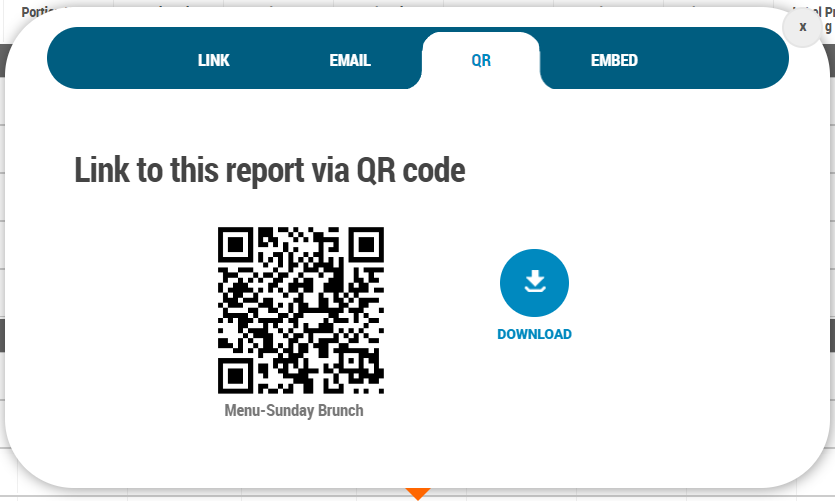
- Share: Share the menu report via a live link. This export will update in real time as your menu is edited in Nutritics. You can also share this link directly to a person’s email address under the Email tab. Download a QR code under the QR tab or view the Embed link under the Embed tab:
- Print: Print a snapshot of the menu and selected columns directly from Nutritics
- PDF: Download a PDF of the menu report
- Excel: Download the menu data into Excel, including menu name, groups, menu items, portion names, portion sizes and selected columns
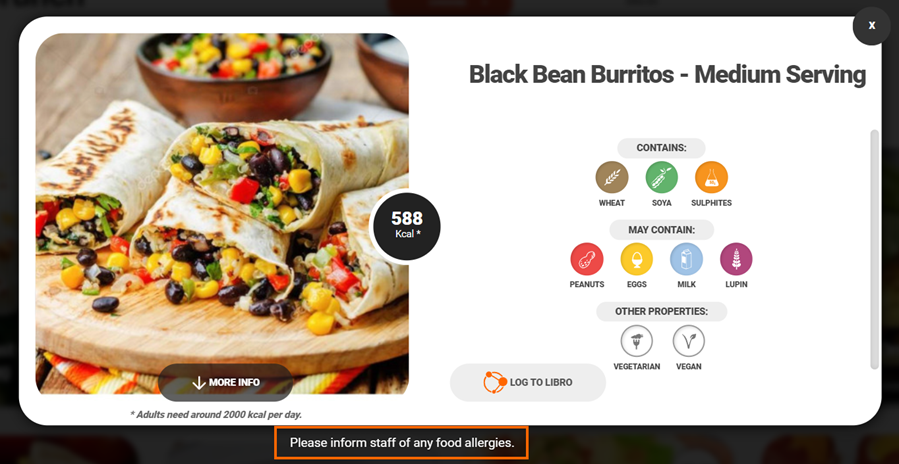
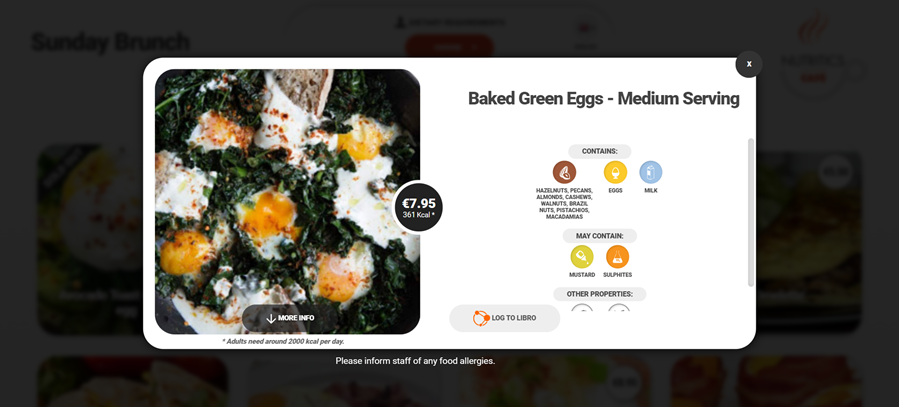
To export your menu to a paper menu or allergen summary report, click ‘Export to’ > ‘Allergen Table’. This will include a report of menu items, pricing, calories, allergens and dietary properties:
MENU SETTINGS
Menu settings are accessed by clicking on the grey slider icon in the top right corner of the menu workspace or via the View button>QuickDish>Configure:
Within the settings menu, there are several tabs that allow for the customisation of the menu:
DISPLAY TAB
- Choose the information to be displayed on digital menus. This includes showing prices, calories, allergens, ingredient lists, food claims, nutrition information etc.
- Select show the ‘all items’ group to allow the menu to default to all items as the main tab. Alternatively, toggle this off so the menu defaults to the first recipe group available when opened:
- Choose the look of the menu e.g. apply a light or dark theme and select how many menu items or ‘tiles’ are displayed in each line.
- Decide on a show feature for the menu item tiles e.g. show a Foodprint badge on items without needing to click in.
- Enter a disclaimer to be displayed on all menu items, or add a welcome message for your menu:
INTERACTIVITY TAB
Choose how customers can interact with the menu.
- Interactive mode allows customers to scroll through the menu and click on menu items for more information/ordering purposes. This is recommended where menus are being displayed on touchscreens. Untick this option if your menu will be displayed on a digital display or TV that is not a touchscreen.
- Decide when the menu resets by setting the inactivity limit. Please note that this is only relevant to tablet devices, and will not apply to those using a mobile.
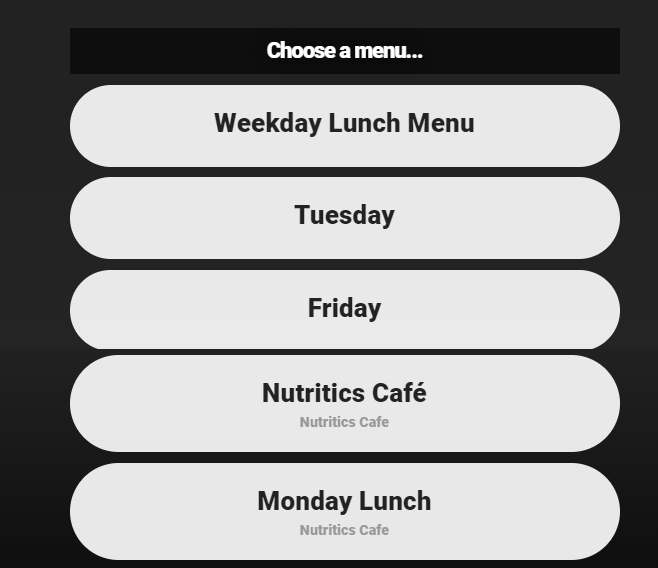
- Tick Allow users to go back to the list of menus to allow customers to exit the current menu they are viewing and browse all published menus from your account. This is useful if you want to allow customers to exit the bar menu and look at the restaurant menu:
- Tick The screen resets to the list of menus and the menu will return to this list of published menus after a period of inactivity.
- Enable ‘featured items’ screensaver on reset and menu items will flash on screen when the menu is left idle:
ORDERING TAB
For more information please see our separate guide on meal ordering here.
NOTIFICATIONS
Choose what notifications you or the customer receive with ordering. Please see our guide on ordering for more information.
PUBLISHING TAB
Make your menus live for viewing.
- Choose whether the menu requires staff login. Staff can be set up by clicking the ‘+Add Users’ button.
- Publish menus to Libro to allow Libro users to browse the menu on their smartphone when they are in your area.
- Choose if the menu should be published immediately or schedule a date and time for the menus to go live. Watch a video on this here.
- Live menus have an orange circle beside the menu title in the Nutritics Explorer:
SHARING TAB
Choose how to share your menu with customers.
- Click Copy to copy the menu’s live URL to display the menu on a website, on a tablet or other displays
- Click QR to generate a QR code for the menu so others can scan
- Click Embed to get the Embed link for another website
- You can also share the menu with other Nutritics users. Please see our guide on this here.
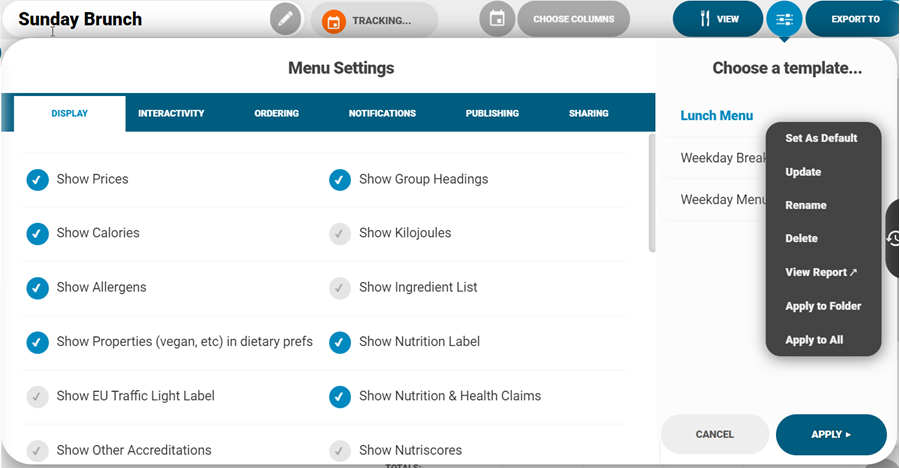
MENU TEMPLATES
Menu settings can be saved as a template and applied to other menus.
- Click Save As…, name your template and the template will be saved for reuse:
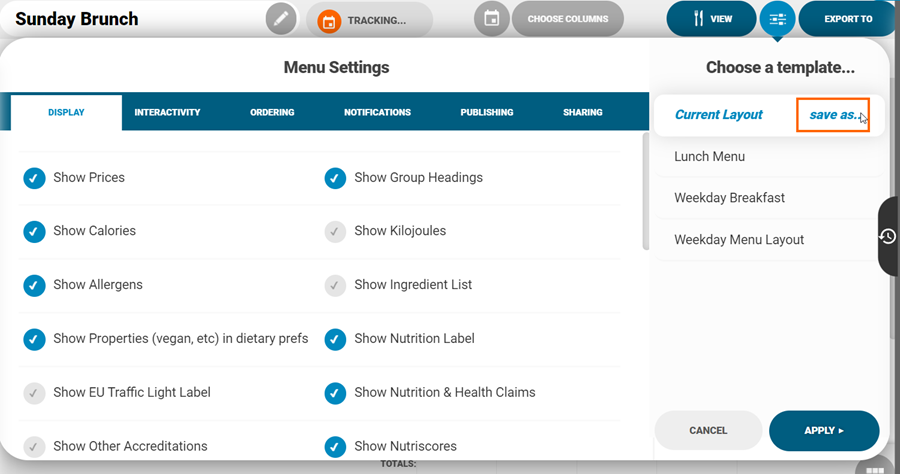
- To apply a template to a menu, click the template name and select Apply in the bottom right corner.
- Right-click on the template name to set it as the default menu layout, to update the template with new settings, rename or delete the template.
- You can also click ‘View Report’ to generate a report for your menu using another template without applying the changes.
- Templates can quickly be applied to entire menu folders or all menus at once also: