Labels can be printed in bulk using the Label Magic app. This is useful where recipe labels are developed e.g. at a head office level, and printed by staff on site.
This guide will cover:
- Accessing Label Magic
- Pinning Labels to the Homepage
- Printing Labels from Label Magic
- Printing using the queue tray (Bulk printing)
- Editing Placeholders at the printing stage
- Using Offline Mode
- Accessing Label Magic as a ‘View Only’ account
- Sharing Labels from Nutritics to ‘View Only’ accounts
- Restricting template use as a Master account
- Resetting Passwords for ‘View Only’ accounts under your licence
- Translating Labels
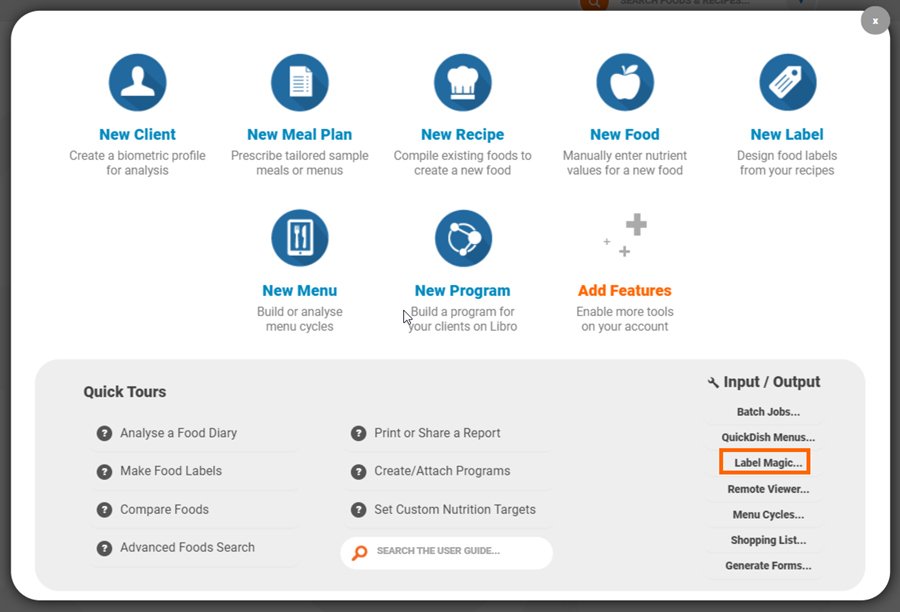
Accessing Label Magic
Label Magic is accessed from the start menu under the input/output heading:
Click on the URL or scan the QR code to open the Label Magic app on a tablet, laptop or mobile:

Note that you must be logged into a Nutritics account to access Label Magic this way.
On premium and enterprise accounts, a separate login or ‘view only’ account can be set up for Label Magic. This is useful where staff need to print labels on site but do not have access to edit recipes in the main Nutritics account.

Staff can see and print recipe labels that have been shared with their ‘view only’ Label Magic account (see below to learn how to do this) but cannot edit the labels or recipes.
Staff log in via the same Label Magic url found in the Nutritics account but with a separate username and password. This account must be set up by the Nutritics team. Premium account holders can email admin@nutritics.com with the desired username and password and we will set this up for you.
Note that premium accounts can only have one view only account, so the username and password should be generic if it’s going to be shared among staff. If you require more view only accounts e.g. one for each site, contact sales@nutritics.com to learn more about our enterprise rates.
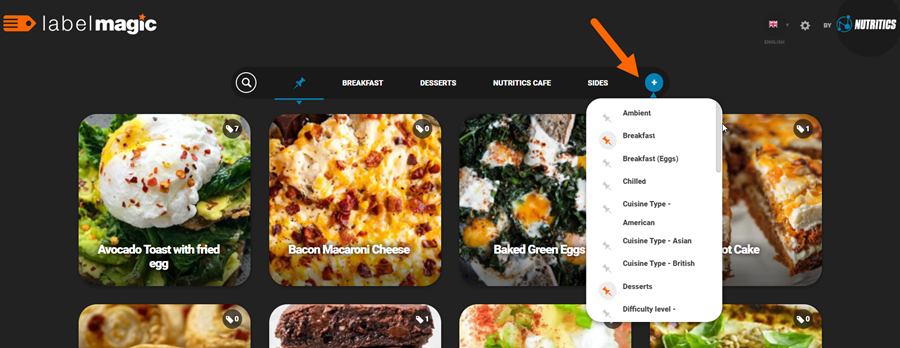
Pinning Labels to the Label Magic Homepage
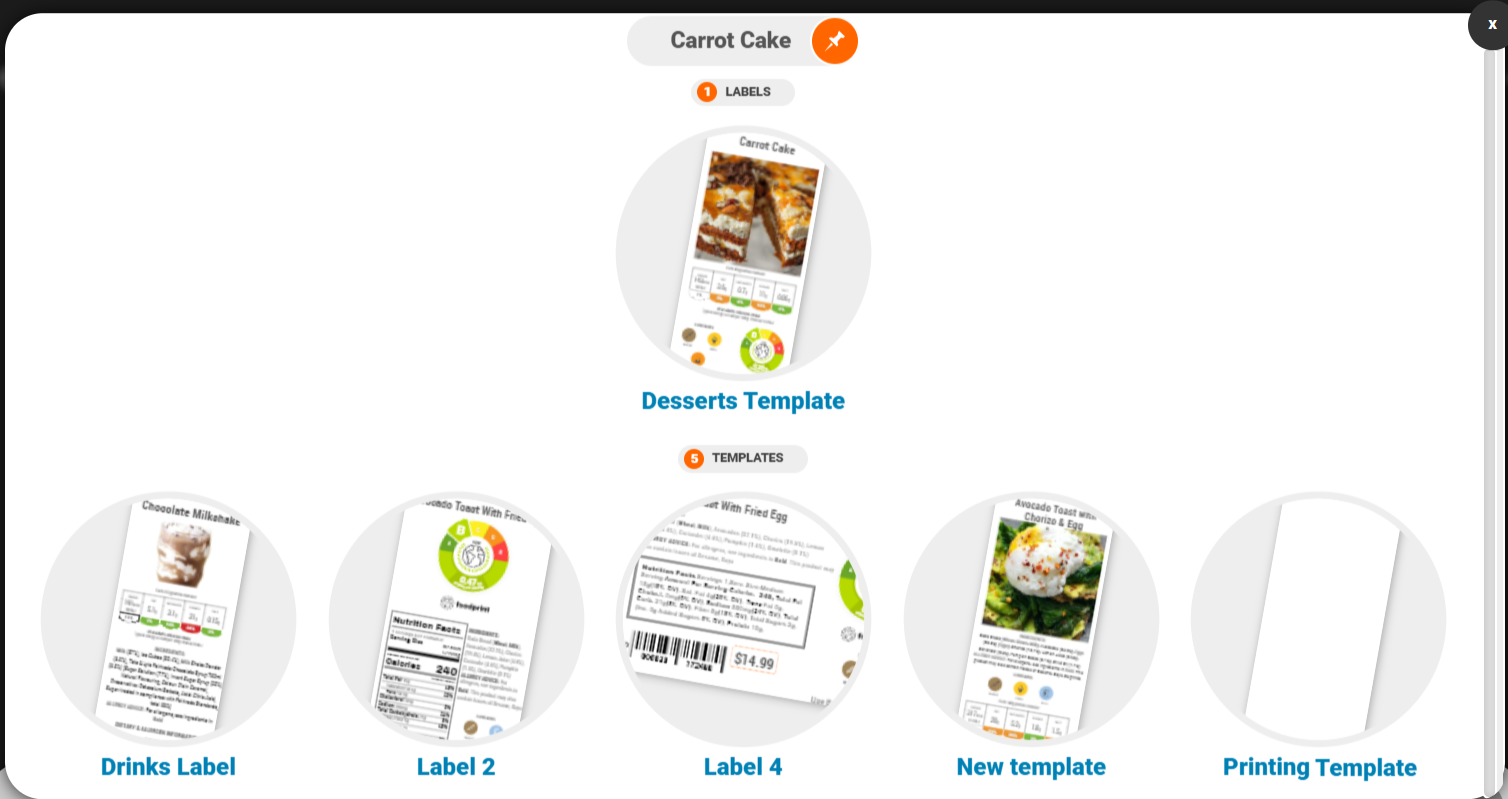
All recipes will be displayed in a tile format. The number of labels created for a food or recipe is displayed in the top corner of the recipe tile.
By default, only pinned labels or groups will show upon login. Click the search icon to search for a particular label.
Click the + icon to pin other groups to the home page. Deselect the group from the list to unpin.
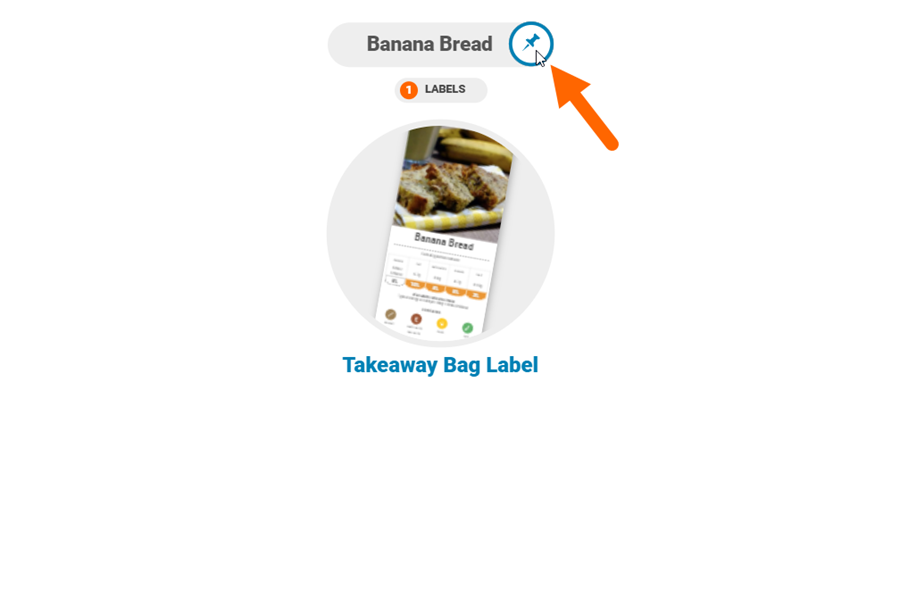
You can also open a label/recipe and pin the individual label to your ‘pinned’ items instead of the entire group:
Printing from Label Magic
Click on a recipe to see the available labels.

Labels created by you are shown at the top while label templates are shown underneath:
Select the label style (1) and portion size (2) that you would like to print.
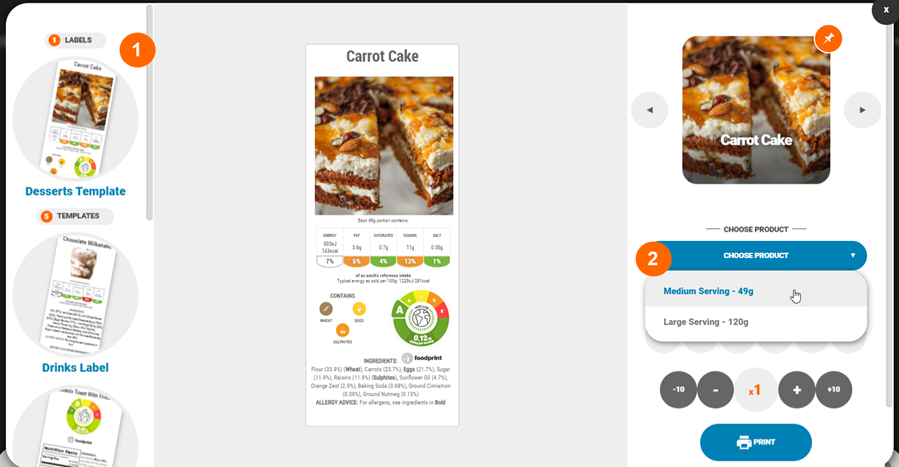
If requested, specify the preparation date of the product to update use by, best before and/or sell by date automatically.
A text element can be enabled on a label and positioned in an area that you would like to populate later at the printing stage. Select other element>text and input a ‘Placeholder Hint’ to inform the person printing on what text to input:

Click ‘Allow editing from LabelMagic’ so the custom text can be inserted:
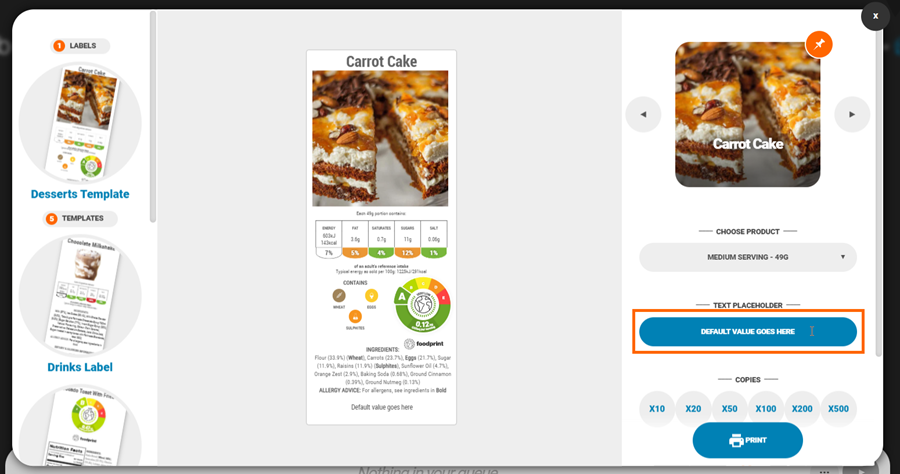
Select the desired number of copies and hit ‘Print’:

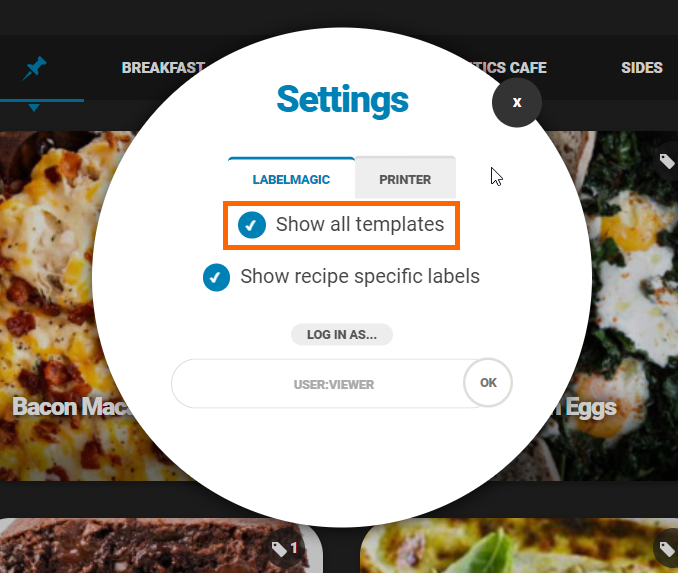
You can hide label templates by clicking on the settings cog in the top right corner:
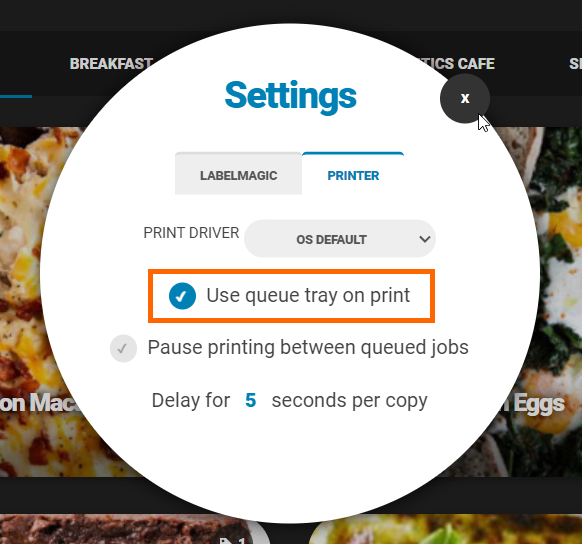
Printing from Label Magic using the Queue Tray
Print labels in bulk using Label Magic. Turn this setting on by navigating to the settings menu in Label Magic, clicking ‘Printer’ and selecting ‘Use queue tray on print’:
Choose a label to print by opening the item, selecting a product/pack size (where relevant) and the amount of copies you need:
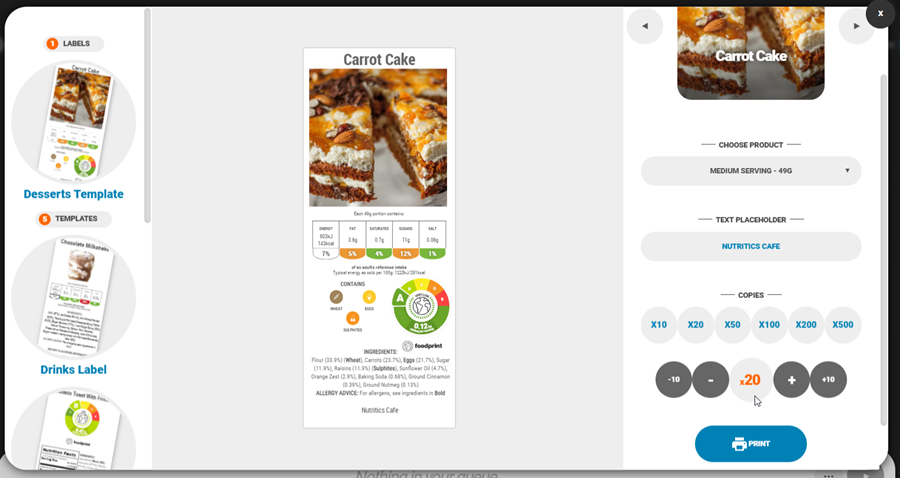
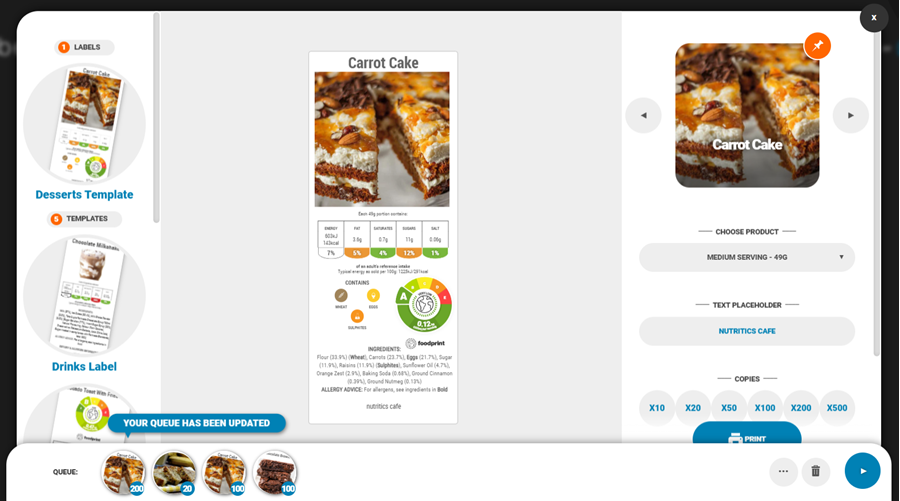
Click the print button to add this to the queue at the bottom of the screen. Continue adding labels to the queue to print at once:
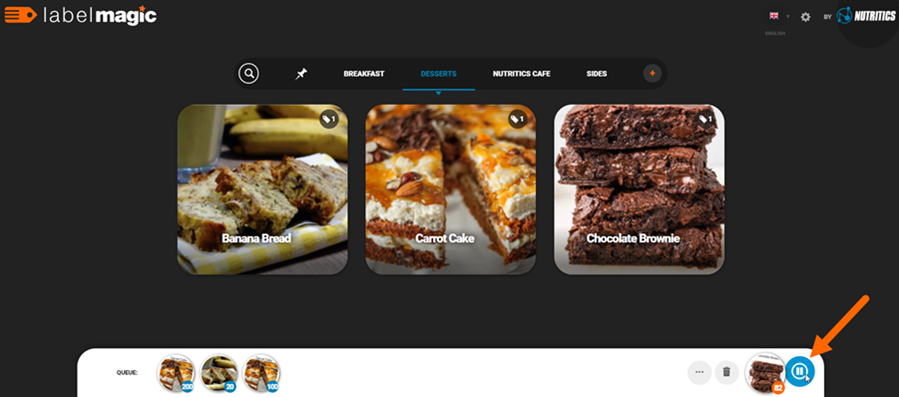
Click the play button in the bottom right corner to start the print run.
You may want to pause the printing per item if you need to change the label size in your printer. If this is the case, you can click the pause button during printing and it will stop once the current item is finished:
Turn this on by default in the settings so the printing stops between every item automatically:
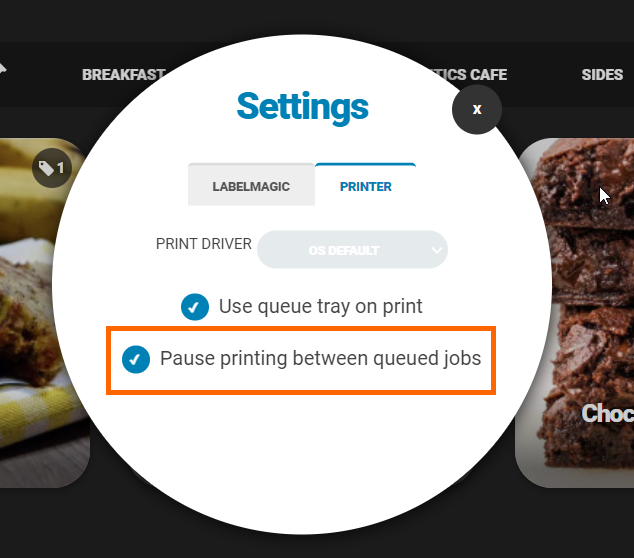
Alternatively, keep this setting off and input a delay between items.
Click the play button again to resume printing.
You can also save print jobs for future use. This means if you regularly print the same number of labels for products you can have these at a click away! Line up your labels in the queue as normal, click the three dots to the right and select ‘Save Active Queue’
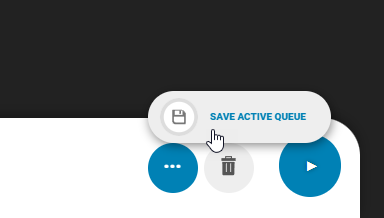
Name the queue e.g. Monday’s Dessert Run, and click ‘OK’. This queue will be available for use at any time by clicking the three dots again. It will automatically populate the queue with the products/pack sizes and quantities previously selected.
Label Magic Offline Mode
Enable Offline Mode to access your labels without internet access. Navigate to Settings > Label Magic and change the ‘Work Offline’ drop down:
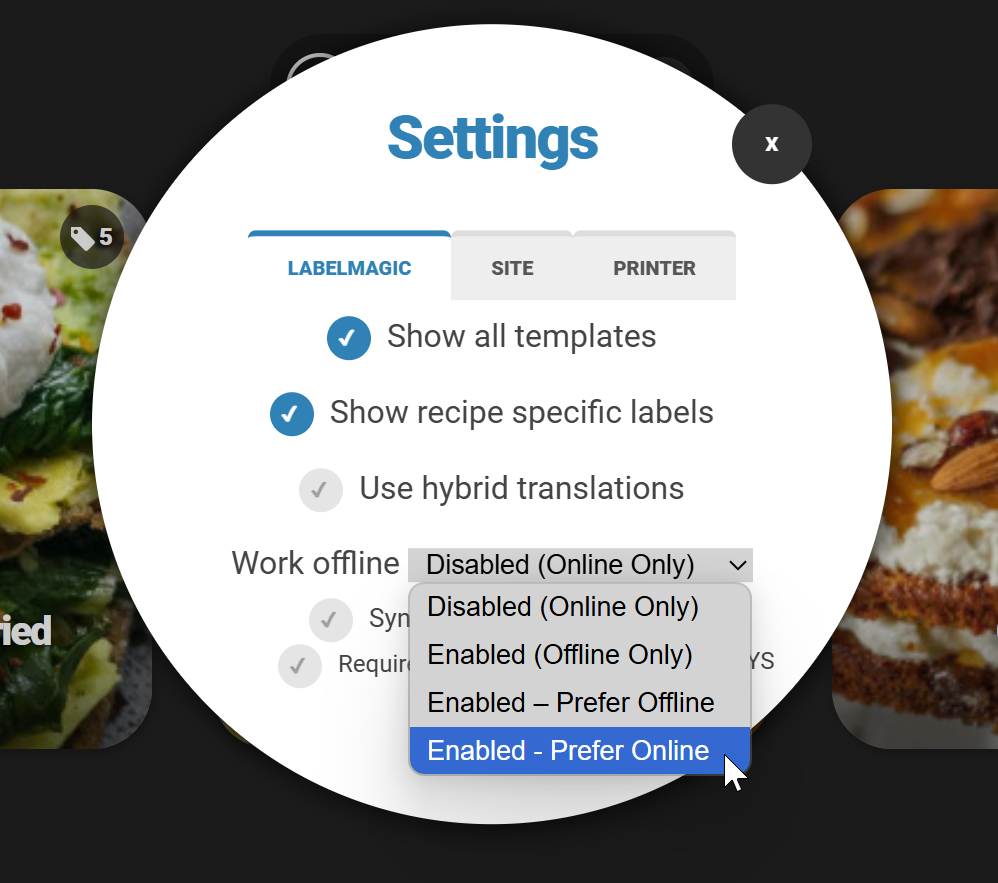
- Disabled (Online Only): Use Label Magic online only
- Enabled (Offline Only): Use Label Magic offline only
- Enabled – Prefer Offline: Use offline as first port of call. Label Magic will open in offline mode.
- Enabled – Prefer Online: Use this if you do not want to do a large sync of labels. We’ll keep a log of labels used and save an offline version as you print to provide an immediate fallback if connectivity is lost.
Labels must be synced to Label Magic before using offline mode. To sync labels switch to ‘Enabled – Prefer Offline’ with a valid internet connection. A sync will begin automatically if this is your first time switching to an offline mode. You can also prompt a sync by clicking the sync icon in the top right:
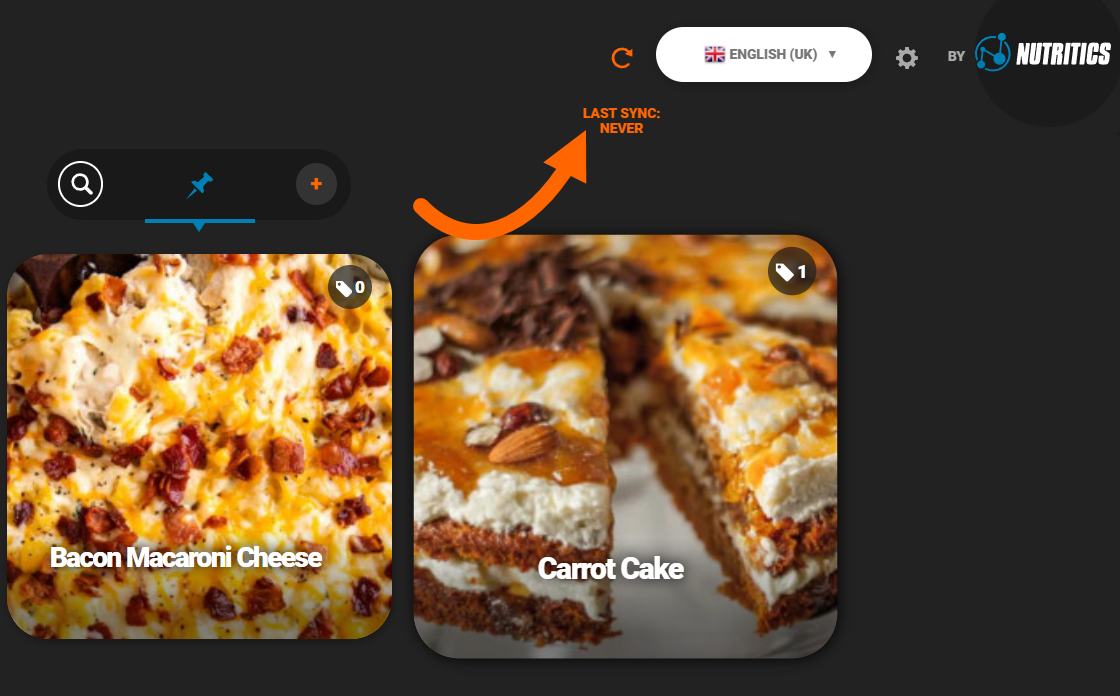
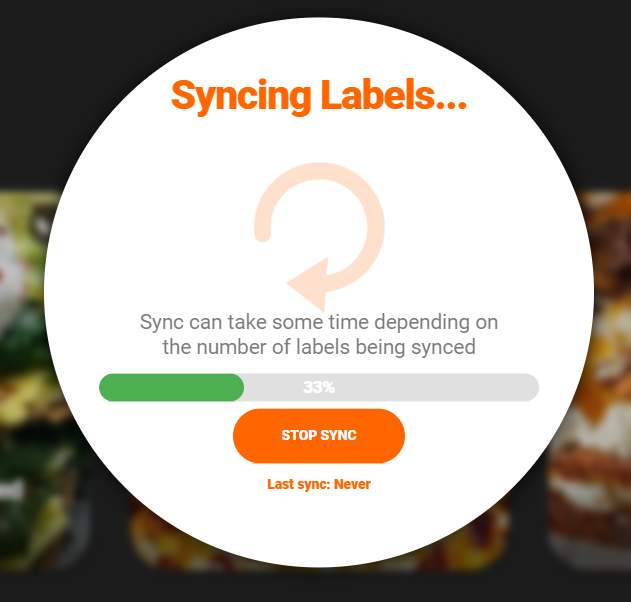
Here, you can also view the date of the last sync that occurred. Prompt another sync by clicking ‘Start Sync’:

Labels will then begin syncing so you can access these without internet connection. The sync will save all labels pinned to the Label Magic home screen. Please ensure you have the appropriate labels pinned before beginning the sync. You will see a progress bar for the syncing process:
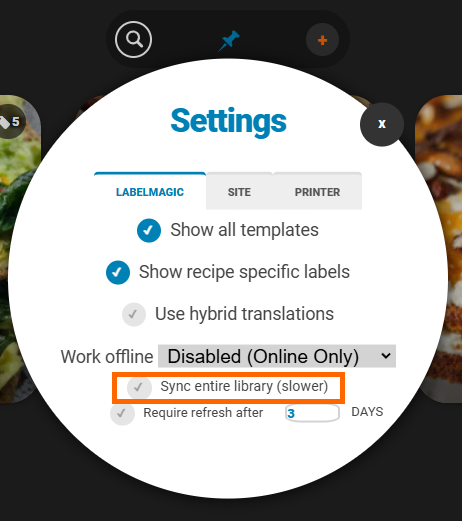
If you would like to sync all labels (not just those pinned) you can select to ‘Sync entire library’ via Settings > Label Magic:
Once the sync is complete you can access these labels offline. Please note that clearing your cache and cookies will require a re-sync of labels. Syncing is also device specific, so they sync to the ‘cache’ of one device.
If you would like to set up a prompt to resync your labels you can do this in Settings > Label Magic and input how many days you would like to refresh the resync:

Accessing Label Magic with a ‘View Only’ account
On Premium and Enterprise accounts, a separate login or ‘View Only’ account can be set up for Label Magic. This is useful where staff need to be able to print labels on site but should not have access to/edit recipes in the main Nutritics account.
Staff can see and print recipe labels that have been shared with their ‘view only’ Label Magic account (see below to learn how to do this) but cannot edit the labels or recipes.
Staff log in at the same Label Magic URL found in the Nutritics account but with a separate username and password. This account must be set up by the Nutritics team. Premium account holders can email admin@nutritics.com with the desired username and password and we will set this up for you.
Note that premium accounts can only have one view only account, so the username and password should be generic if it’s going to be shared among staff. If you require more view only accounts e.g. one for each site, contact sales@nutritics.com to learn more about our enterprise rates.
Sharing Labels to a ‘View Only’ Label Magic Account
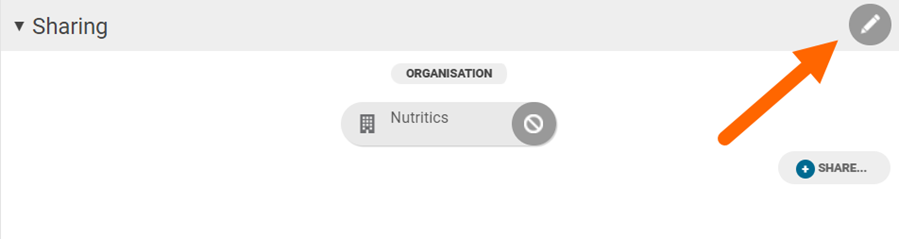
To share a recipe with a ‘view only’ Label Magic account, open a recipe in Nutritics and scroll to the Sharing section.
Click ‘+Share’ to see any view only accounts under the LabelMagic / Viewers heading:
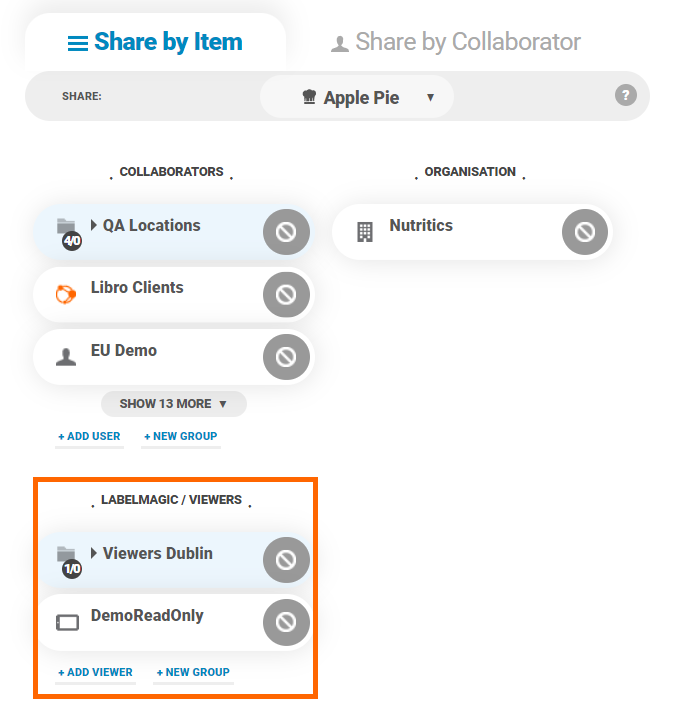
Click on the name of the account you would like to share the recipe with and an eye icon will appear indicating that that account can now view this recipe and any associated labels. Click the username again should you wish to revoke access.
Recipes can also be shared in bulk by clicking on the edit button to the right of the sharing heading:
Select the name of the view only account you wish to share recipes with from the drop down at the top. Tick any recipes or recipe groups that you would like to share with the account:

The next time the view only Label Magic account is accessed, labels for any shared recipes will be visible and available for printing.
Restricting template use as a Master account
If you are a master account with accounts attached to yours, you can restrict that account’s use of label templates. This will prevent use of templates that are not relevant to that account. Go to Settings > Preferences > Advanced > toggle on ‘Hide system / sample label templates’:

Site accounts will no longer see label templates in their Label Magic, they will instead see labels that have been created and shared to them. The account will also not be able to edit their Label Magic settings, they are essentially locked at what the Master account decides to share.
Resetting Password for ‘View Only’ accounts
Send password resets for view only accounts set up under your licence.
Click Start > Remote Viewers and reset a password by clicking the three dots next to the viewer’s row:
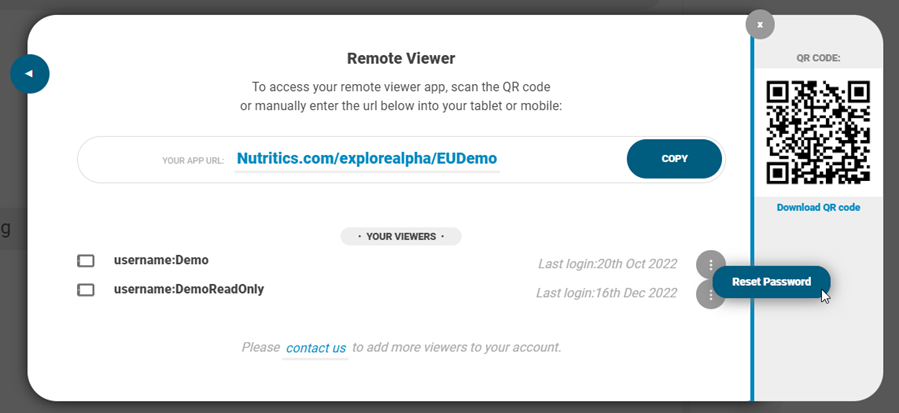
Input the viewers email address and send the password reset.
Translating Labels
You can translate labels into other languages by using the button in the top right.
Label Magic will automatically translate label names and information on the labels to the chosen language. The next time you log in to Label Magic, we’ll remember your choice of language also.

To switch it back, just reselect from the options in the top right.