Nutritics programs enable you to plan and schedule content for delivery to your clients via their own smartphones. Programs are built from a series of items delivered across multiple days or even months. These will appear as a checklist in Libro for your clients to complete each day.
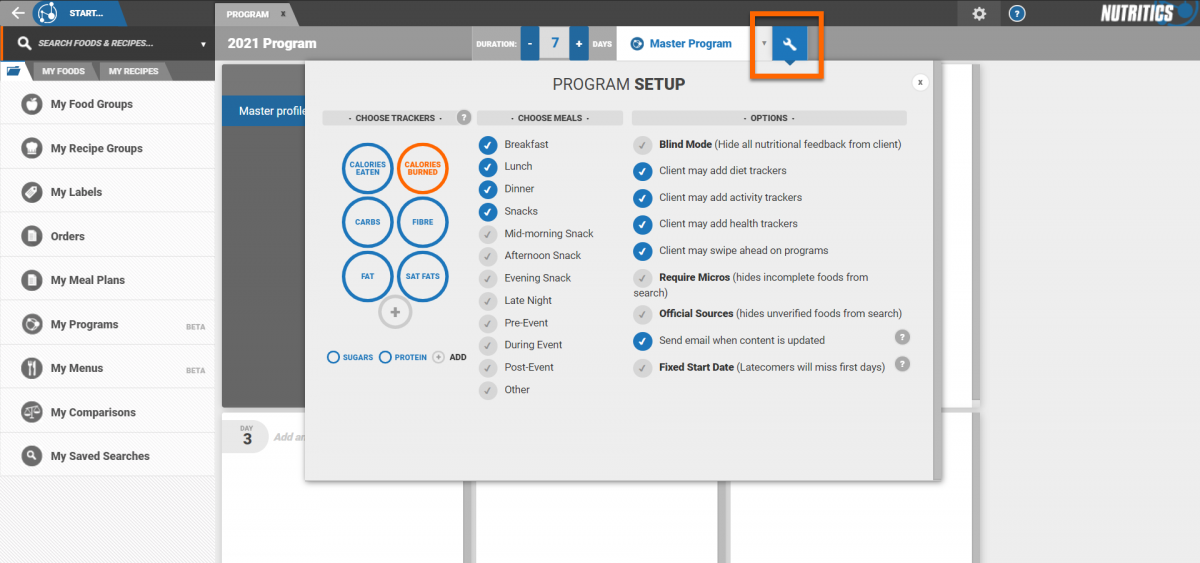

Specify which nutrients, exercises and other tracking monitors should be active by default on this program
Specify which meals are available on the clients phone, specific to the program
If your program is bound to calendar dates and events (eg. when managing sports teams or research project groups), this option should be selected, and a start date input. All clients on the program will then receive the same content on the same days. Any client added late to the program will join in with the group (and miss the previous days of the program)
If the program is not bound to a specific start date (as per the default setting), then clients that are added to the program will always receive day 1, and progress sequentially through the program without missing any days.
Blind Mode – Nutritional information and reports are hidden from the client
Client Diet Trackers – Specify if the user may add nutrition-type trackers that are not part of the program
Client activity Trackers – Specify if the user may add activity-type trackers that are not part of the program
Client Health Trackers - Specify if the user may add other health related trackers such as sleep, blood pressure, that are not part of the program
Client may swipe ahead on programs - Allow your clients to swipe ahead in their program to log future days
Require Micros – Disable sources of data that are known to be missing vitamins and minerals (typically branded food items which have label nutrients only)
Official Sources - You can hide foods in your client's Libro that are not verified, or from our published database
After setting up the program parameters click ‘New Item’ at the bottom of any day tile.
This will present various item types which can be added to the program:
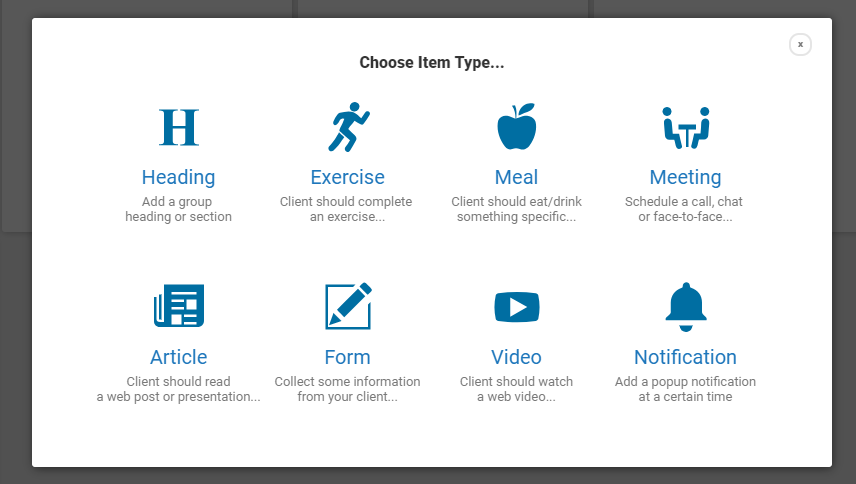
Headings – provide structure to the program by grouping similar items together (e.g. a series of foods for a meal, or series of exercises within a gym program)
Exercise – specify an exercise with steps or video instruction
Meals – select a food or recipe from your Nutritics account for the program
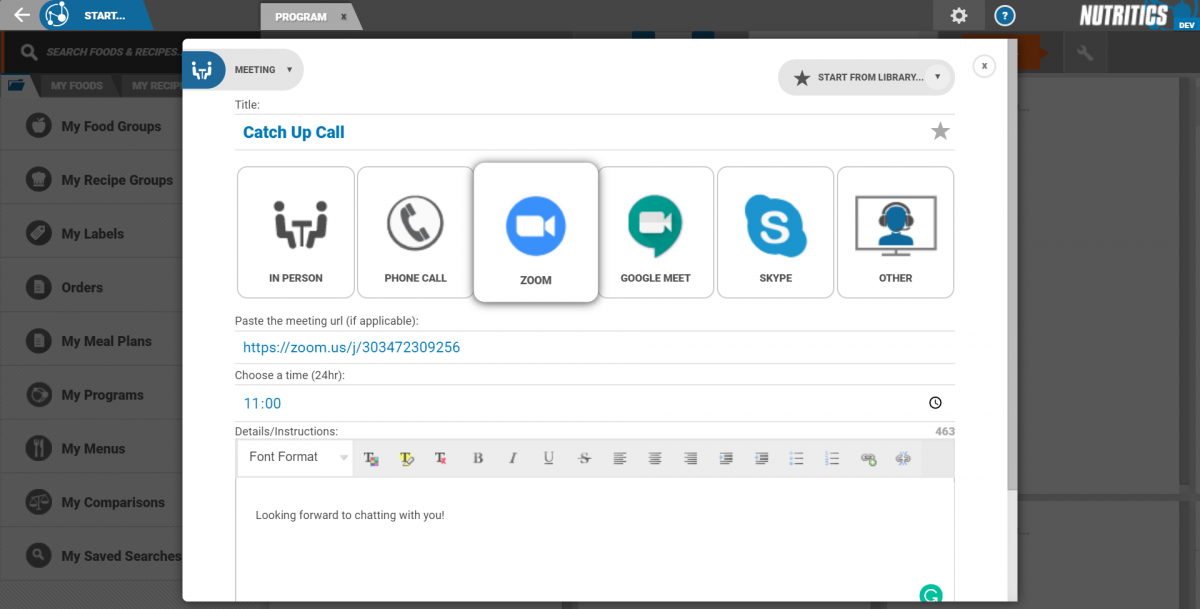
Meeting – schedule an appointment with your client, in person or call / video call.
Article – provide an article or presentation for your client to read
Form – request that your client completes an online form
Video – provide a video for your client to watch
Notification – trigger a popup on your clients phone as a reminder
Pro tip: Using online URLs rather than uploading static files is great because you can freely change the form at any time in the future, and you don’t need to update the URL or make any changes to your program.
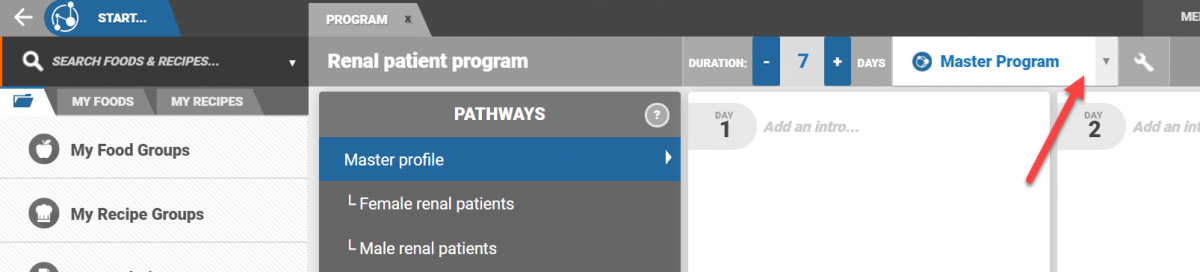
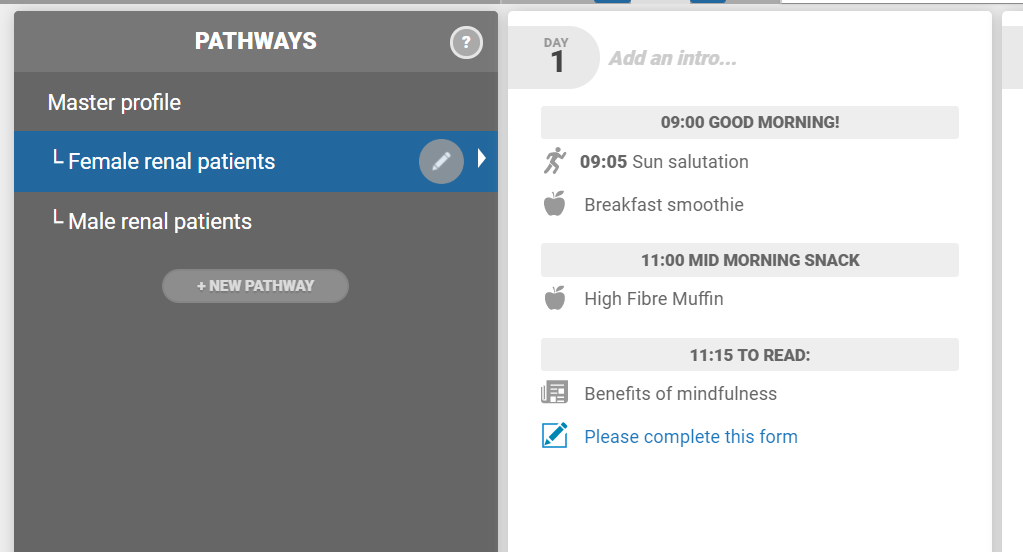
Pathways allow you to create a different journey for different groups of people.
Click on 'new pathway' in the pathway box to create a new pathway. For example, you might have a master profile for renal patients, and then 2 different pathways depending on if they are male or female.
You can switch between the master profile and the new pathways by clicking on them in the pathways box. Any program items created in the master profile will be visible in the new pathways, shown in grey (these can be hidden if needed by clicking on the item). Items added within a pathway will only be visible in that pathway (not the master pathway) and are shown in blue.
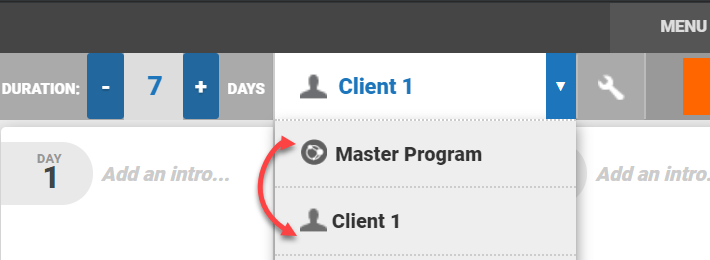
Once you have created all your pathways, you can assign programs to clients. You can do this by opening the program you would like to share and navigating to the drop down menu at the top of the screen.