Nutritics recipe creator can be used to combine foods from the database into a new recipe entry. Recipes can be used in diet logs, meal plans or combined with other recipes to make full meals quickly and easily. Nutritics Foodservice edition includes a cost analysis system for recipes, as well as a menu cycle builder and product reformulation engine, which makes ingredient suggestions on how to improve the nutritional profile of a dish. Recipes can also be used for the production of Nutrition Labels, digital menu board displays and allergen reports.
There are a few top tips you should know before getting started:
Split your recipes into sub recipes, one for each 'pot' or cooking method.
Analyse base sauces, sides, and multi-purpose / batch recipes first.
Enter all ingredients as raw, with the exception of deep fried items and grilled fatty meats.
When possible, weigh ingredients in their prepared form (skin, stones, bone waste removed).
Follow the on screen prompts that appear in the lower right corner of the screen as you log.
As you enter ingredients, the nutrition & allergen information will update in real time.
All changes are saved automatically, except the recipe photo, which must be saved after editing.
Recipe Analysis – Step by Step
1. To open the recipe creator, click the ‘Start’ button, then click ‘New ‘recipe’:
2. Enter a title for your recipe and optional description (useful for recipe source, web link, searchable keywords etc)
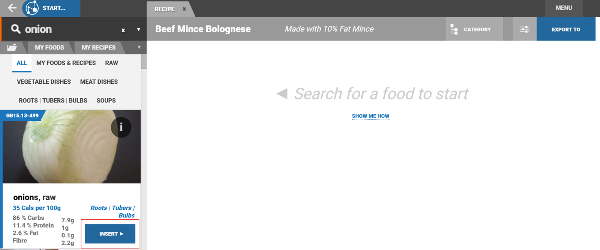
3. Search for ingredients using the search box at the top left of the screen , click the insert button to add the food to your recipe:
Pro Tip: It is best to enter the ingredients in their prepared 'ready to cook' form.
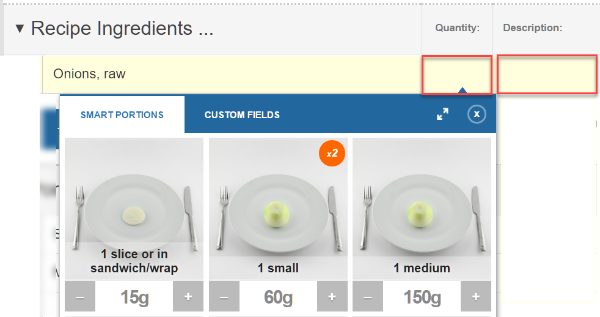
4. Click the ‘Quantity’ box to open the portion entry box. Choose one of the portion size options suggested or enter your ingredient weight directly in any unit):
5. Add any custom fields you wish to tag to the ingredient such as country of origin, shelf life or storage instructions from the custom fields setting
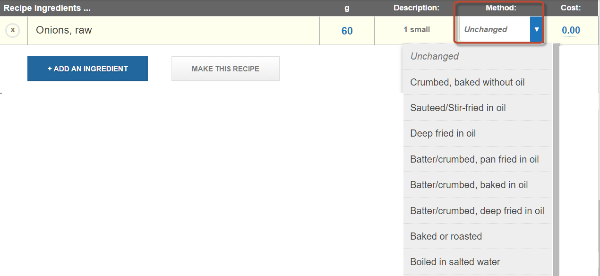
6. Apply a cooking method as appropriate in the ‘Method’ drop down box to account for vitamin and mineral losses on cooking, as well as fat absorption, and salt absorption. This should only be applied if your ingredients are entered as raw (or applied to cooked ingredient where they have a second cooking method or process)
Pro Tip: If your ingredient is fried in oil or boiled in salt, it is important to include the specific oil or salt in your recipes ingredient list and tag it with the same cooking method as the ingredients cooked.
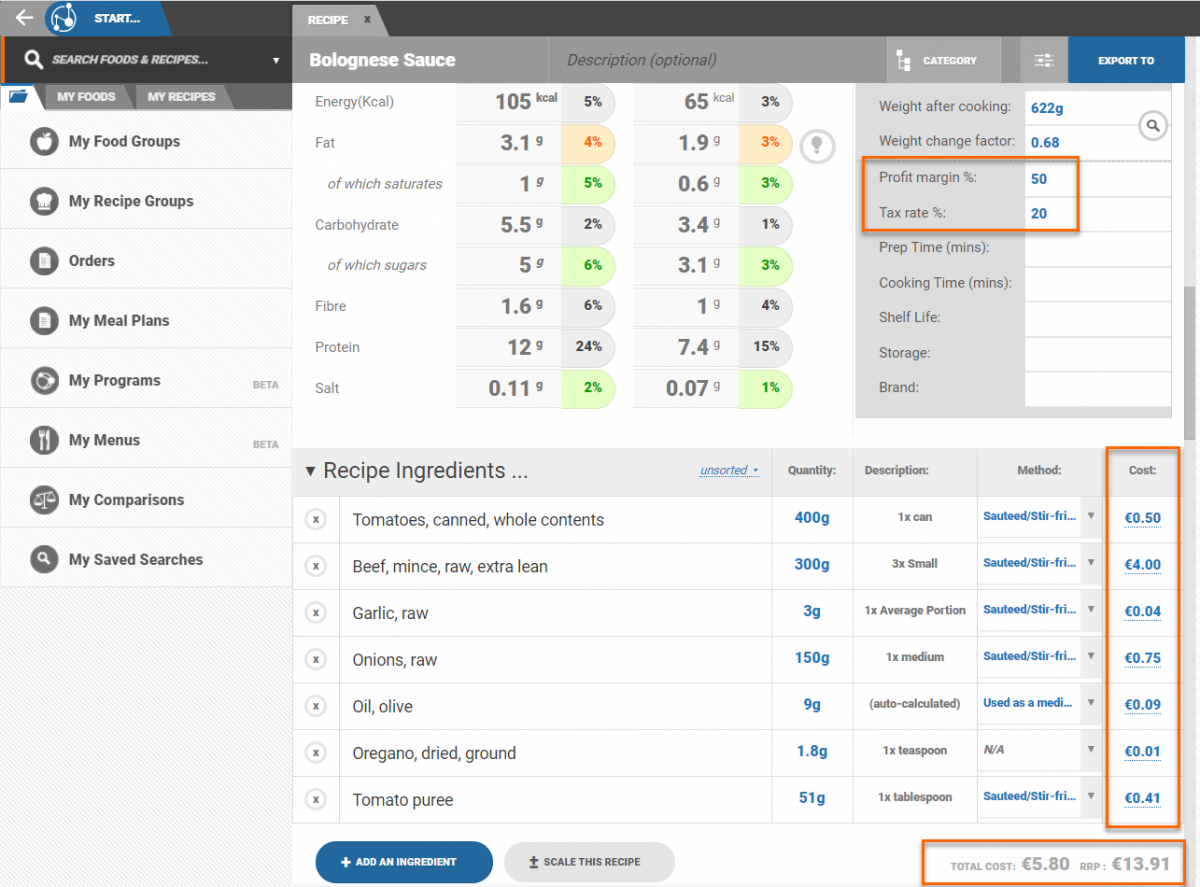
7. Input the ingredient cost to calculate the cost of your recipe batch and servings. Costs are entered manually in the box provided. Once you tag an ingredient with a cost, this amount is recalled each time you use the ingredient automatically.
Pro Tip: Generate a table showing all of your ingredients and costs from Start > Ingredient Costs
8. Repeat steps 3-7 for each ingredient.
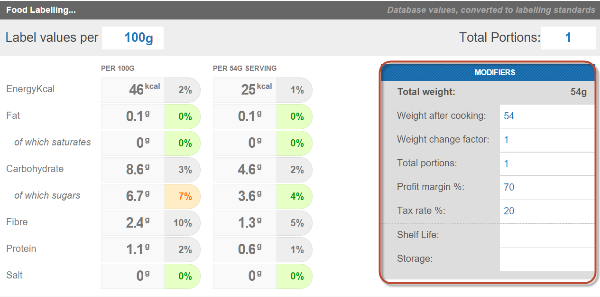
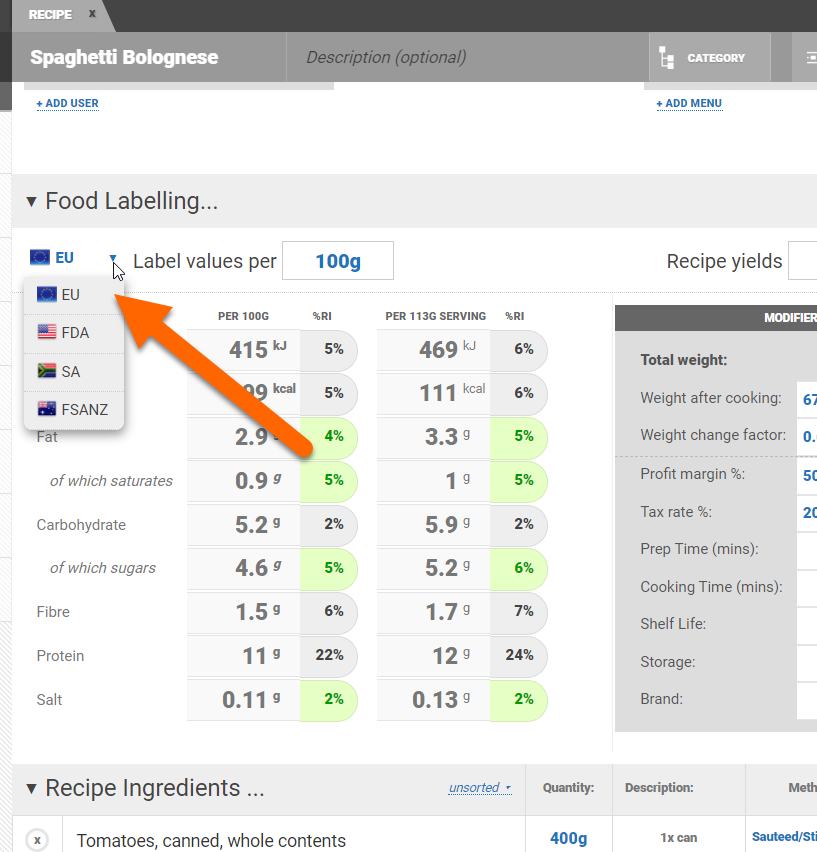
9. Scroll up the page to the food labelling section and enter the number of portions this recipe serves, ‘per serving’ label data will then be generated:
10. Input any other data on the recipe level in the ‘Modifiers’ box, such as recipe storage, weight change factors, or profit margin & tax to calculate RRP of recipes and various portions.
Pro Tip: If you intend to report nutrient values per 100g, or with reference to any unit of weight (e.g.food for label), it is important to account for weight change on cooking by either the weight yield of your recipe, or entering an appropriate weight change/ yield factor in the boxes provided. However, if you are simply reporting nutritional values 'per serving' (e.g calories on menus initiative) it is not necessary to apply a weight change factor, but the weight of the serving must not be referenced.
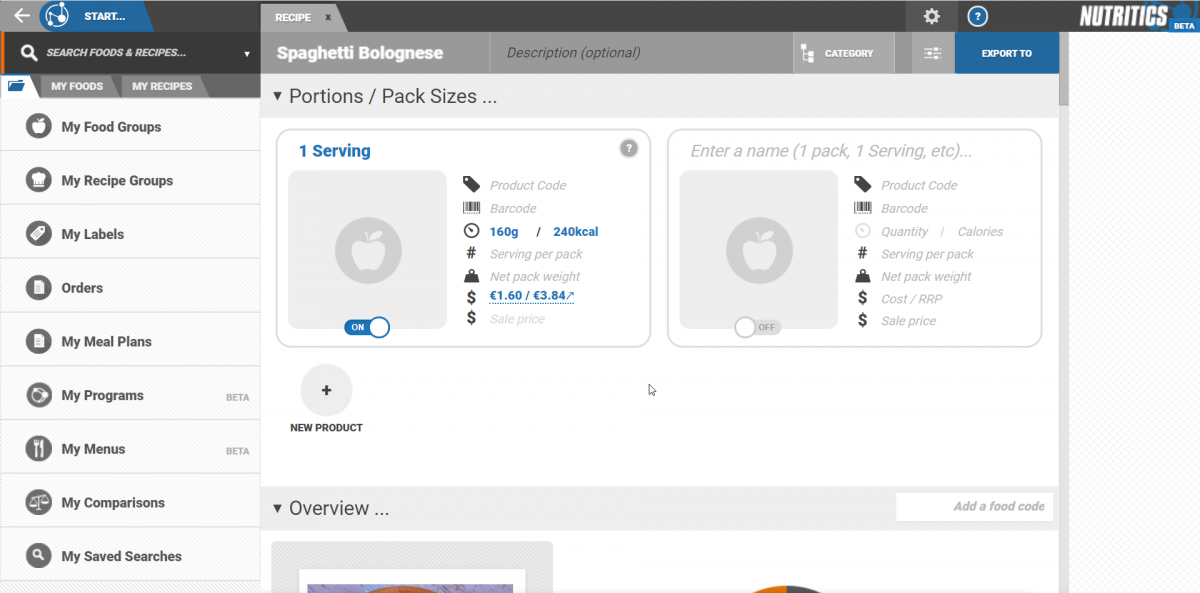
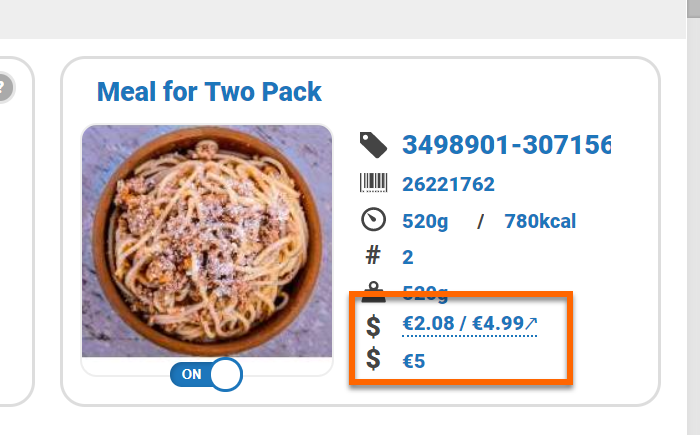
11. Add products/portion sizes under the ‘portions/Pack sizes heading’. If the number of servings the recipe yields is specified, a default of ‘1 serving’ will appear automatically. This cannot be deleted but can be edited.
Add additional products/servings can be added by clicking ‘+new product’.
All fields are free text boxes so simply click on them to type. Enter the name e.g. 1 pack, 1 serving, kid’s portion, 100kcal smoothie etc.
Upload an image from your computer or enter an image url.
Add the product/portion quantity and Nutritics will work out the energy value of that quantity. Conversely, enter the energy value and the system will work out the quantity.
Additional fields
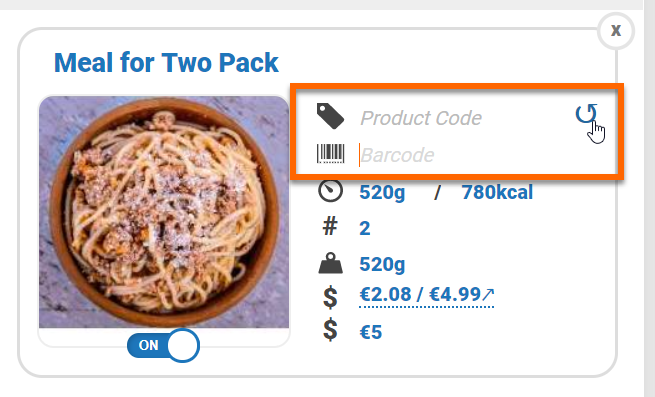
Product code/Barcode
(Only visible on accounts with the label maker, digital menus or publishing panel enabled)
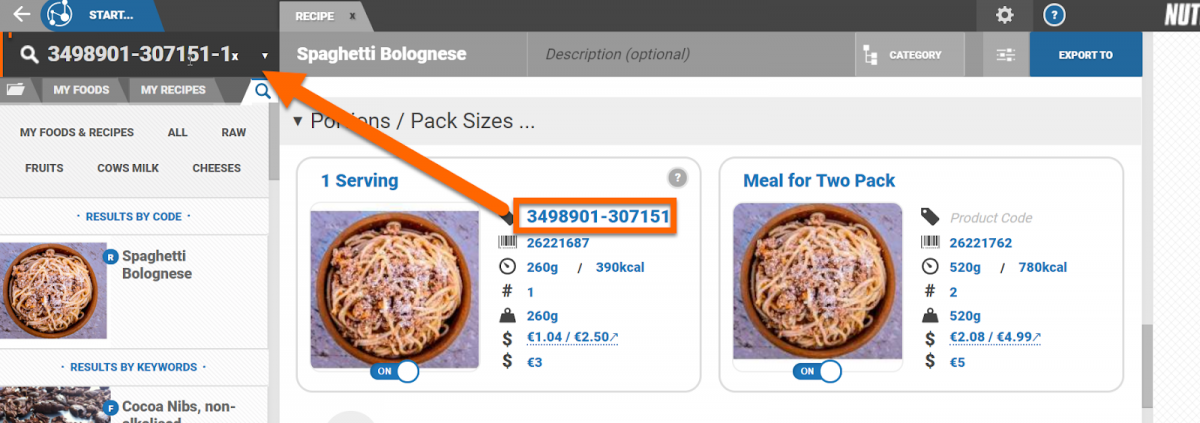
Enter a product code and barcode or else click on the round arrows to automatically generate codes. Codes can be used as keywords in the food/recipe search bar.
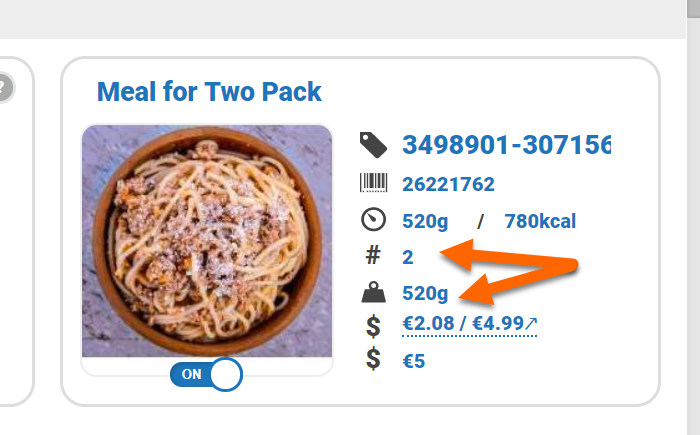
Servings per pack and net pack weight
(Only visible on accounts with the label maker, digital menus or publishing panel enabled)
Specify the number of servings in each product pack and the net weight of the pack.
Costings and sale price
(Only visible on accounts with costings enabled)
If costings are enabled and entered for the recipe ingredients, Nutritics works out the cost of the portion and the recommended retail price. Enter a sale price to appear on labels, menus etc.
Ingredient costs must be entered for the portion cost and RRP to be calculated. Nutritics will incorporate the profit margin and tax rate you set in the modifiers box of the recipe workspace when calculating the cost and RRP.
Toggle on/off
(Only visible on accounts with the publishing panel)
Toggling a portion ‘off’ means that product will not be published to your database, but this product will still be available for you to use throughout your own account e.g. to create labels, menus, as a sub recipe.
12. Add any cooking instructions and notes for your recipe in the text entry box, or photos to illustrate key steps of the preparation process
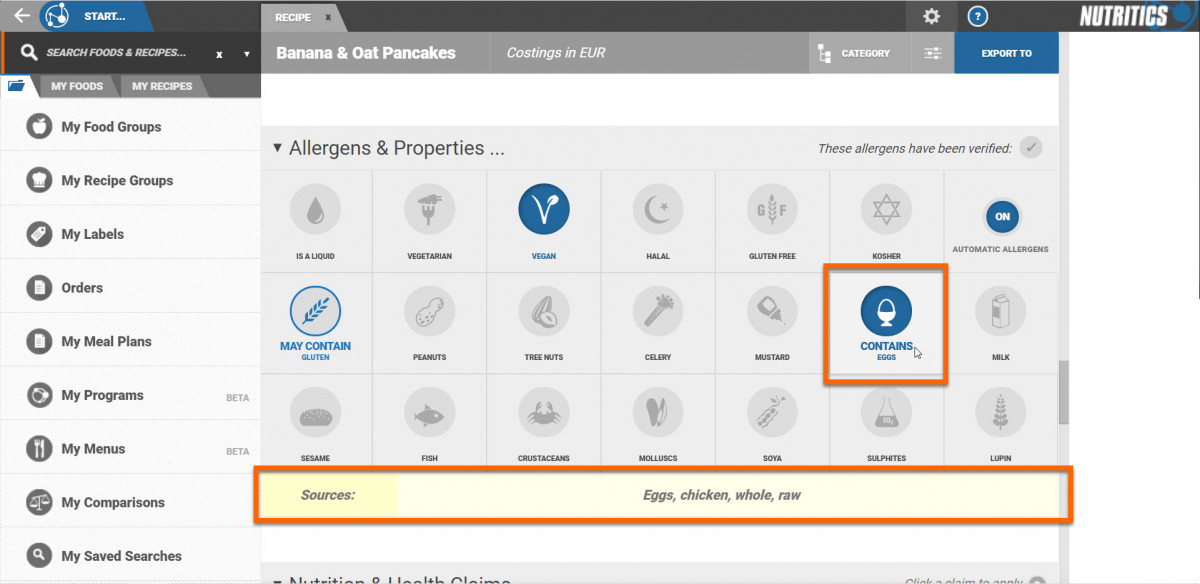
13. Scroll to the allergens & properties section. Check the allergen information indicated is appropriate for your specific ingredients.
Hover your mouse over an active allergen to see which ingredient it's coming from. This is particularly useful for developing allergens out of recipes.
The allergens presented are specific to your region. The region can be changed under the ‘food labelling’ section by clicking on the dropdown.
We highly recommend reading more on allergen management here and more on ingredient list management here.
The properties along the top e.g. is a liquid, vegetarian, vegan, halal etc. are customisable and can be toggled on and off by clicking on them.
14. Scroll up to the top of the page and add a photo to your recipe if desired.
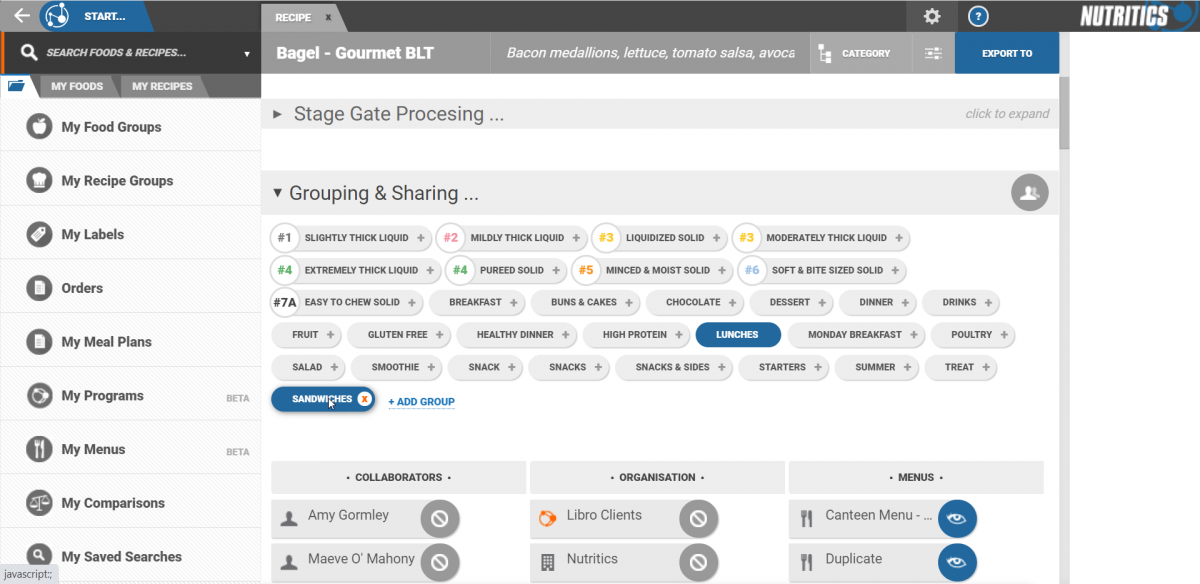
15. Under the grouping and sharing heading, recipes can be categorised into groups for easy data organisation and shared to other users. Click on '+add group' to create a new group. Click on a group name to add a recipe to that group. Recipes can be added to multiple groups.
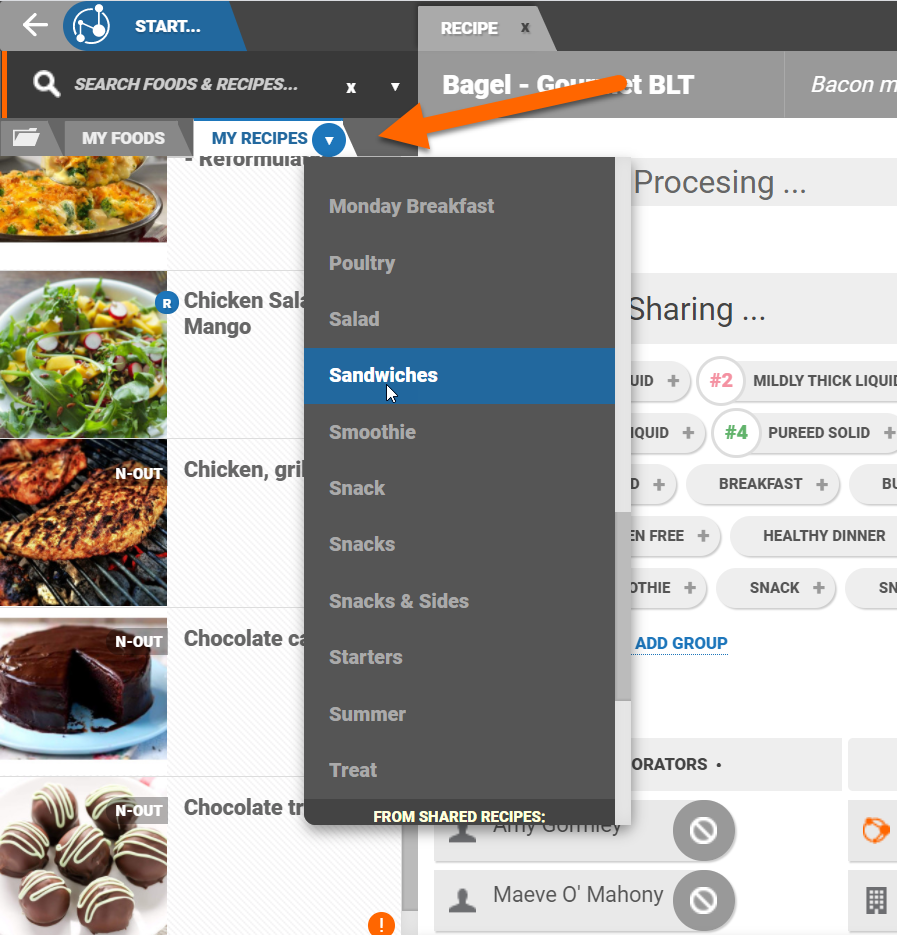
Recipe groups can be viewed by clicking on the 'my recipes' tabs and then hovering over the arrow beside this tab.
Alternatively, you can click on 'My recipe groups' in the Nutritics explorer.
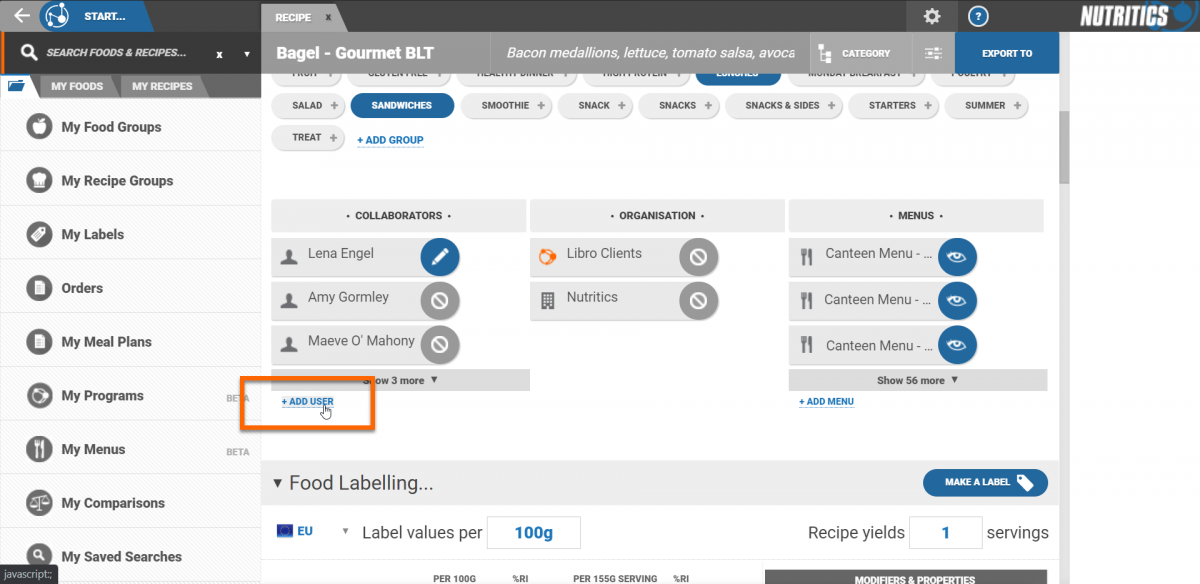
Share the recipe with other Nutritics users under the collaborators heading.
Click '+add user' and enter the username or email address of any Nutritics user you'd like to share the recipe with.
The user's Nutritics username will be added under the collaborators heading. Click on the name to share with viewing access. Click again to share with editing access and click a third time to revoke access.
Shared recipes are denoted by an R icon with and outward arrow in your list of recipes.
16. Use the Export button or Menu > Output tools to publish your recipe to various outputs