Meal Plan Templates
6th Jan 2018 To create a meal plan template click start < new meal plan.
Select a pre-existing meal plan or start from scratch. Selecting ‘start from scratch’ will open a blank meal plan template.
This is a master meal plan and is not attached to any clients. The meal plan can be attached to clients by clicking on the drop down menu at the top of the workspace. See below for more on attaching meal plans to client profiles.
Any changes to the master meal plan will be applied to any client copies of the meal plan. Changes to individual client copies of the meal plan will only apply to that client.
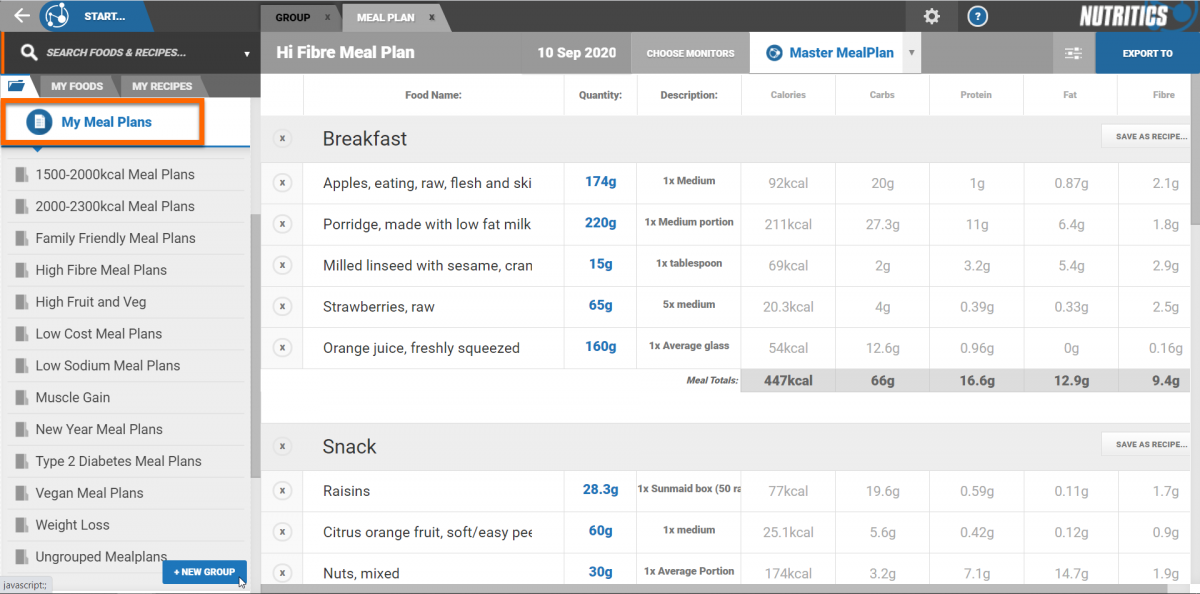
Build your meal plan (see
here for a guide on this). Once you are happy with your meal plan template, add it to a group for easy retrieval later.
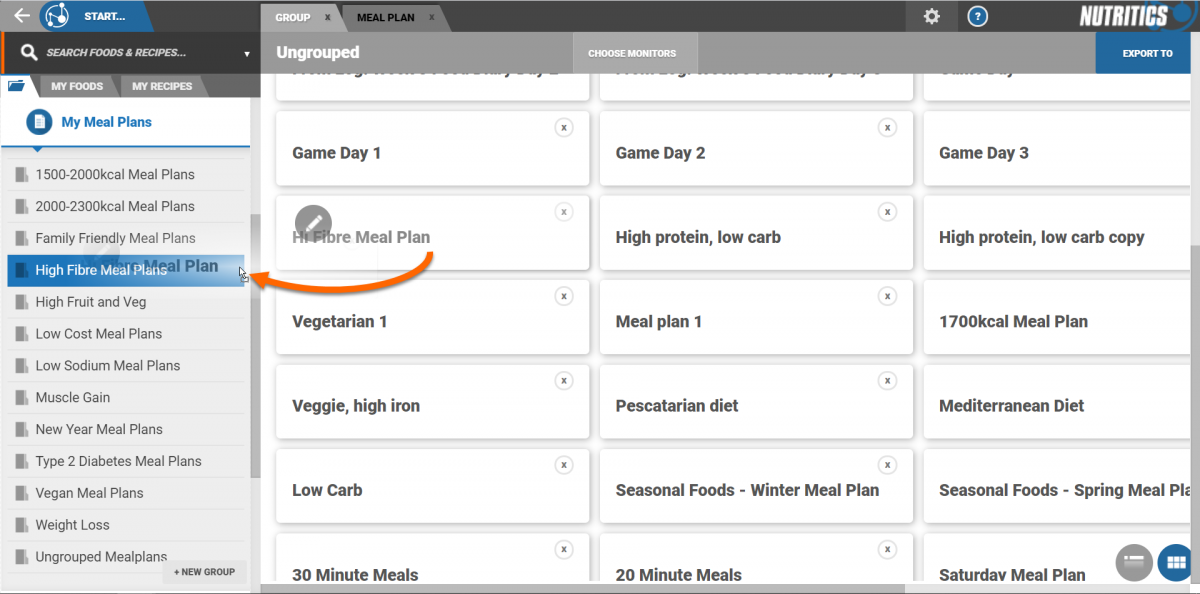
To do this, click on the ‘meal plan’ folder in the Nutritics Content Explorer.
By default, all newly created meal plans are added to the ‘ungrouped’ meal plan group.
Click on the ‘ungrouped’ meal plan folder. Drag and drop the newly created meal plan into an existing group or create a new group.
Click on a meal plan group to see all meal plans within that group.
USING THE MEAL PLAN TEMPLATE
The meal plan can be attached to a client profile in a few ways.
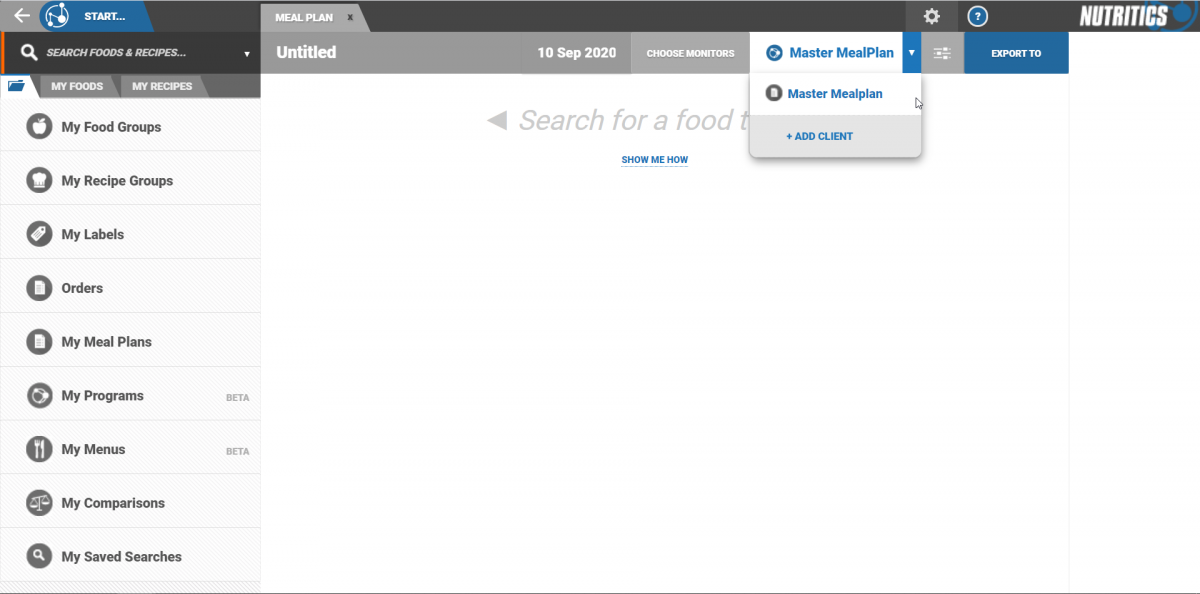
1. When working on the master meal plan, the meal plan can be attached to clients by clicking on the dropdown menu and selecting 'add client'.
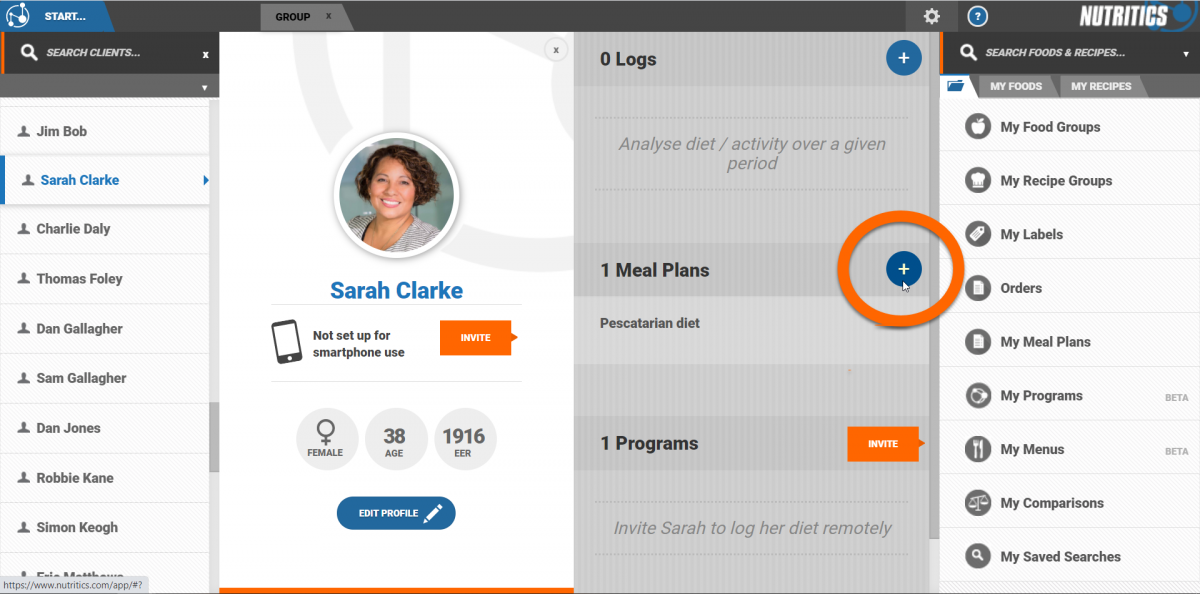
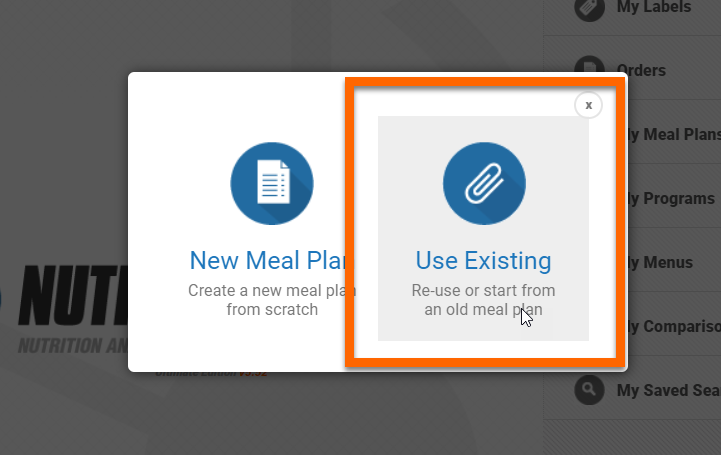
2. Alternatively, open a client profile and click on the plus button beside the meal plan heading.
Select ‘use existing’ from the options presented.
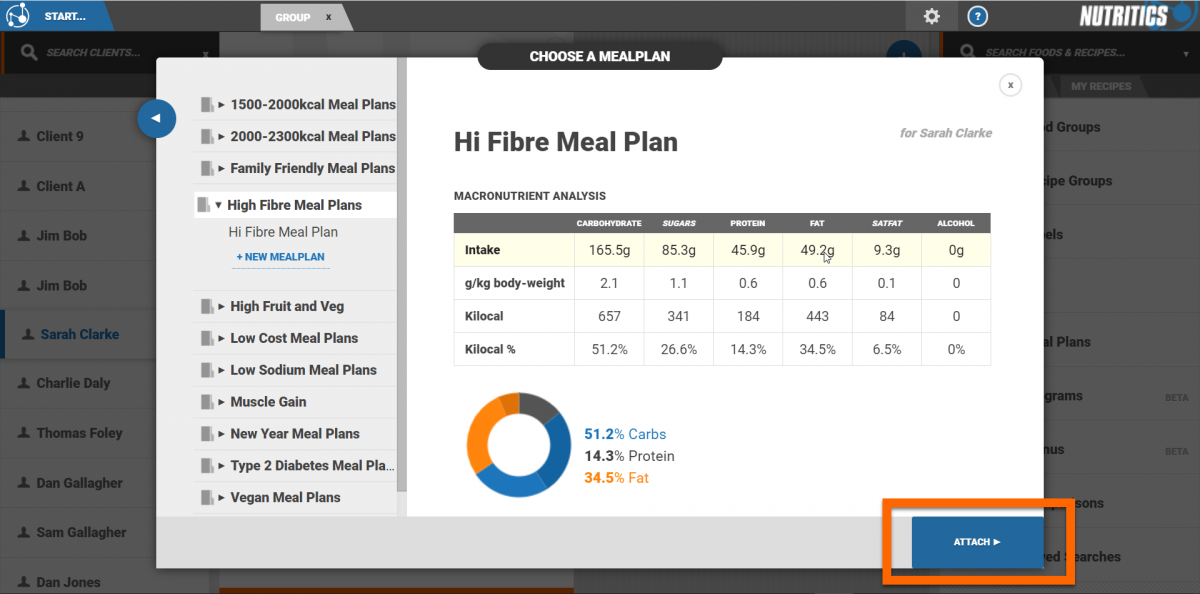
Select a meal plan from the meal plan groups and click 'attach'.
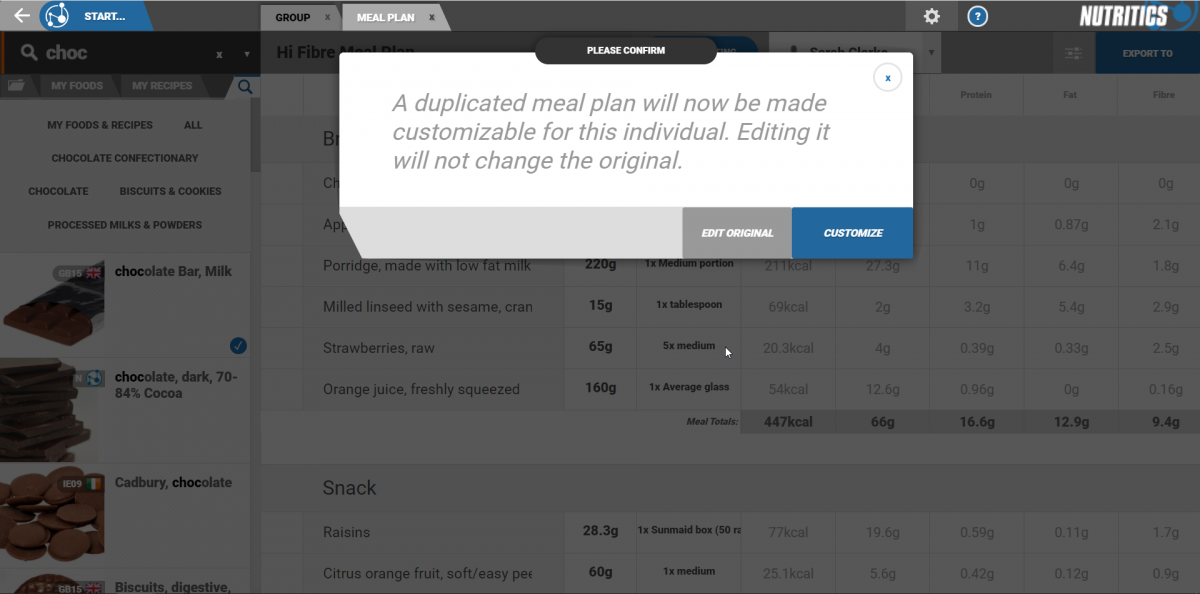
Click 'enable editing' to make an editable copy of the meal plan (any changes made will not affect the original meal plan, they will only be applied to the copy).