Once the menus and the outlet have been set up, open the menu you would like to publish from the Nutritics content explorer and review the menu settings. If you have not already created your menus in Nutritics, please see our guide on menu creation here.
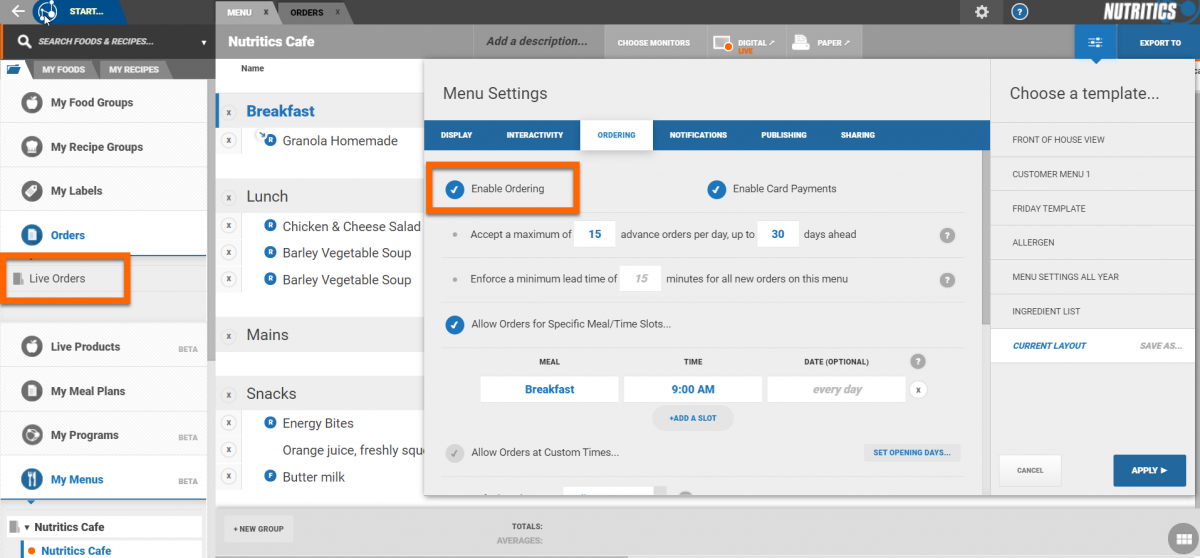
Menu settings are accessed by clicking on the grey slider icon in the top right corner of the menu workspace.
Enable ordering to allow customers to place orders from the digital menu. Orders will appear in the ‘Orders’ folder in the Nutritics content explorer.
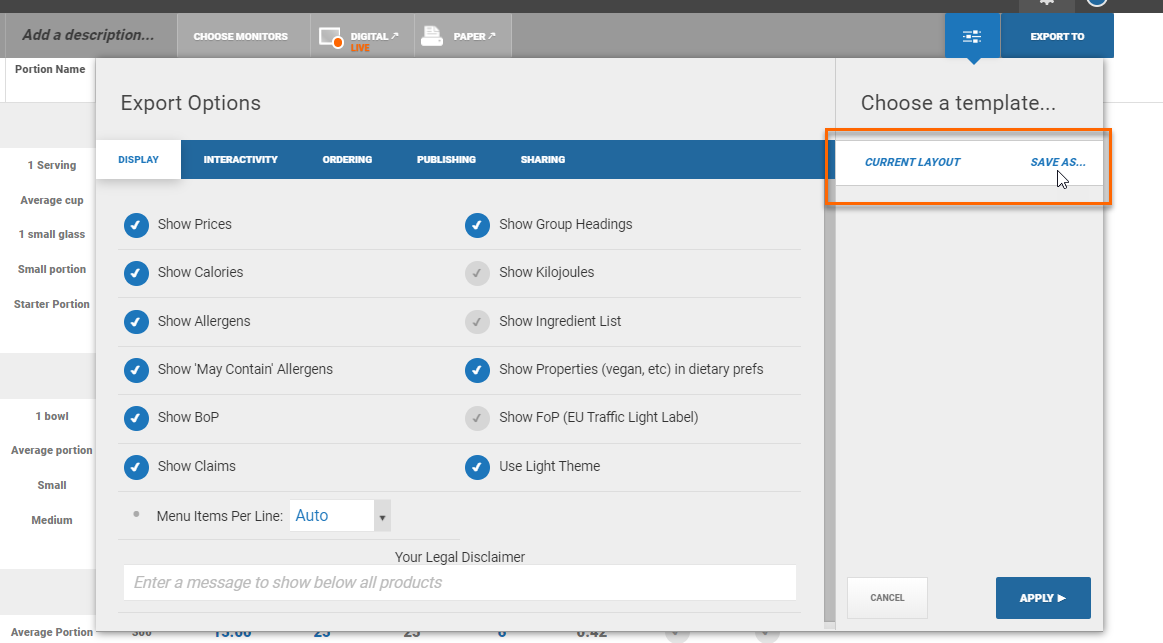
Menu settings can be saved as a template and applied to other menus. Click ‘save as’, name your template and the template will be saved for reuse.
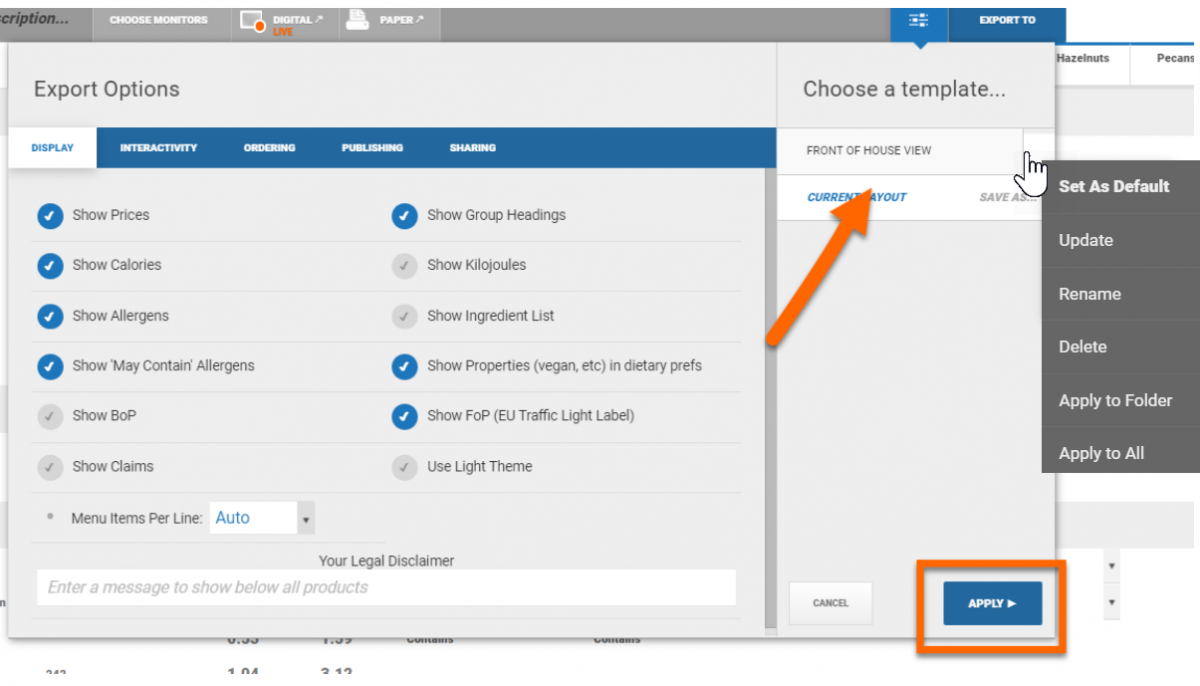
To apply a template, click on the template name and select apply. Right-click on the template name to set it as the default menu layout, to update the template or to rename or delete the template.
Templates can be applied to an individual menu, a menu 'folder' group or all menus across your account by selecting the relevant option from the drop down shown above.
Limiting items ordered on menus
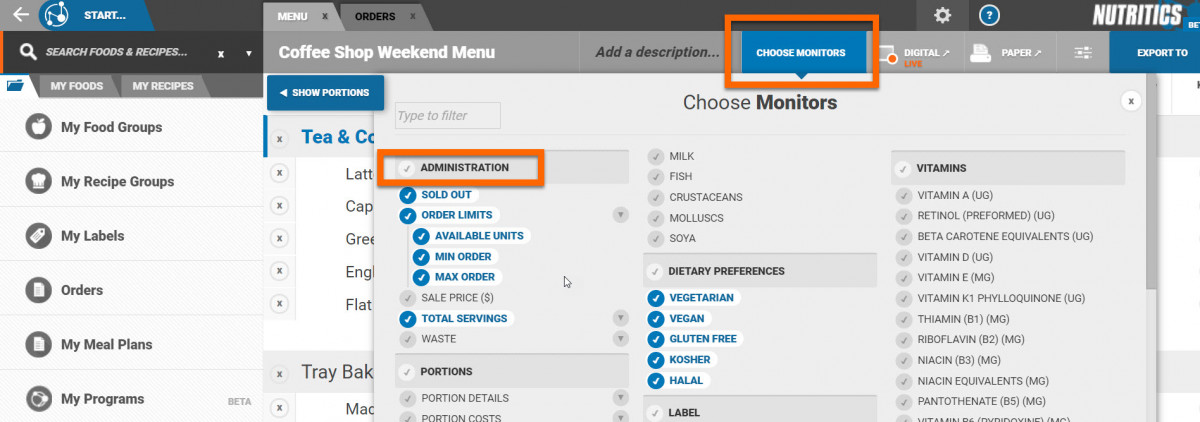
To limit the amount of items that can be ordered from a menu, click on the monitors button from your menu workspace.
Order limits can be set using the monitors under the 'administration' heading.
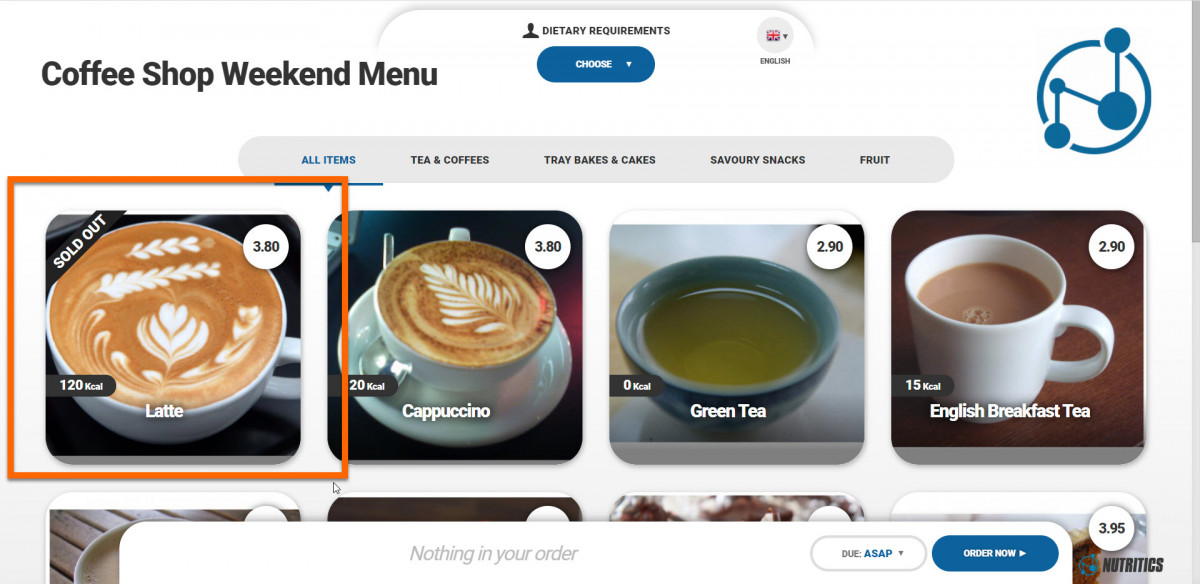
Sold out: Enable this monitor and tick any items that are no longer available. The item will still appear on your digital menu, but will bear a 'sold out' banner.
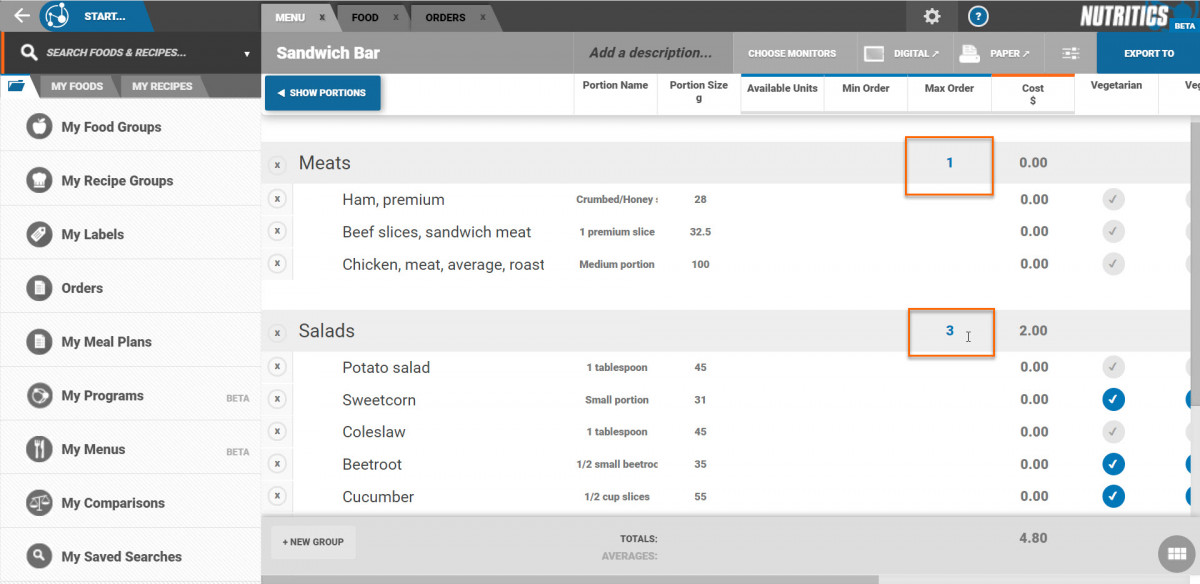
Min and max order: Setting a min order means the customer must select at least this many menu items from this menu group e.g. create your own breakfast by selecting 2 meats.
Setting a max order means the customer cannot select any more than the specified number of items from this menu group e.g. make your own sandwich, choose 1 bread, 1 meat and 3 salads.
Any order limits will be displayed on the digital menu beside the menu group name.
Customer view
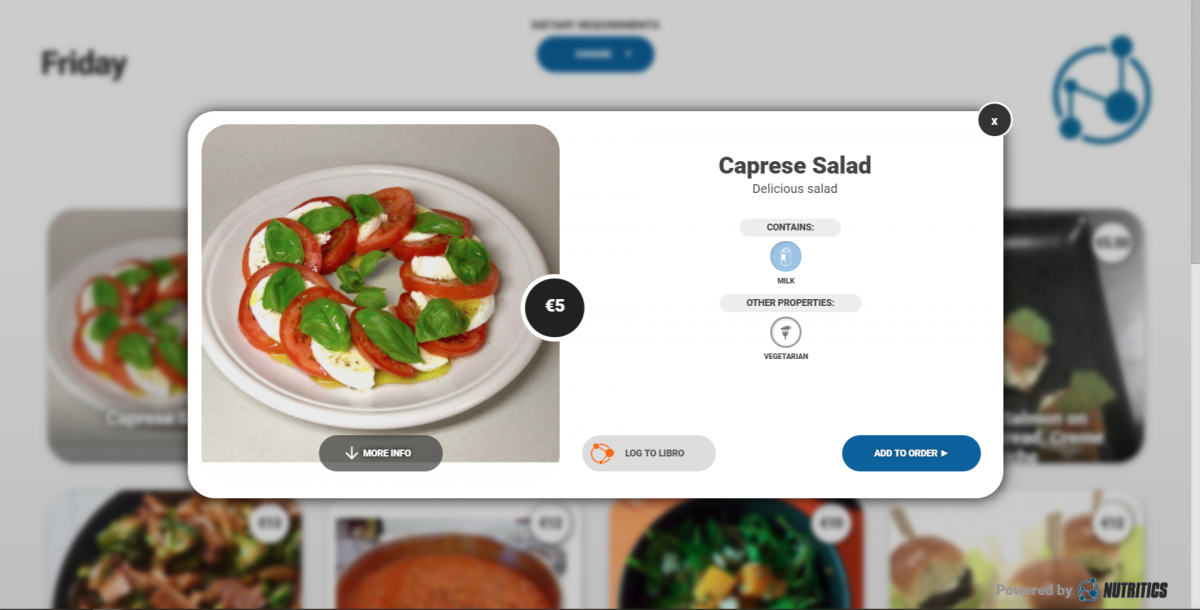
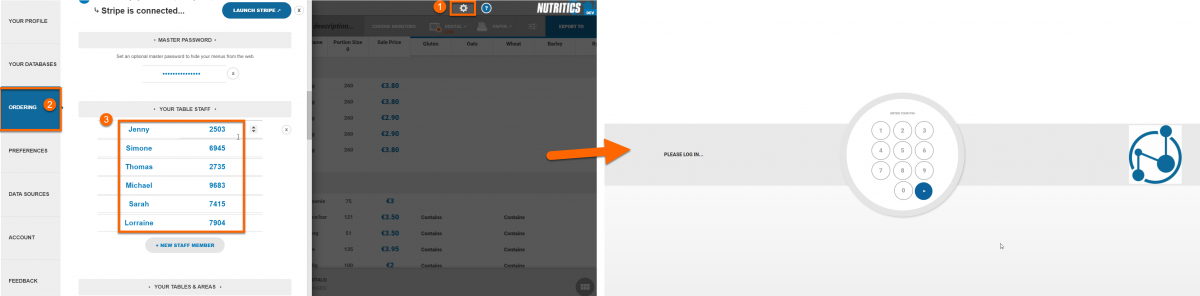
If a menu is password protected, a staff member will be required to log in to see the menu.
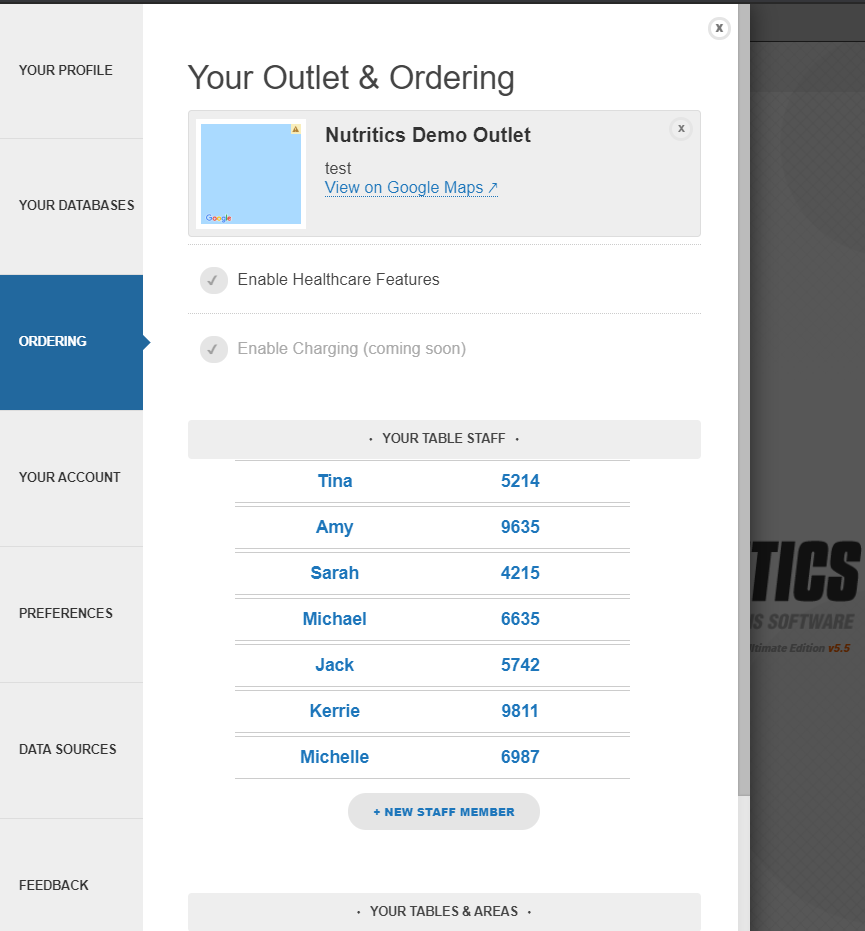
Enter the name and pin assigned to the staff member in your outlet settings.
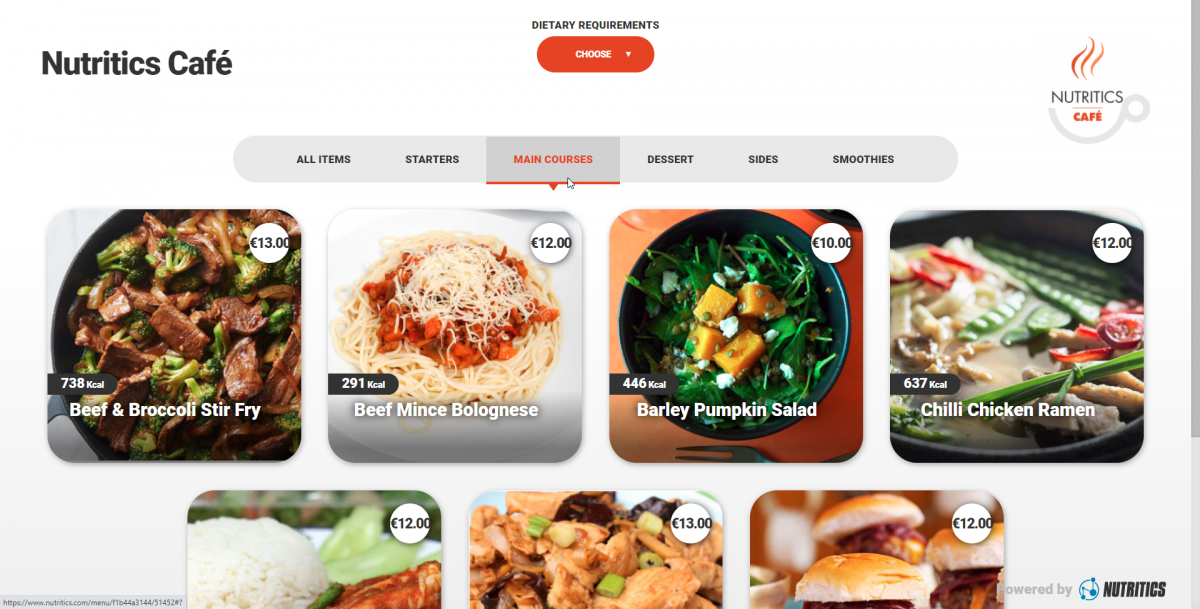
Menu items are shown in a tile format.
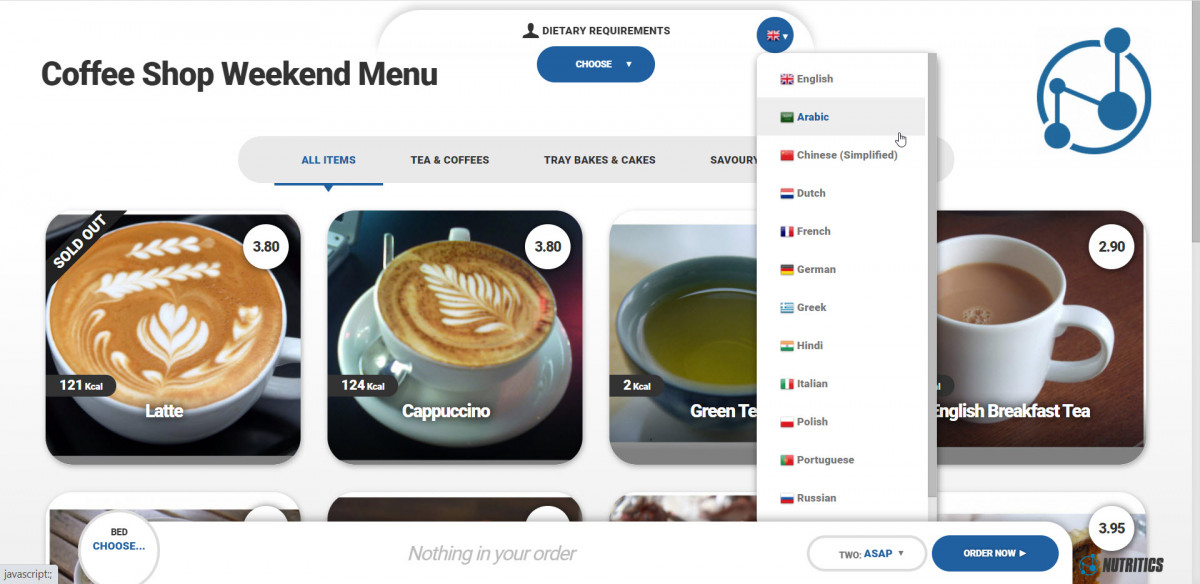
Customers can click on the language dropdown at the top of the screen to translate the menu into their preferred language.
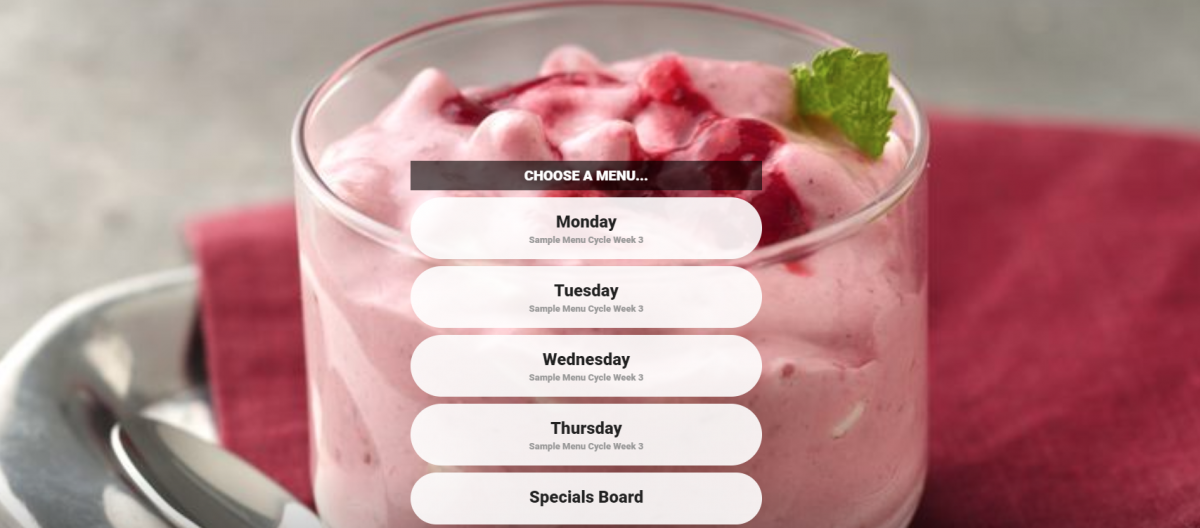
Customers can scroll through and filter the menu by clicking on the tabs along the top.
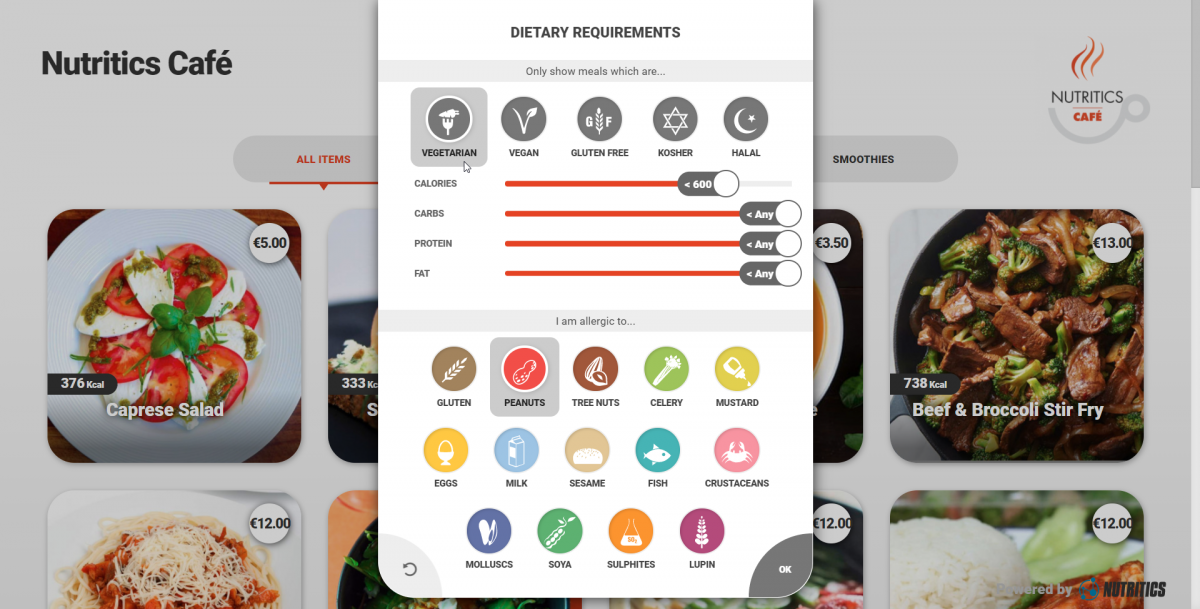
Customers can also filter by their dietary preferences and allergies by clicking on the drop-down menu at the top of the screen.
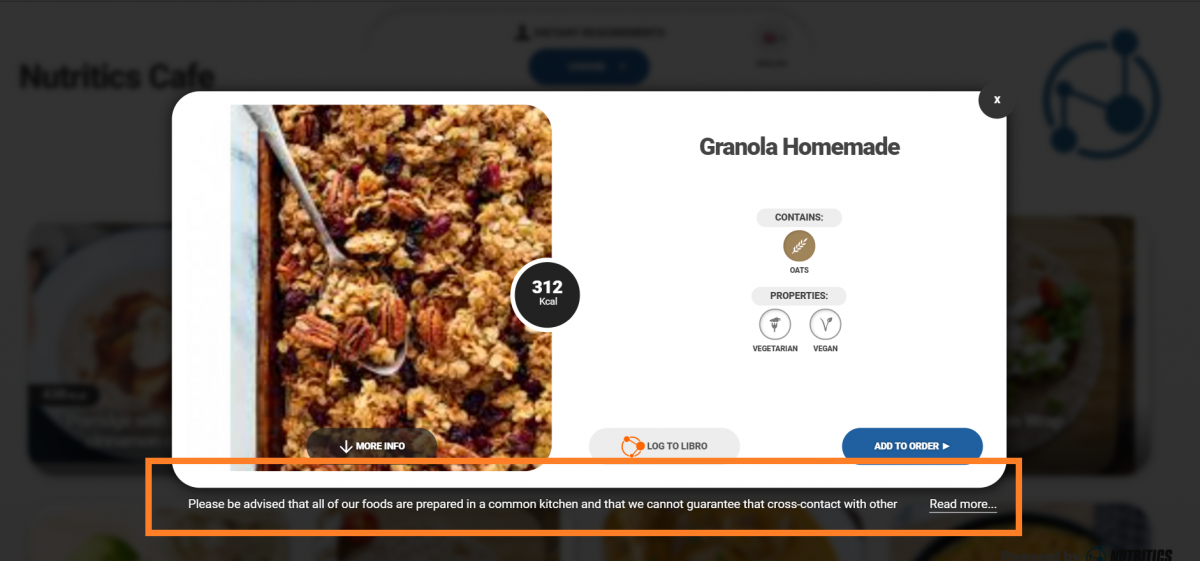
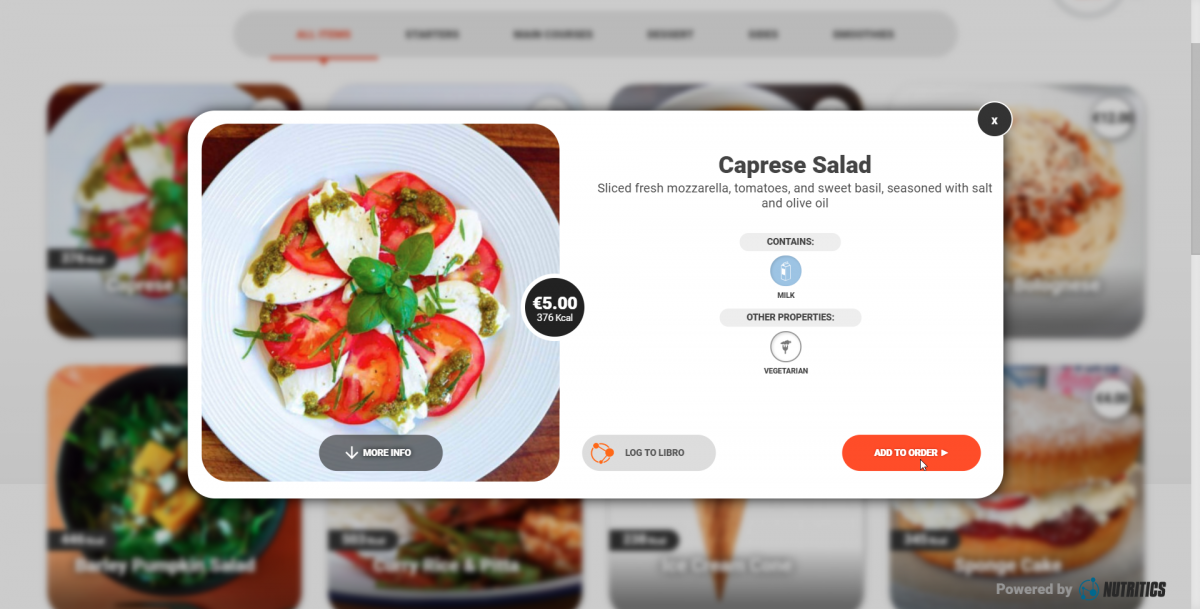
Clicking on a menu item will open it (the information on display e.g. calories, pricing etc. can be controlled from the menu settings).
Specify the desired number of servings and any notes for the kitchen.
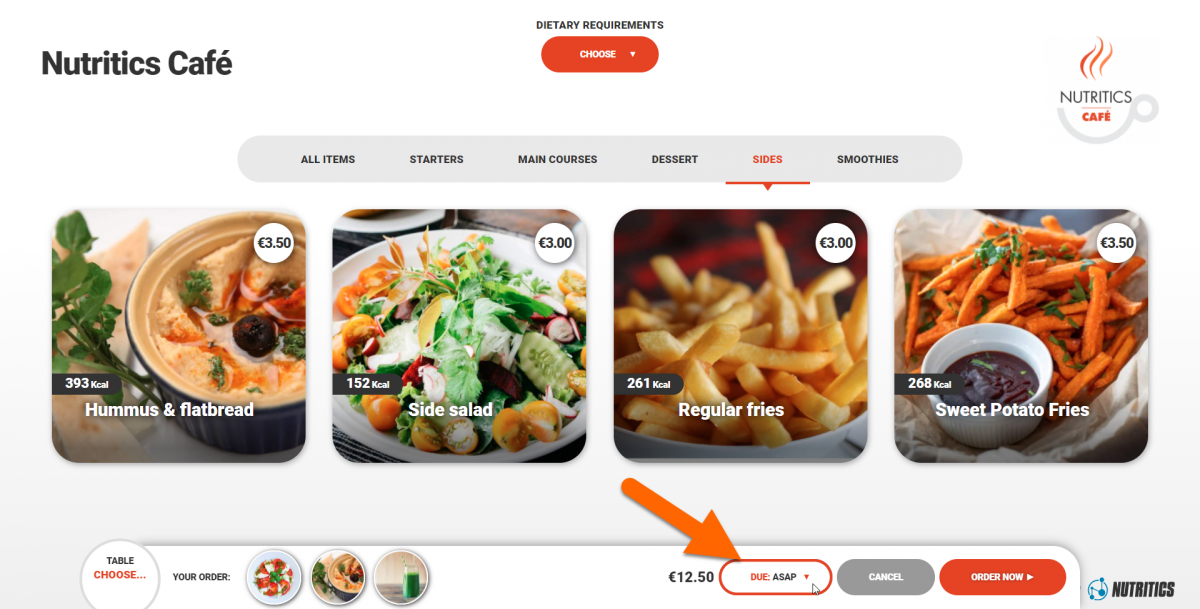
Items are added to a basket at the bottom of the screen.
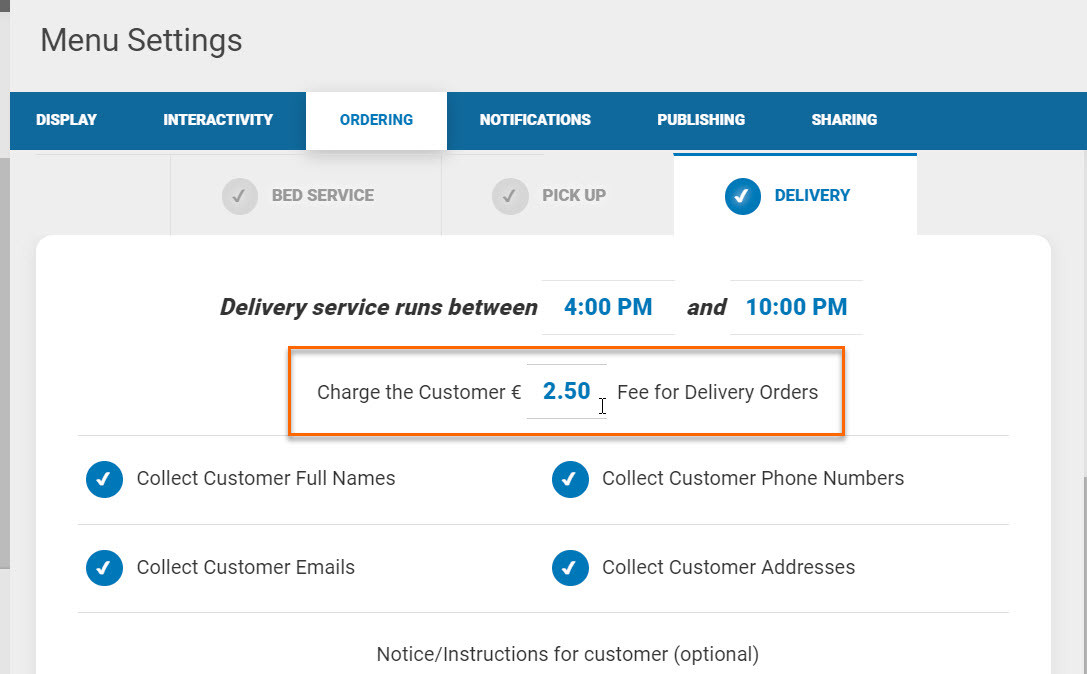
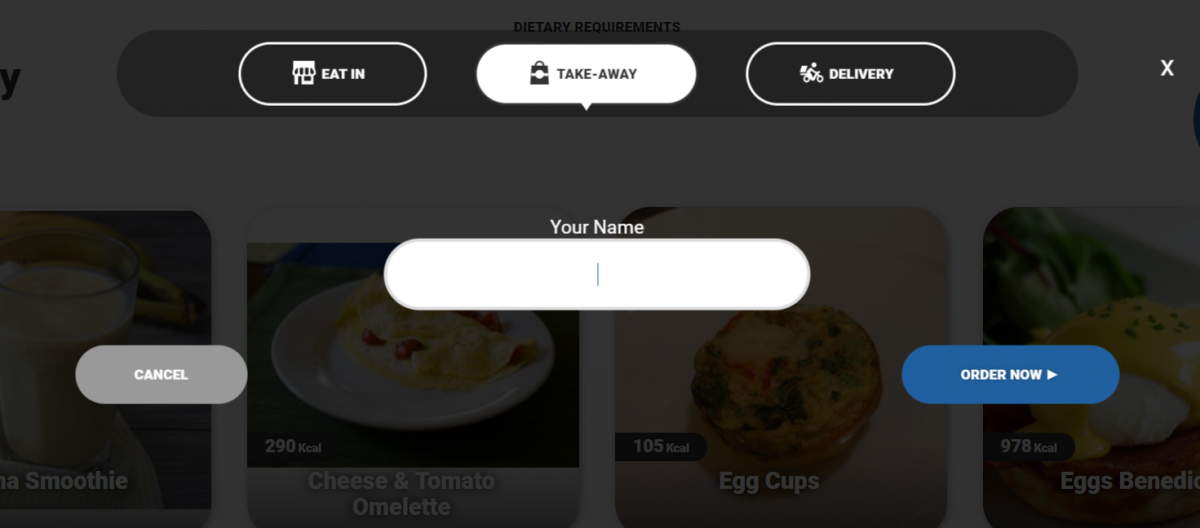
Depending on the menu set up, customers can choose to eat in, take away or have their order delivered by following the prompts on screen.
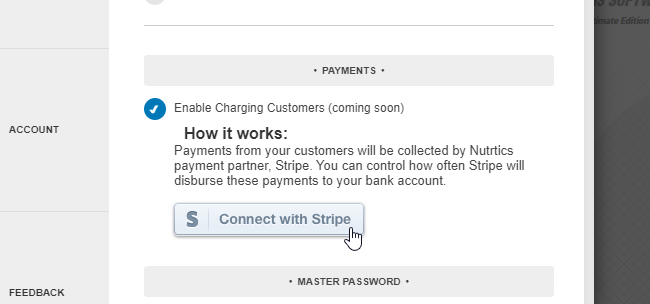
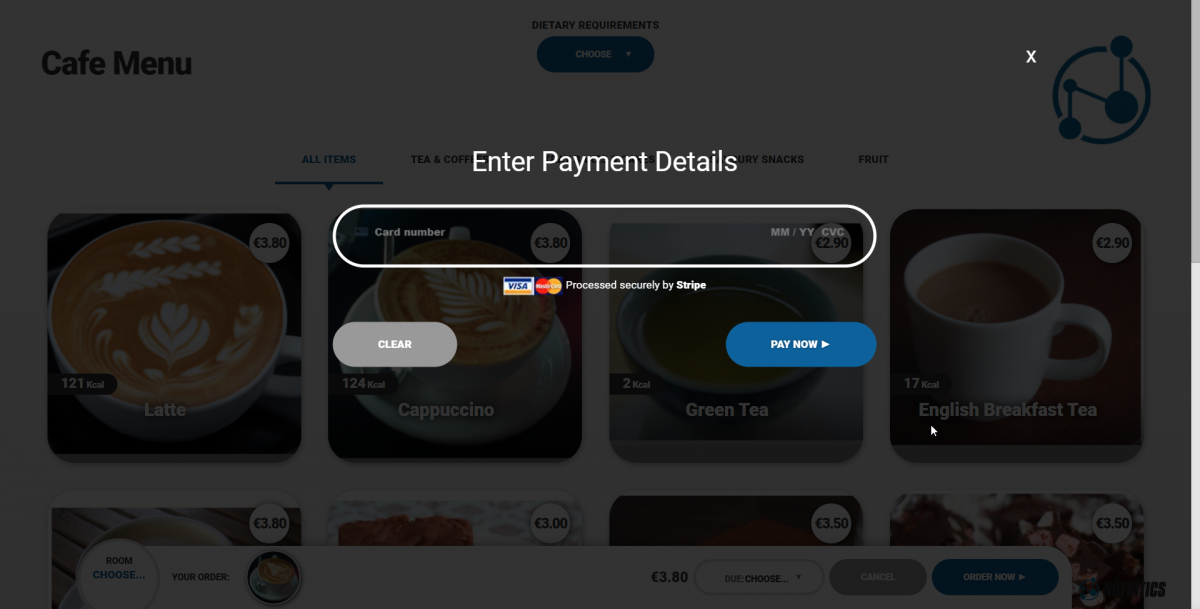
If payments are enabled, customers will be prompted to enter their card details to complete their order.
Customers will receive on-screen confirmation of their order.
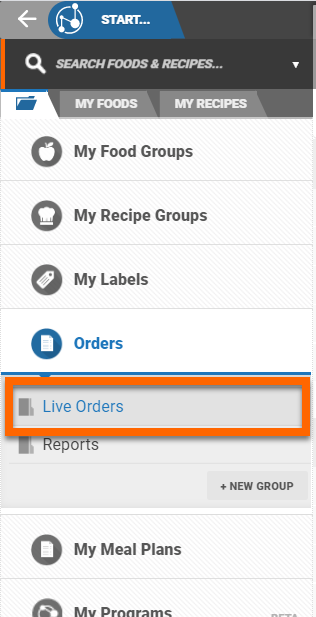
Order Dashboard
The order dashboard is accessed via the Nutritics Content Explorer. Click ‘Orders’ then ‘Live Orders’.
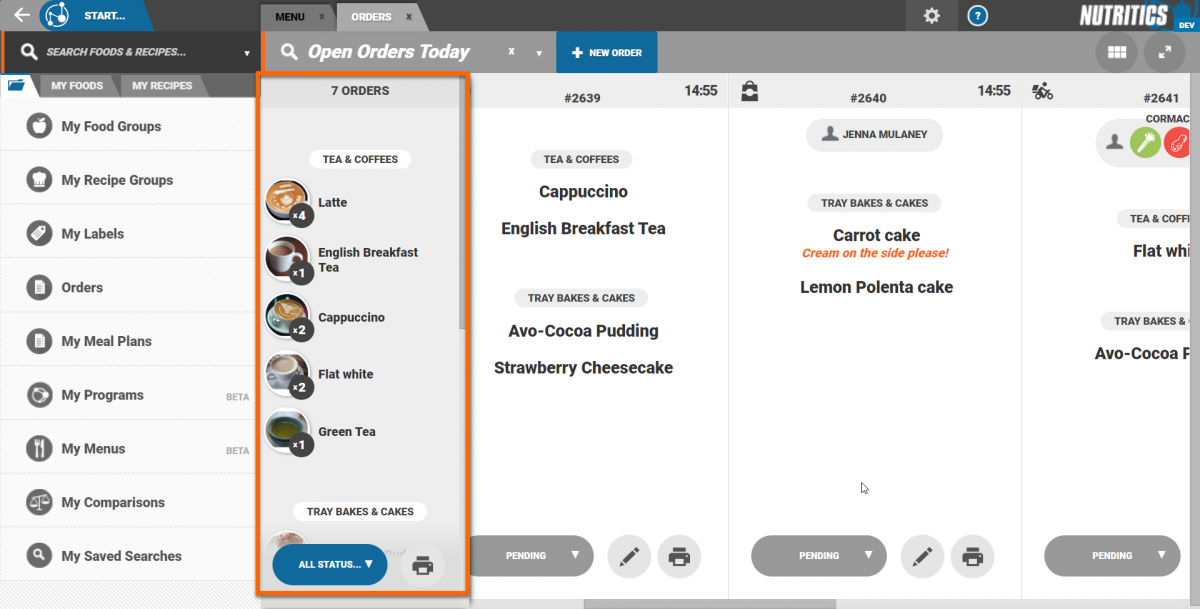
- A summary of all orders is shown in the first panel. Items are organised into the food and recipe groups set up in the Nutritics account.
- The number of times an item has been ordered is shown beside the item name.
- Individual orders are shown to the right of the summary panel.
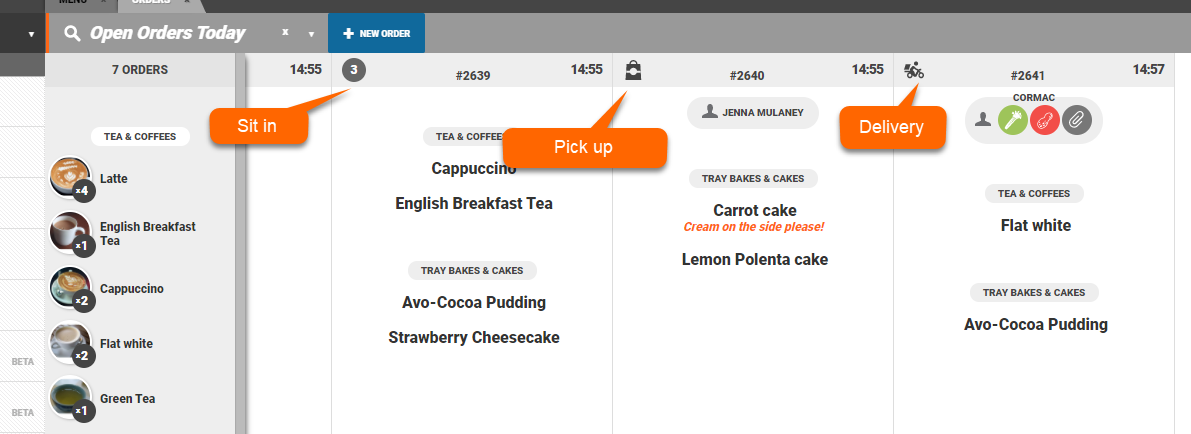
- Order information includes an icon displaying if the order is for sit in, take-away or delivery
- Also shown is the order number; the time the order is due; customer details; and the order items organised into groups.
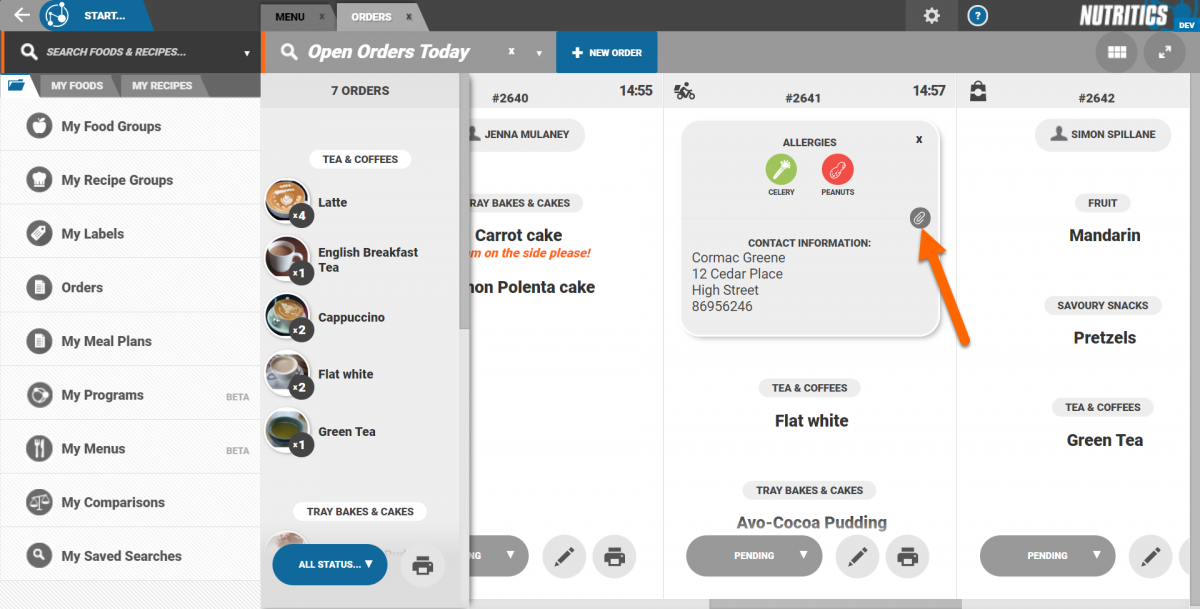
- Click on the paperclip icon beside a customer name to see more information on the customer.
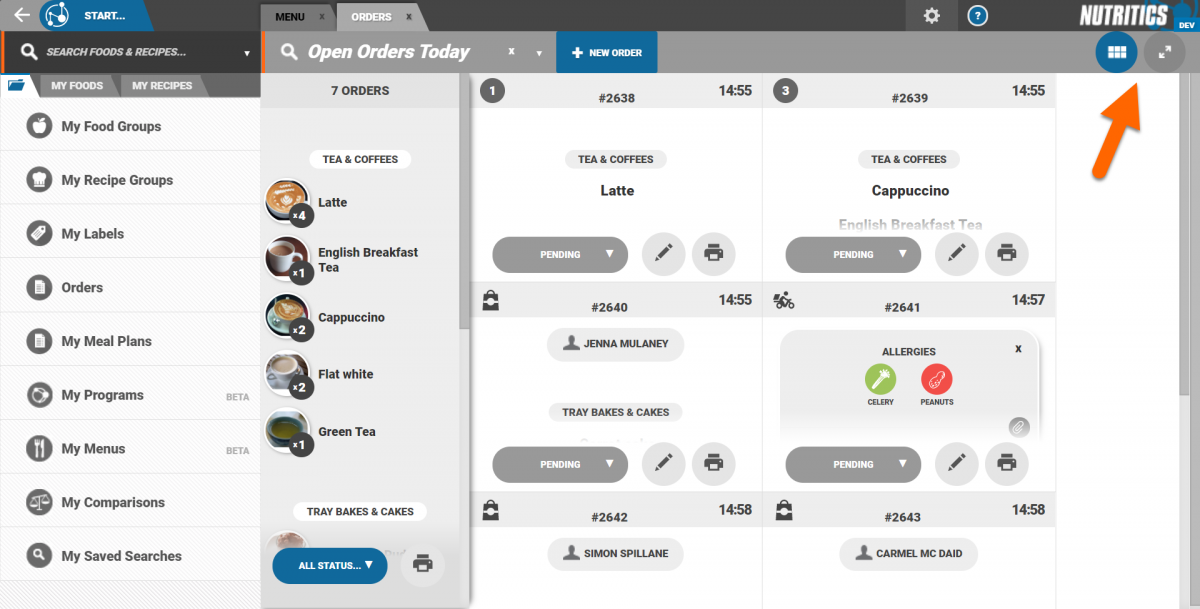
Toggle a condensed view of the orders or enable fullscreen mode using the icons in the top right corner of the screen.
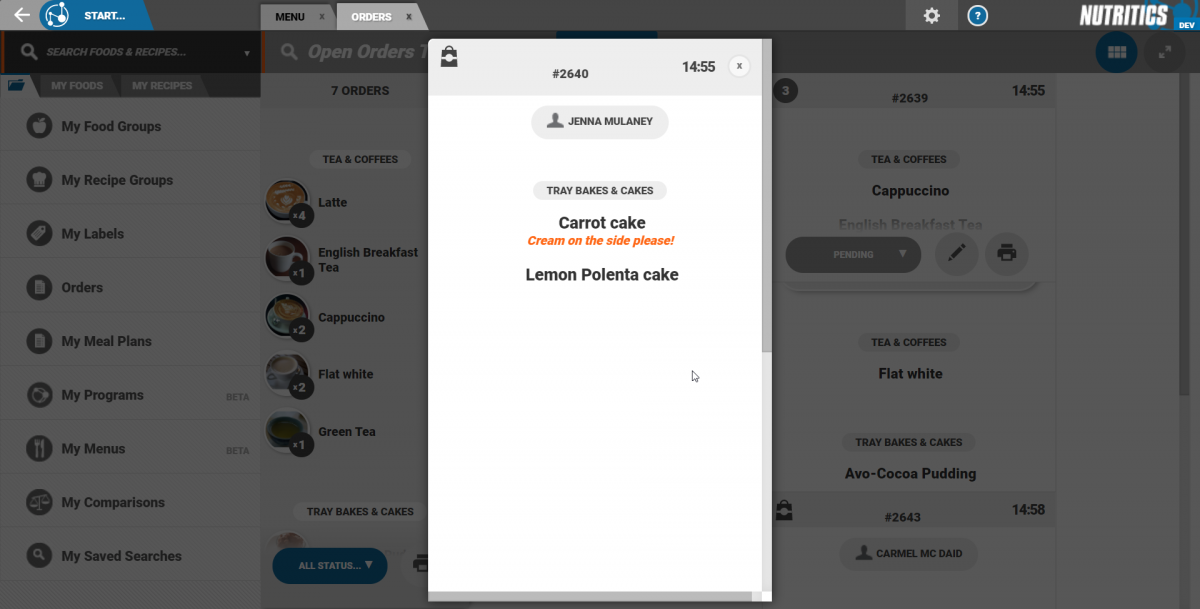
In the condensed view, click on an order to see more information on it.
Control the minimum lead time for orders directly from the orders dashboard. Click on the due time and use the plus / minus icons to increase/decrease the lead time. This is useful for ensuring the kitchen is not overloaded with orders.
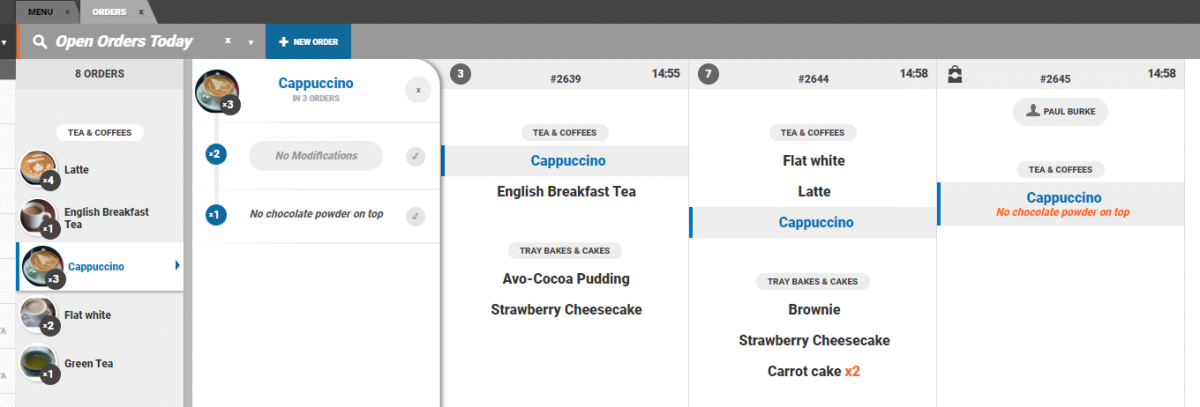
Click on an item in the order summary panel to view all orders containing that item. In the panel that expands, you will see if any orders require a modified version of that item, for example if the customer has added any notes to their order. Click on the item again in the order summary panel to go back to viewing all orders.
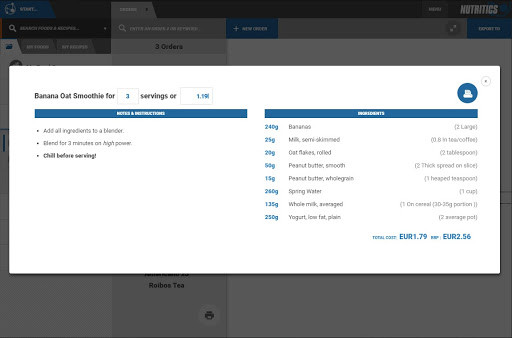
Right-click on an item to view the cooking instructions and ingredient list. You can adjust the number of servings required and the ingredient list will update automatically.
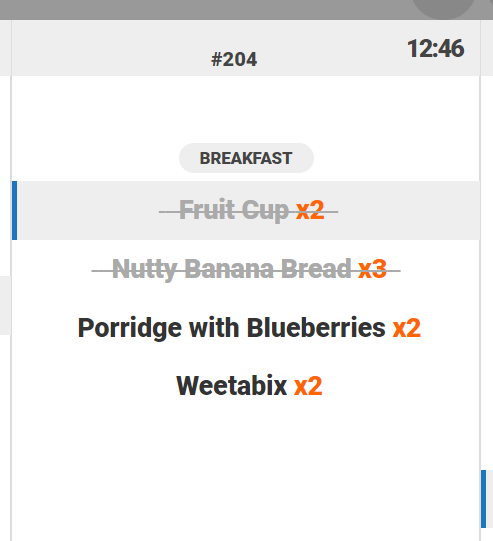
Keep track of order progress by clicking on order items to tick them off.
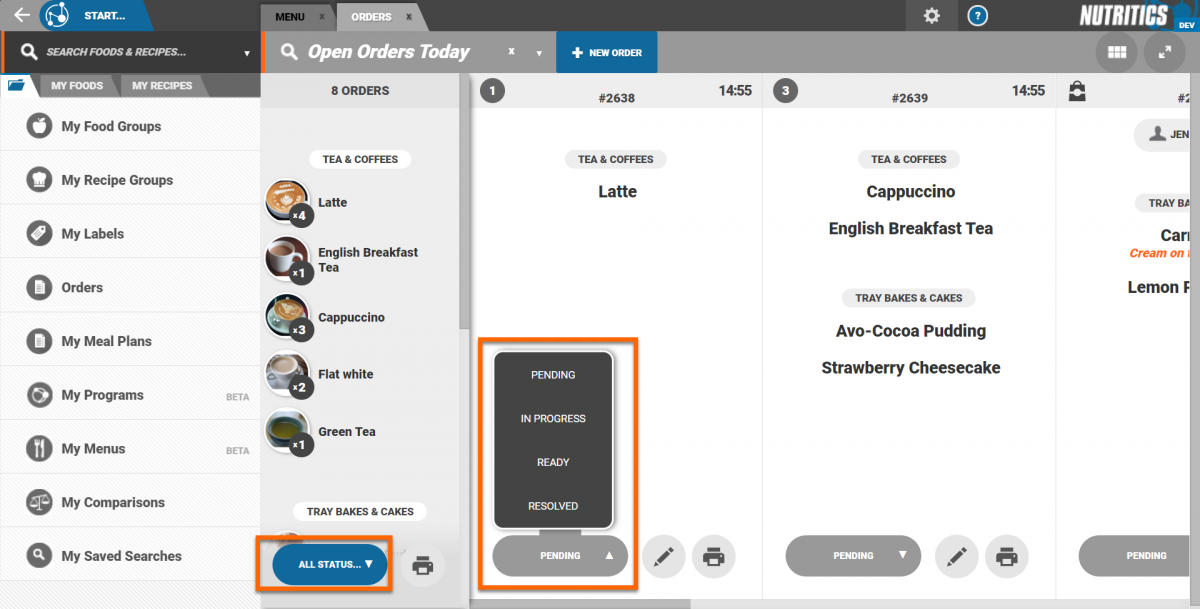
Change the status of an order using the drop-up menu on individual orders, or set order status in bulk from the order summary panel.
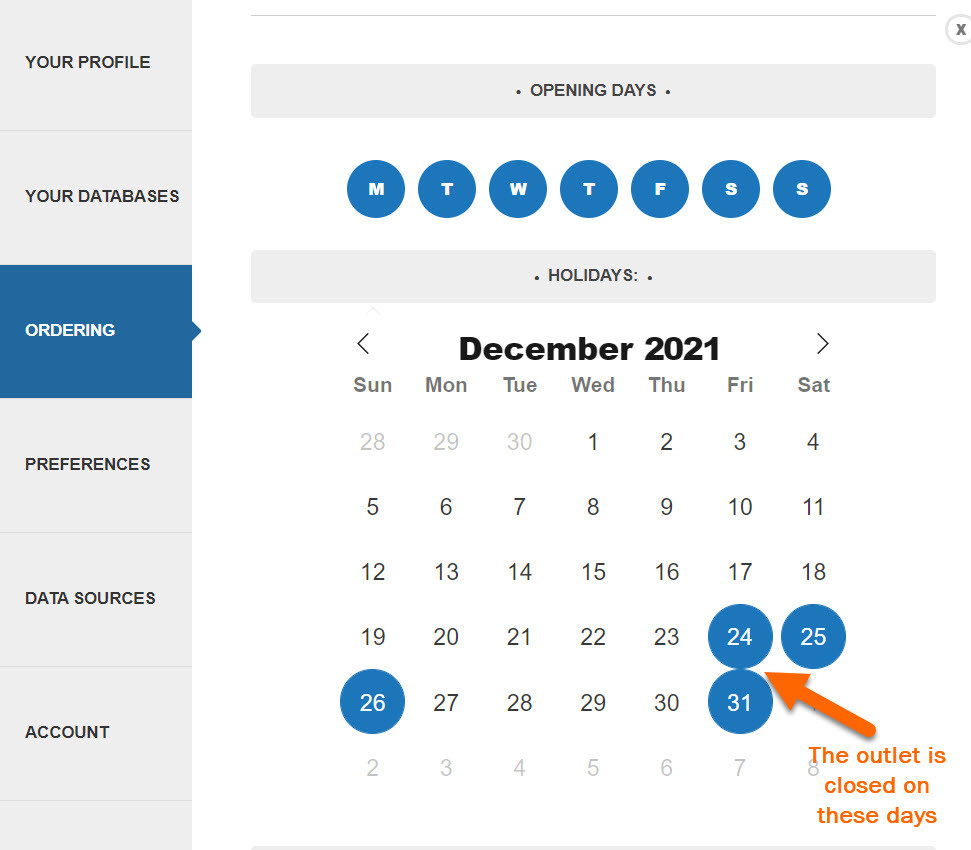
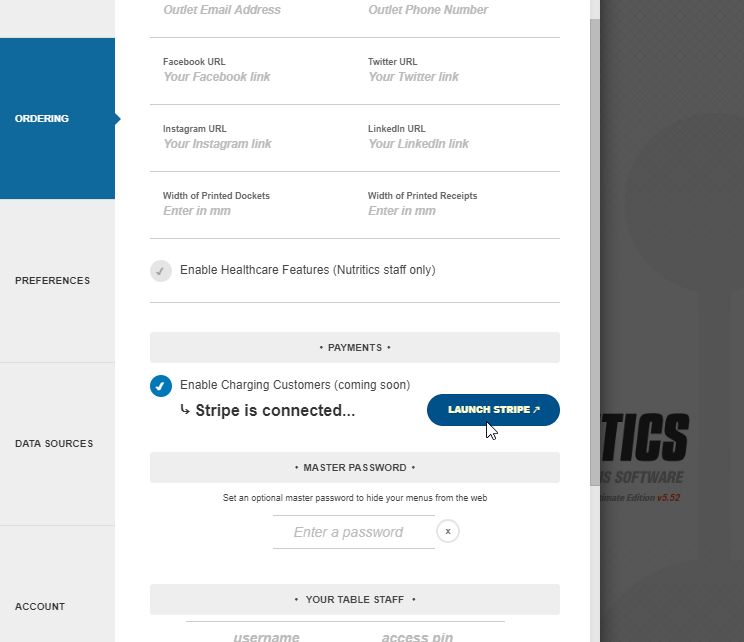
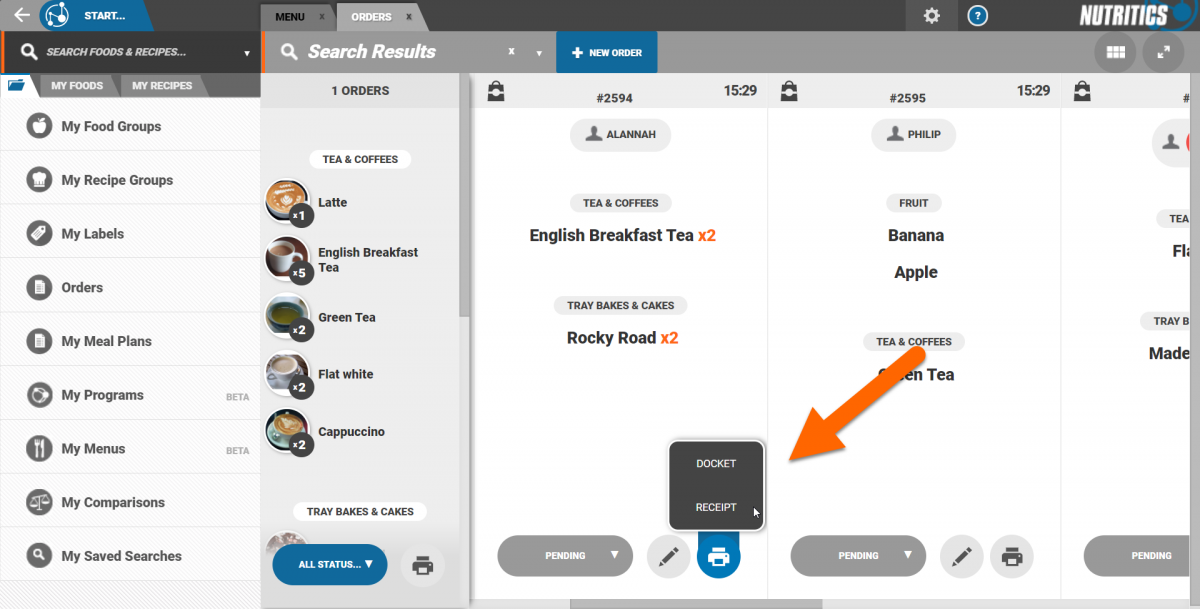
Print a receipt or docket for an order by clicking on the printer icon on individual orders. Note that the width of the thermal rolls used for printing must be specified in your outlet settings accessed by going to the menu in the top right corner of the screen > settings > ordering. Print dockets in bulk based on their status by clicking on the printer icon in the order summary panel.
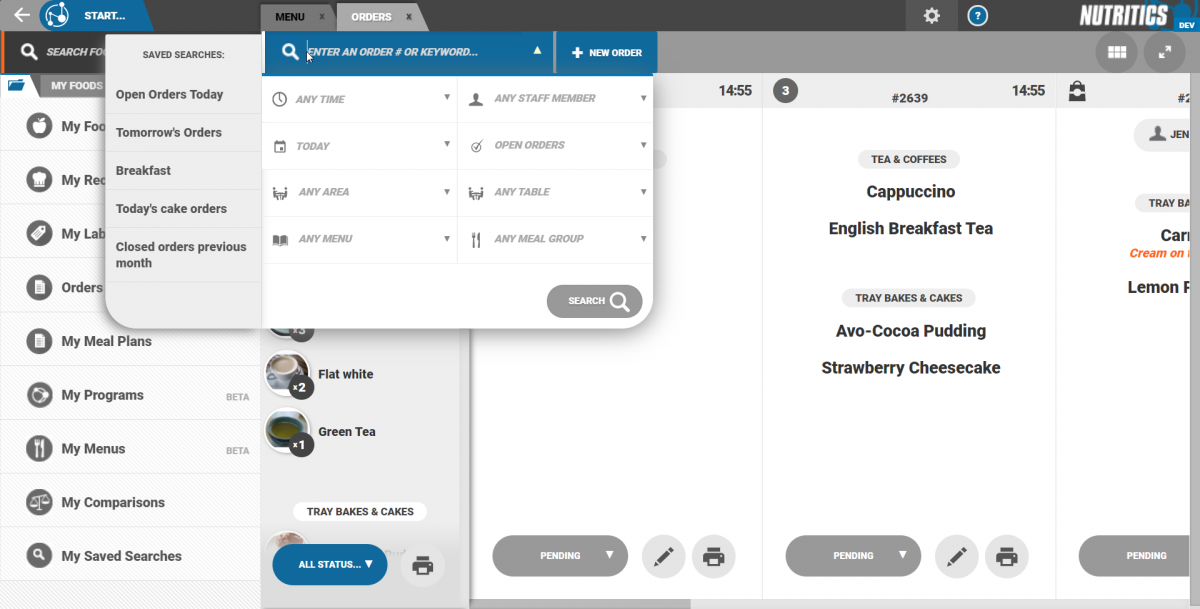
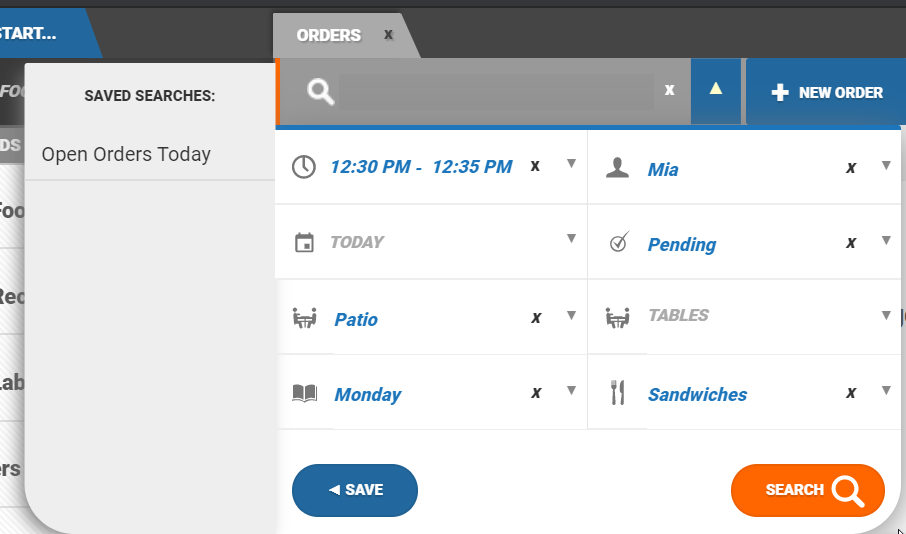
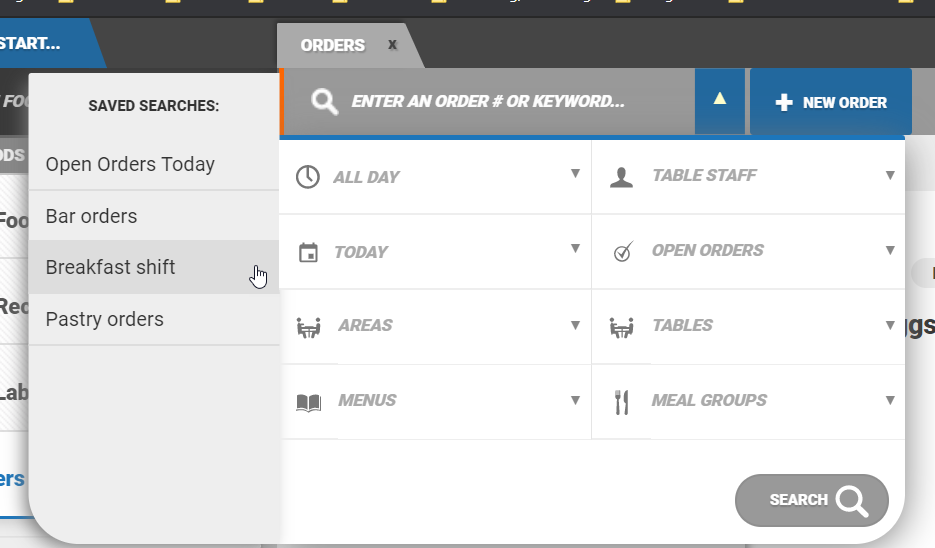
Filter your orders using the search tool.
Orders can be filtered by:
- Due time
- Date the order was placed or days offset e.g. days in advance, setting this to 0 will show today’s orders, setting this to 1 will show orders for tomorrow, setting it to 2 will show orders for 2 days time and so on
- Area where the customer is sitting (if applicable)
- The menu the customer ordered from e.g. bar menu, main restaurant menu
- Staff member (if staff login is enabled on menus)
- Order status e.g. pending, ready for collection
- Table number
- Meal groups e.g. starters, pastries
Save commonly used searches by setting your search criteria and clicking ‘save’. Give the search a title. Saved searches appear to the left when the search dropdown is open.
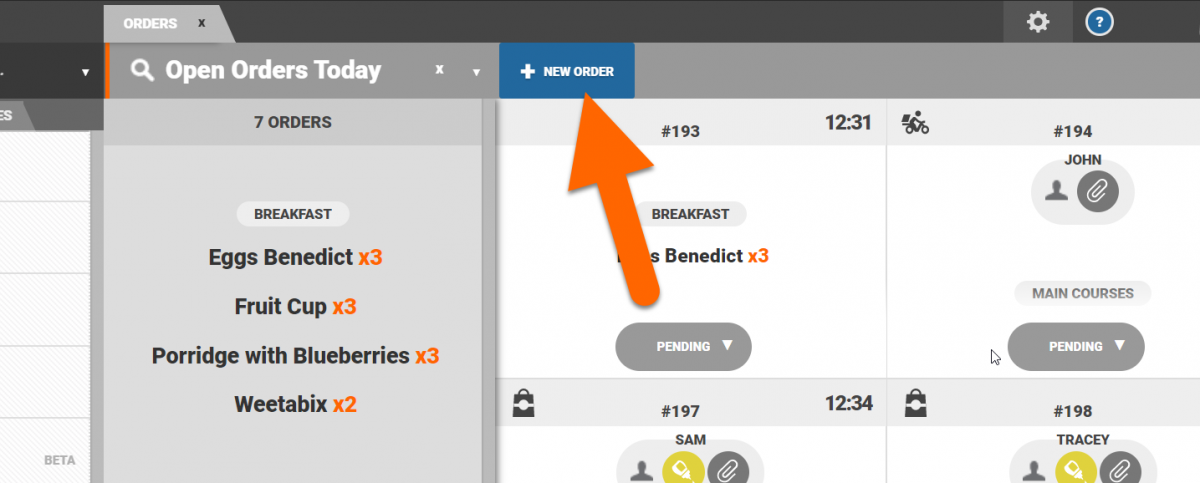
New orders can be placed directly from the order dashboard by clicking on ‘new order’. This will open a list of menus. Select the relevant menu and order as normal.